Introduction:
As I have shown in my plan for this module, I will be producing an instrumental composition based around the DOOM (2016) original soundtrack. To do this I will be using both recorded audio and midi instruments, including a focus on synthesisers as they are a crucial element in producing sounds that can be heard on the DOOM soundtrack. Almost all of the instruments and sounds I use will be plugins I have downloaded for Ableton Live as this allows me to explore more options, and is also a good use of modern technology in compositions. I will be documenting my project through various screenshots to show how it progresses clearly.
The beginning of the piece:
When I began to compose for this project, I settled on working with a synthesiser plug-in straight away. I found an FM synthesiser plug-in called Exakt Lite which I used a few times in this project. I used this synthesiser to begin with as it provided an extremely broad range of possible sounds, and has a very user friendly interface which aided me in achieving the sounds I wanted.

I also bought an Alesis V mini midi keyboard to use with this plug-in and help my composition make progress.

When I began to put together my project I wanted to capture the feeling of the original DOOM soundtrack, and to do this I decided to incorporate the original ‘E1M1’ theme from the 1993 release into my composition, much like how Mick Gordon did with a very short part of the 2016 reboot’s soundtrack. Linked below is the original theme.
I learned to play the theme on the guitar and then I began the composition by transposing the theme to C minor, and learned to play it on my keyboard. I also slowed it down a lot to get a heavier feel that was closer to the 2016 soundtrack. Here is a link to the site I used when learning the theme: https://www.songsterr.com/a/wsa/doom-e1m1-hangar-tab-s43926t0
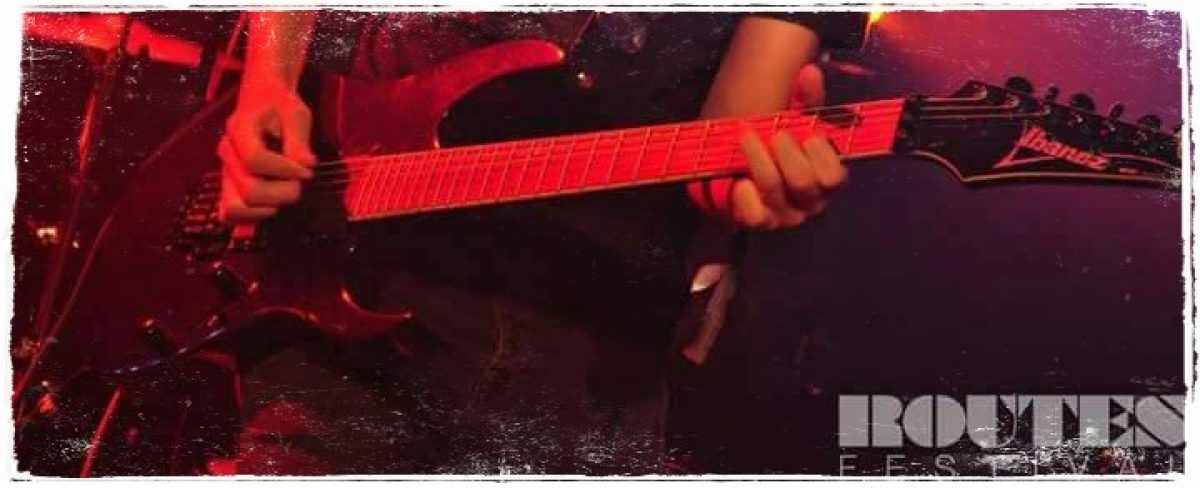
Pictured below is one section of this theme in my project.


I used a sawtooth wave for this part of the track as it sounds more aggressive and ‘edgy’ than the other wave forms to my ear, and this suits the sound I’m trying to produce well. I also increased the gain to increase the aggression of this sound. Additionally I also detuned the sound by -6ct to really reinforce the heavy sound I was going for.
Once recorded, I looped this theme to repeat for 8 times and then added more instruments to provide a big build up leading into the main part of the composition.
To start with I downloaded a midi drum kit plug-in called MT Power Drum Kit 2 (Pictured below). I felt as though adding drums was a good step towards building up the texture as it gave the composition a rhythm to lock into.
This plugin was really useful to me as Ableton Live’s built in drum kits are more suited to house and electronic music while I was looking to add a more realistic sounding rock kit to my composition.


I began this part by adding just a kick drum for the first half, and some light hi hats over the top halfway through that. I further built this up by adding use of the rack and floor toms before building up the ending with a fill on the snare drum.

I also added some EQ to the drum kit to make the bass drum and toms more punchy by raising the low end and the middle slightly. As this is a midi kit and not a live recording, I was able to really push the bass end up high as there wasn’t any spill or ringing of the drums to try and eliminate.
Next, I wanted to add a kind of drawn out held synth sound to thicken up the texture and give the piece a kind of ambient background noise. To do this I again used the Exakt Lite synth, this time adopting a square waveform to contrast the sawtooth one I was already using. I lowered the gain on this to 70 rather than 100 as it didn’t need to be as powerful as the main part. I also detuned this by -1ct as it was just enough to add a slight edge to the tone.

Additionally, I added a flanger effect on top of this to make the sound feel more active and erratic as this kind of sound is what makes the DOOM soundtrack so recognisable. I also wanted to experiment using this as effects like these are another technological development that I felt would be good to include in my project.

Finally, I needed to add an electric guitar part to the composition as this is one final crucial element of the DOOM 2016 soundtrack I wanted to replicate in my track. To get the right I detuned my guitar to drop C, which is a whole tone lower than standard tuning, with the deepest string being 2 tones lower than standard. Next, I researched into guitar amp plug-ins for Ableton Live and found one called Emissary. I found this amp from Spectre Sound Studios YouTube who produce informative videos primarily on rock and metal guitar which was perfect for my project. (https://spectremedia.ca/)


I downloaded Emissary, as well as the TS-999 Tube Screamer pedal and NadIR impulse response dual cab processor all from the Ignite amps website. (https://www.igniteamps.com/)
In the images above you can see all of the settings I used on the guitar parts for this piece. I had the gain set to about 4 as the TS-999 pedal provided a big boost to the sound of the amp. I also had the bass maxed as I planned on not using a bass guitar on this piece as the regular guitar was tuned low enough to fill out the frequencies I was after. The virtual cabinets I used were two 4×12 speaker cabs picked up by simulated SM57 microphones both centred and off axis. This gave me a really heavy metal sound which was perfect when combined with the rest of the instruments.
I also added some EQ to the guitar channel, as well as a compressor. (Pictured below)

I raised the higher frequencies in the guitar part as turning them up on the amp plug-in didn’t do much to noticeably change the tone. I added a compressor as I wanted the guitar parts to be at a consistent volume for the duration of the composition, as this is how the guitars come across in the DOOM soundtrack.
For this intro part I faded the guitar in on a held C power chord, and then played along to the E1M1 theme that is already playing on the synthesiser to thicken up the texture and finish off creating this big build up. I added a low guitar and a high guitar part here as doing so created a really big sound fitting of the original soundtrack. Below is a video of me playing this part:
Lastly, here is what the whole intro section looks like in Ableton:

The top track in yellow is the drone synth with the flanger. Below that in blue is the E1M1 theme on the Exakt Lite synth. Lower again are the two audio tracks of the high and low guitar parts, and lastly at the bottom is the drum section.
Section 1:
For this next section, I made a riff of my own that fitted in with the style well. Linked below is me playing it:
Accompanying this is the Exakt Lite synth from the intro, this time playing the same riff as the guitar as shown below:

I also added an additional synth at the end of this section, and I wanted to make this one sound raspy and raw, almost a static like sound but still musical in it’s tone. To do this I took my already set up Exakt Lite synth patch, played the riff again but a couple of octaves higher, and then ran it through the tube screamer guitar pedal plug-in I downloaded earlier.

Here is what the whole first rhythm section looks like in Ableton:

At the top I still have the siren synth running for part of this section. Below that is the original synth sound playing the same riff as the two guitar audio tracks. This is followed by the ‘Raspy Synth’ that comes in as the siren part stops. The lowest line is the drum part maintaining a slow, cymbal heavy rock drum beat.
Section 2:
When listening to the DOOM (2016) soundtrack, you can noticeable hear a lot of panning on parts which makes the compositions sound more involved and exciting. Therefore I wanted to try something similar in this next rhythm section.
Firstly I started out by coming up with a guitar riff that I could use as the backbone of this section. I came up with a kind of call and response pattern that sounded really good when having one guitar panned to the left, and the other to the right, here are both parts:
I really liked the sound of the Raspy Synth I had made for the last section, so I used it as the most prominent synth in this section, with the original synth only being used in the second half of this part. I played a riff consisting of an augmented 4th that resolves to a 5th (power chord) as this sounded really heavy and allowed me to automate some panning onto this riff.


Here you can see the automated panning I did on the synth riff. when the red line is high the sound comes from the right speaker, and when it is low it comes from the left.
This combined with the panned guitar tracks made for a really interesting texture that fit with the style really well.
In the second half of this section I wanted to build up to a new part, so I came up with a new riff on the original synth, and then combined it with the raspy synth at the end. The riff consists mainly of notes from the E1M1 theme with one or two exceptions. This also gets backed up by the guitar part as can be seen in the two videos above.

Section 3:
In this section, I wanted to experiment with the use of sampling and a drum rack. To incorporate these into my composition and really stick true to the DOOM theme I was going for, I decided to take some sample sounds directly from the videogame and use them as a drum rack in Ableton. My idea was to create kind of an ambient dark sound of a distant battle that maybe you would hear in the game. Firstly I wanted to find a background to work with so I found some royalty free audio of howling winds that fit the theme of the game and composition. I used a site called Zapsplat to find one that was just right for my piece. (https://www.zapsplat.com/)

When I had this section in place, I wanted to get some samples of the various gunshots, explosions and other sound effects from the game. To do this I found some clean gameplay with good quality audio, and converted the audio into a .wav file that I could then chop up in Ableton. Here’s a clean video as an example:

In the image above you can see the audio file I loaded into Ableton with a whole range of sound effects. The bottom track where sections have been cut and moved to are the few sounds I settled on to use in my drum rack. I could’ve used far more, however I didn’t want to over cluster the track and only needed a few solid sounds that worked well with the ambient backing.

Here you can see the drum rack with my eight sounds loaded, and where they sounds fall in the orange track at the top. I started off playing sound effects sparsely and then increasing the frequency of them towards the end of this section. Additionally, I used track panning to make the sounds appear from all angles and make the section feel like the listener is stood in the epicentre of a battle. Panning automation is pictured below:

To finish off the sound effects part, I added an explosion sound at the very start of this section to give a powerful transition from the last part into this. I also used Ableton’s built in filter delay on top of this as it really added to the DOOM sound I was trying to achieve.

Moving on from the sound effects, I wanted to include some synthesisers in this section as well. I was aiming to achieve a slow electronic hum with plenty of bass to give the feeling of raw electricity and energy to this slower section. To do this I used Ableton’s wavetable synthesiser on two separate tracks. I used the first track to achieve the bassy hum I was after by holding long notes, and automating the filter to open from 0 to 100 slowly on every note. Here’s the part in Ableton:


For the second synth part that accompanies this, I used short staccato notes and applied a large amount of delay using the filter delay. These two parts combined provided the perfect electrical sound that complimented the ambience of the other parts excellently.

To pull the composition out of this ambient section and back into some rhythm I chose to use the E1M1 theme again but this time at half the tempo making for a really heavy gradual build up. I did this on the same synth as the intro and also doubled it up with a second one halfway through to add to the texture as it builds up. As this is a quieter section I also automated the gain on the synthesisers to be considerably lower for this part.


Here is what this section looks like with all of the parts in Ableton:

The top two tracks are the bassy synth and the delay effect synth. Below these in blue are the slowed downE1M1 synths that build up the end of the section. At the bottom is the drum rack with the various sound effects, and the ambient wind noise below that.
Section 4:
As I was reaching a point where I wanted to end the piece, I wanted to capture the feeling of the original DOOM from 1993 as I felt as though it would be an excellent contrast to the DOOM (2016) sound I have already achieved through the rest of the piece. I wanted to keep the same level of heaviness surrounding the track, while also bringing forward that classic DOOM sound. To do this I brought back the full pace E1M1 riff and faded it in along with a basic drum beat to bring in this new section.

Here you can see the E1M1 theme on the guitar fade in as I had automated the track volume along with the drums. As this is building up, I also brought back the siren synth from the first sections, having it play erratically until it comes in fully after a few bars. Once this builds up to full volume I added another guitar track an octave higher and panned this to the right as the low part was panned to the left.


I built up the drum line alongside this as you can see in the image above, this time I added a fast fill at the end of each riff as it felt true to the sound of the 1993 theme. Additionally I modulated the key down a tone when the high guitar part comes in as this further added to the already nostalgic feel.

Additionally, I added the original synth from the intro in, playing the same theme to bulk up the section. Finally, I brought back my original riff from the second section to finish off the piece. This comes to a fast ending followed by the return of the ambient sounds which proceed to fade out as I had automated the track volumes.


The whole composition:
With this outro section finished I had completed the composition. Here is the whole project loaded up in Ableton:


Below, I have linked the full track with no mixing or mastering:
I already had a fairly good mix on my project as I had only used built in instruments and plug-ins, and I had also been balancing the audio levels as I was composing the various sections.

Here is the mixer from my project. Most of the instruments had their volume automated as I needed them to increase and decrease in different sections, this is particularly noticeable on the guitar tracks and on the raspy synth channel. I feel like overall I maintained a good balance between each instrument, with some being more prominent than others when necessary.
When I was happy with the mix, I started the master of the track by applying Ableton’s built in limiter. I was initially unsure about using a limiter on my master track so I had to research into the best way to use one. “Overuse of limiting will result in a thin, harsh recording that lacks dynamics” (Mastering: How to Set a Limiter | Soundways, 2017) I lowered the gain of the project by 6db. I did this as the project was already fairly loud and I wanted to make sure it wasn’t too deafening when uploading it to listening platforms. I didn’t want to lower the gain much more than this as it would’ve started to take away from the sound of the piece.
I also lightly applied a compressor to the project. I did this to make the piece sound more consistent in volume overall, but not to the point where volume changes weren’t audible enough.

In retrospect I could’ve spent more time on the mixing and mastering of this project to really get a studio quality finish. On the other hand however, I wasn’t aiming for a super clean mix as the point of the DOOM soundtrack is to sound gritty, heavy, and erratic. I think I achieved this with my final product, and here is a link to it below:
Project summary and evaluation.
The goal of my project was to produce a composition that would fit in with the original soundtrack from DOOM (2016). I chose this as my goal as there is a heavy use of synthesisers in this soundtrack, and it is also a soundtrack I personally enjoy.
I feel as though I have achieved this goal, and feel proud of my final product. I managed to experiment with using various synthesisers, both built in from Ableton Live, and some external plug-ins as well. I feel as though I matched the style of the DOOM (2016) soundtrack to a good standard, and even went beyond to incorporate some of the original nostalgia from the DOOM (1993) soundtrack.
In future projects like this, I would like to get hands on with some physical synthesisers and really get to learn my way around them. I feel as though this could’ve improved my current project further as it could’ve given me an opportunity to perform this track and present it in a live setting.
Bibliography:
Soundways.com. 2017. Mastering: How to Set a Limiter | Soundways. [online] Available at: <http://www.soundways.com/content/mastering-how-set-limiter#:~:text=To%20set%20a%20limiter%2C%20first,and%20listen%20to%20your%20recording.>
Crute, A., 2019. Learning the basics of FM synthesis and how it works. [online] MusicTech. Available at: <https://www.musictech.net/guides/essential-guide/how-fm-synthesis-works/>
Spectre Media Group. 2018. Home – Spectre Media Group. [online] Available at: <https://spectremedia.ca/>
Ableton. n.d. Using VST plug-ins on Windows. [online] Available at: <https://help.ableton.com/hc/en-us/articles/209071729-Using-VST-plug-ins-on-Windows>
Theriault, J., 2016. A Very Pretentious Analysis of the (2016) DOOM Soundtrack by Mick Gordon. [online] Medium. Available at: <https://medium.com/the-cube/a-very-pretentious-analysis-of-the-2016-doom-soundtrack-by-mick-gordon-5740421590da>
Gordon, M., 2021. Home. [online] Mick Gordon. Available at: <https://mick-gordon.com/#/doom/>