Session Setup:
I recorded and organised everything within logic pro, creating separate tracks for vocals, guitar, drums, and any additional increments. While i was setting up i made use of all i have learnt over my last projects and maintained track organisation, and workflow management. This helped me to maintain a clean session so i could focus on the production side rather than fixing errors i could that could have been prevented earlier on in the session.
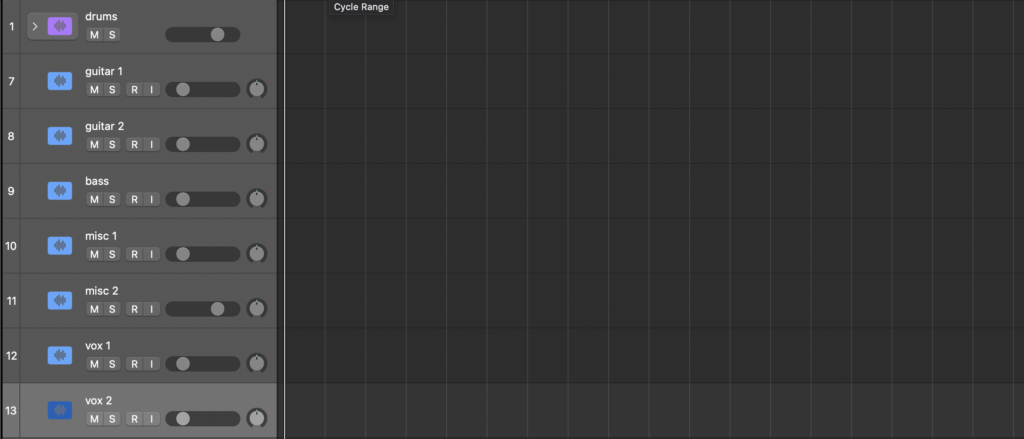
This is how I set up my logic before i started recording, it worked as a good foundational blueprint. Neil Rogers uses the same technique, and Produce Like a Pro youtube channel say it helps to limit distractions, and streamline recording.
Recording:
When recording guitar, i decided i wanted versatility for one of my tracks that revolved heavily around a smooth finger picking guitar pattern. To achieve this i decided that multitrack recording was the best option, I had 5 different microphones all picking up the same audio in different ways and from different angles; i had 2 large diaphragm condensers in an XY pattern at the back off the room to pick up a stereo room noise sound, I then had 1 small diaphragm condenser aimed at the threats of the acoustic guitar, one facing towards the sound hole witch picked up strumming sound, and a large diaphragm condenser facing the 12 threat. I channeled all thease mics through a digital snake witch ran into the control room and recorded onto the preset channels. I thought this was the best option so i could have loads off versatility and control over the sound for when i was mixing them later on. On my other track i decided i didn’t need as much versatility because the guitar isn’t the focal point of the track, so i just used a Neumann TLM103 aimed at the 12th threat.
When i was recording vocals, i used a Neumann TLM103 because i liked the clarity and low self noise, the brightness also brings the recording to the front of the mix. I wore Beyerdynamic DT 770 pros for direct monitoring, i opted for these over my open back DT990 pros to avoid headphone bleed witch i would have to clean up in post. I set up the mic so that the diaphragm was directly in line with my mouth at about 6 inches away to reduce unwanted room reflections and still capturing a full, rich sound. I used a Focusrite Scarlett Solo 4th Gen for phantom power and as my audio interface, in future i would try to find a better preamp because i feel like it couldn’t keep up with the full potential of the Neumann TLM103
Midi:
MIDI played an important part of the production process because it allowed me to add instruments that i didn’t have available to me. I used midi within logic pro witch gave me far more control over note placement, timing, velocity, and overall performance. This ment i could make quick adjustments and experiment with different musical ideas. Through using midi i developed a much better understanding of sequencing, arrangement, and how i could integrate digital instruments smoothly into the mix. I recorded bass, violin, timpani, and many other sound effects through midi.
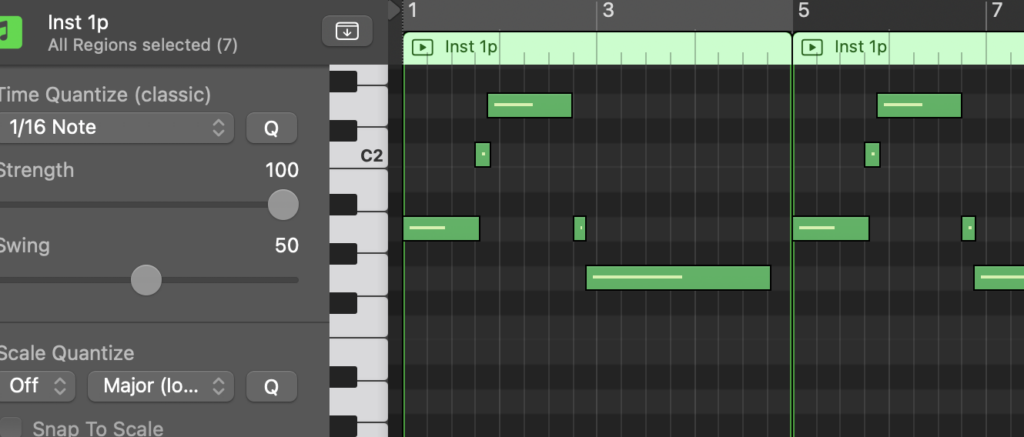
This screenshot off the piano roll within logic and shows me programming a baseline when i didn’t have a bass available. It shows how i changed the velocity off the notes to make it sound more human.
Equalisation (EQ):
EQ was one off the most important tools during the production phase because it allowed me to shape the frequency balance of each track by removing unwanted frequencies that made the track sound muddy, hissy, harsh, or frequency clashes. It also allowed me to enhance arias of frequency that helped instruments and vocals stand out in the mix. By making space for different elements, i was able to achieve a clearer and more professional sounding mix.
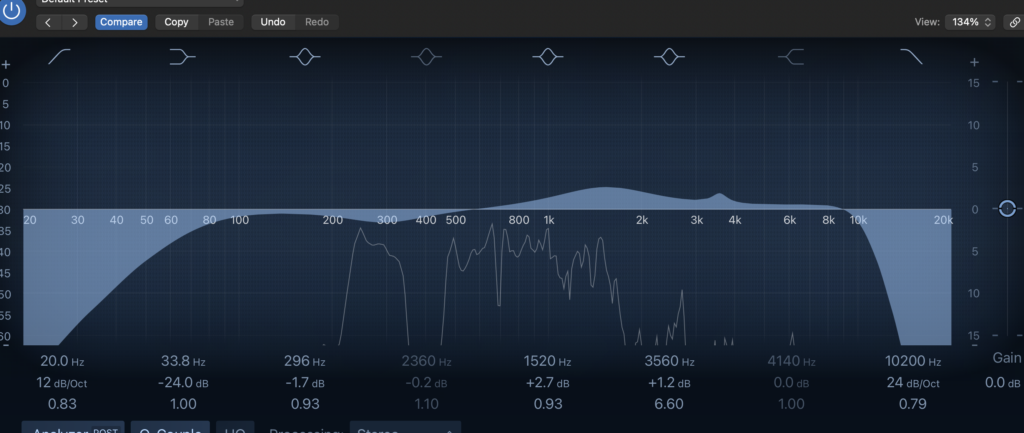
This is an example where where i used the stock EQ plugin in Logic Pro. In this particular vocal mix i noticed a lot of rumble at the low end so cut it off, there was also the occasional parts that sounded hissy so i cut them and boosted a point in the mid section witch i wanted to be a bit more forward in the overall sound.
Compression:
Compression was used to control the dynamic range of my recordings. I wanted the quieter parts to be audible while also not have overwhelming louder sections. As a result, my vocals and instruments sounded more consistent and sat naturally together in the mix. I’ve not used EQ much in previous projects so it was interesting to learn the basics and what different settings such as threshold, ratio and makeup gain and what they will all do.
De-Esser: