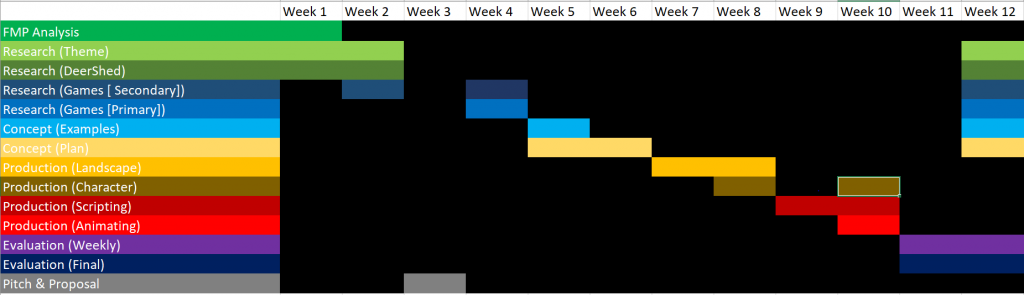
I have gone through what I have done so far within this level 3 course looking for my strengths, weaknesses, ambitions and interests.
I have researched pocket planet to get a understanding on what game I would like to create and develop for my final project.
I have researched on DeerShed to gain an understanding of what it usually brings to its audience. It will help me gain an understanding of what I could create.
I have researched more in depth on one of the pocket planet games I have been looking into because I believe it is really popular and I personally understand/enjoy survival type games.
I have created a pitch talking about my overall thoughts on my game. I started talking about what the game would be if it was completed. I used The forest and Minecraft as examples as I believe the people within the audience have also played them.
I created this document in order to think of a rough idea of my game name. I really struggled coming up with a new game name as I believe it is a crucial part of your game. I decided I do not require one as it is something that can always be developed upon.
I decided to create a game flow in order to have a foundation of how I want the menus to look. At first I was not sure on whether it would have ‘continue’ and new together as personally I believe these sort of subtle changes within game determine what type of game people think of it as. I believe adding continue is used more within more action based graphics games. I believe it will help differentiating from your average ‘survival’ game.
Although I did find this Game Design Document on google images I have used it as it has really helped me organise my thoughts and truly understand what I need, want and could have in my game. This is not my work.
I have used S.W.O.T, which stands for strength, weakness, Opportunities and threats, to assess myself to find faults that I could improve on. Although I was not descriptive I do believe this helped me organise my thoughts and increase my work efficiency
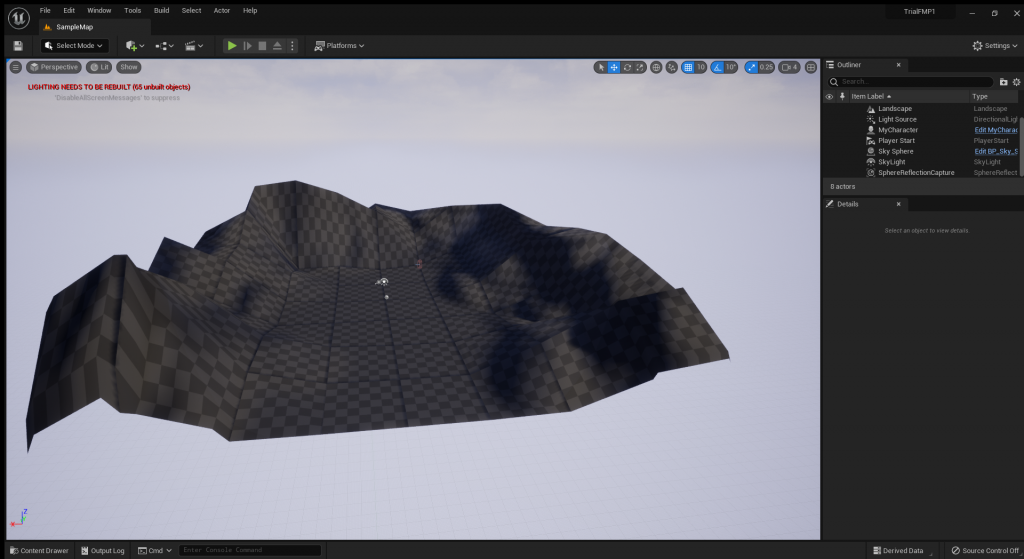
For the first experiment I created a small piece of land with the landscape tool and started sculpting, which increased the size of land within the brush. The centre of the brush would have more concentration while the surrounding land would have less.
For my second experiment I decided to work on a bigger landscape and tried to add more tools into the mix such as smoothening and flatten, which does as it sounds.
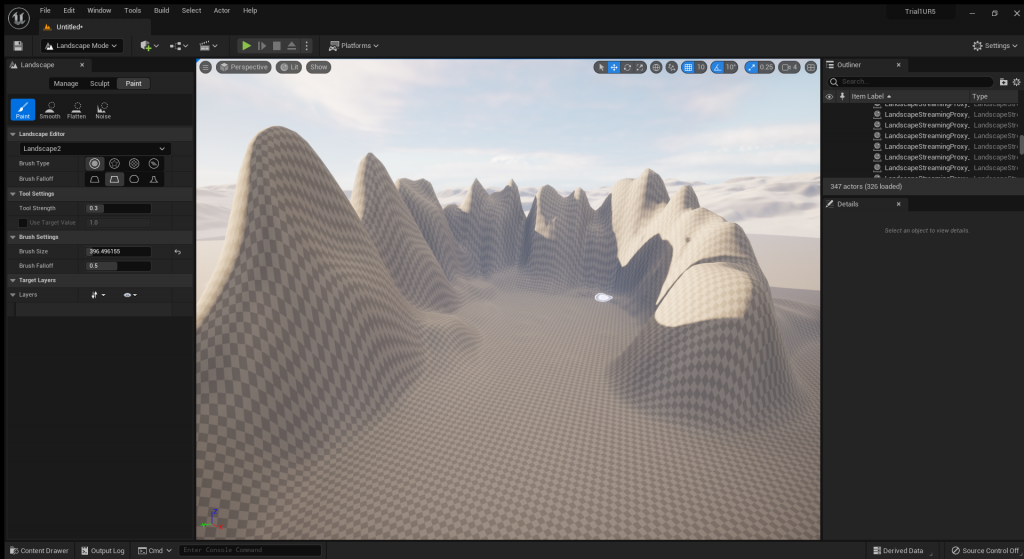
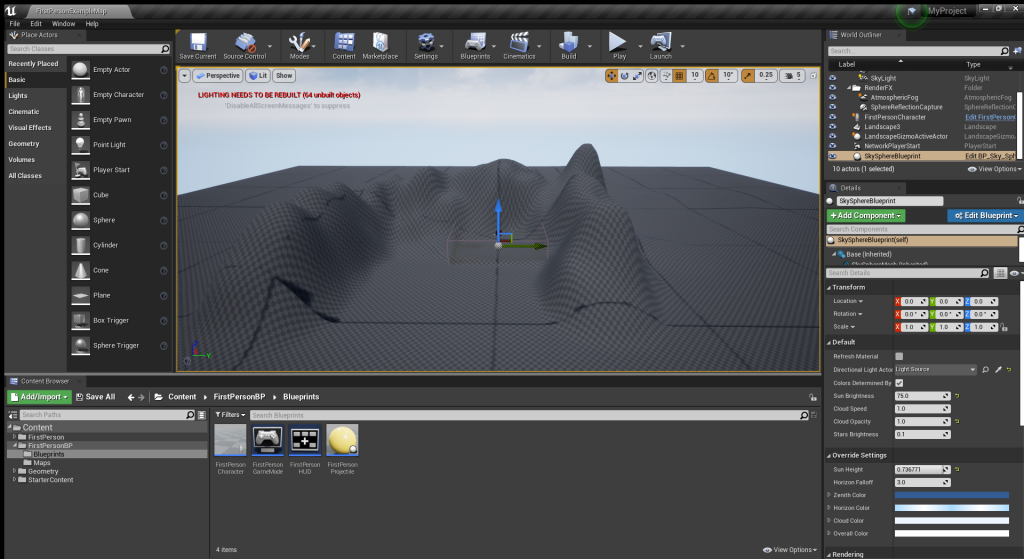
For my third experiment I tried to recreate and improve the second experiment while on the latest software rather than unreal engine 4 as I was previously using. I decided to switch over due to the improvements and benefits such as automated lighting. My goal was to create a secluded land hidden behind mountains.
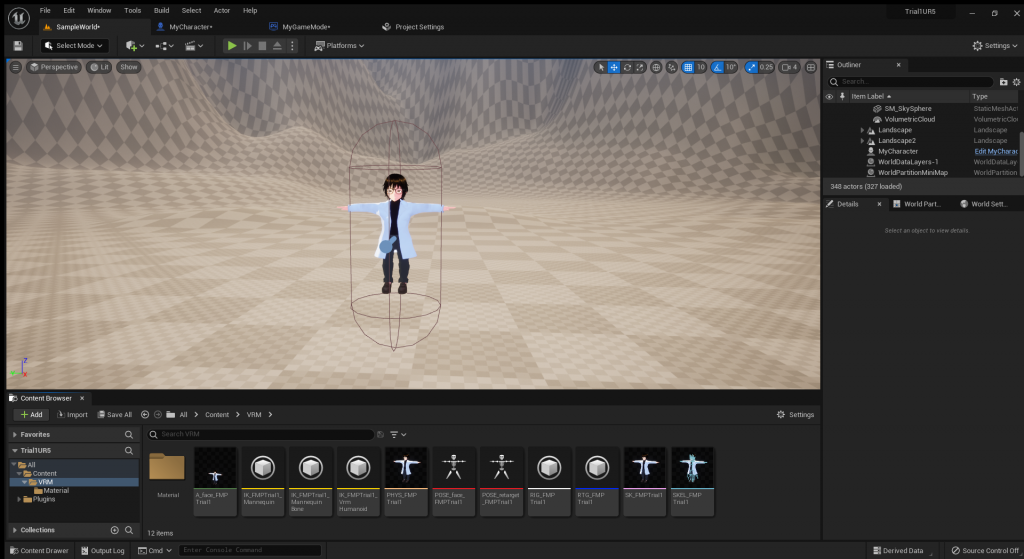
I moved my VRoid character to Unreal Engine 5.
Vroid creates all the characters using ready made mesh including skeleton you can customise it and colour it.

For my final experiment I decided to add colour within the landscape and create something much simpler. While trying different type of colours suitable for a pavement.
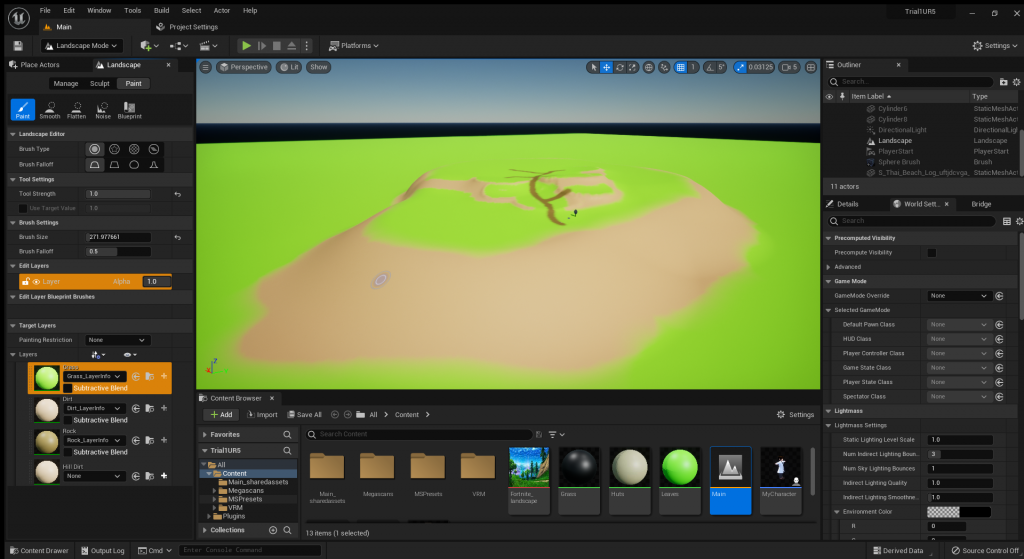
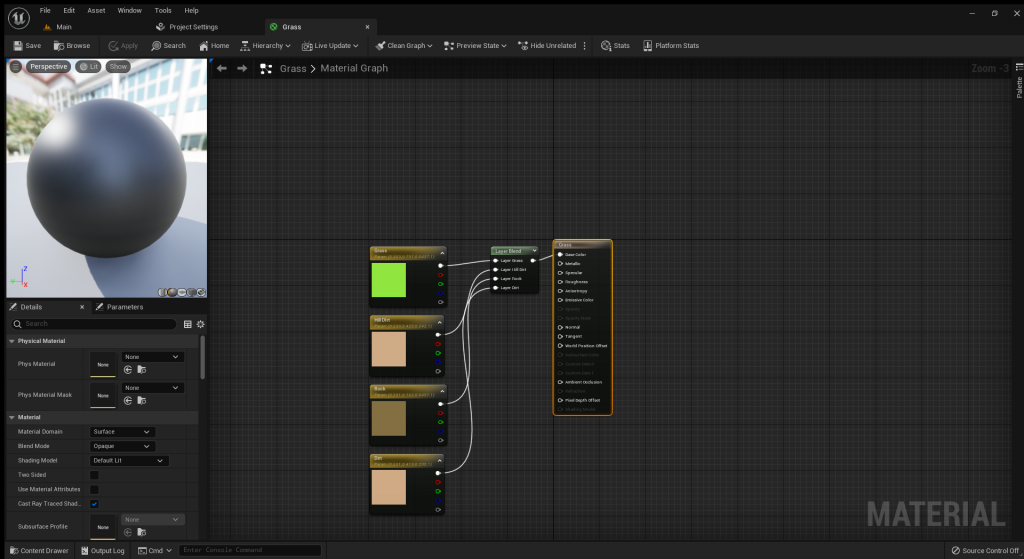
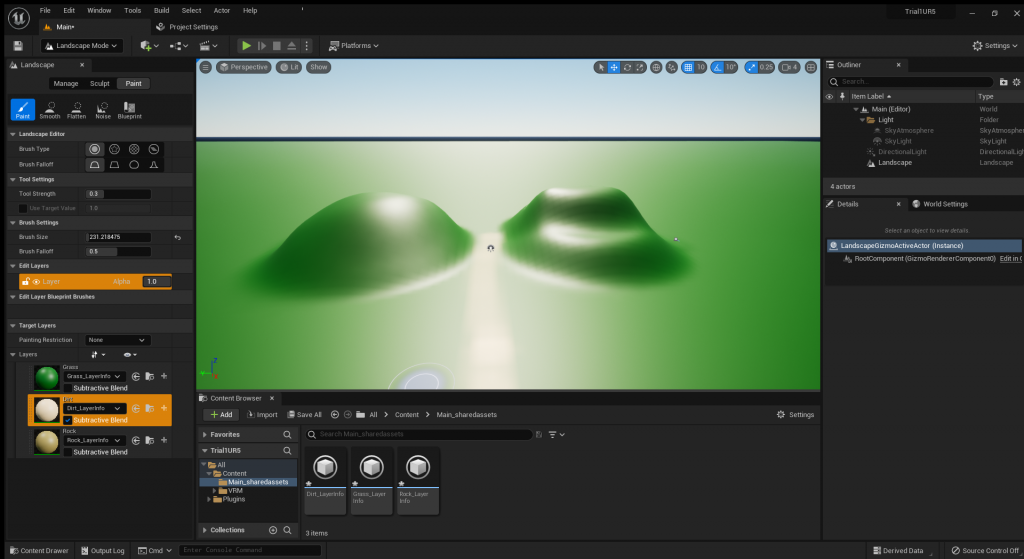
After a few tries I managed to create a terrain, which I believe to be suitable for a sample product. I created it using sculpt, smoothen, flatten tool and paint within Landscape mode. For the paint material I used a landscape layer blend (Adds multiple paint colours) script connecting to 4 Vector parameters (Script choosing pain colours.).
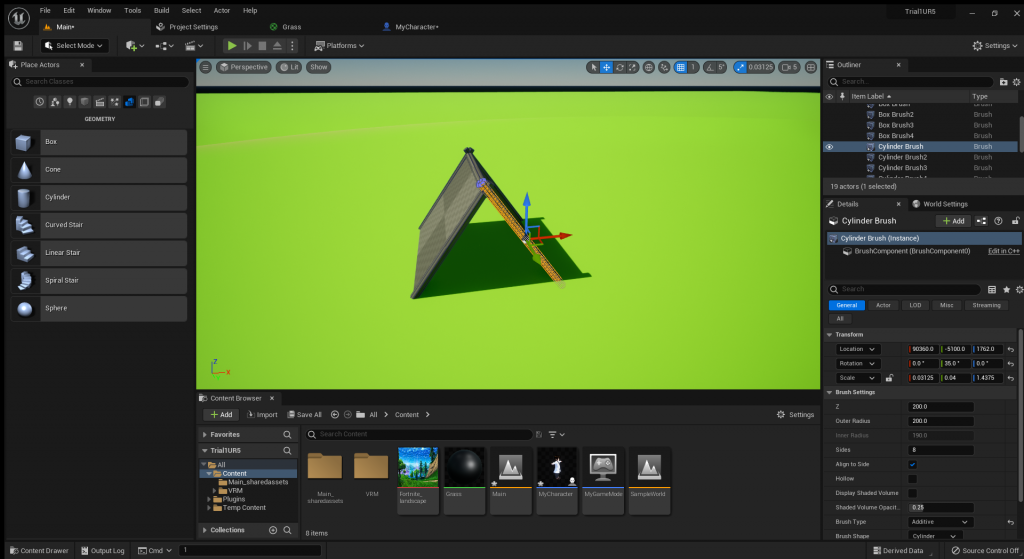
Once I finished building the landscape I tried building some tribal areas within the sample. I first tried using Geometry blocks as that is what I learnt how to build with although I did not need them. I later managed to create a little hut, which I believed was not up to standard.
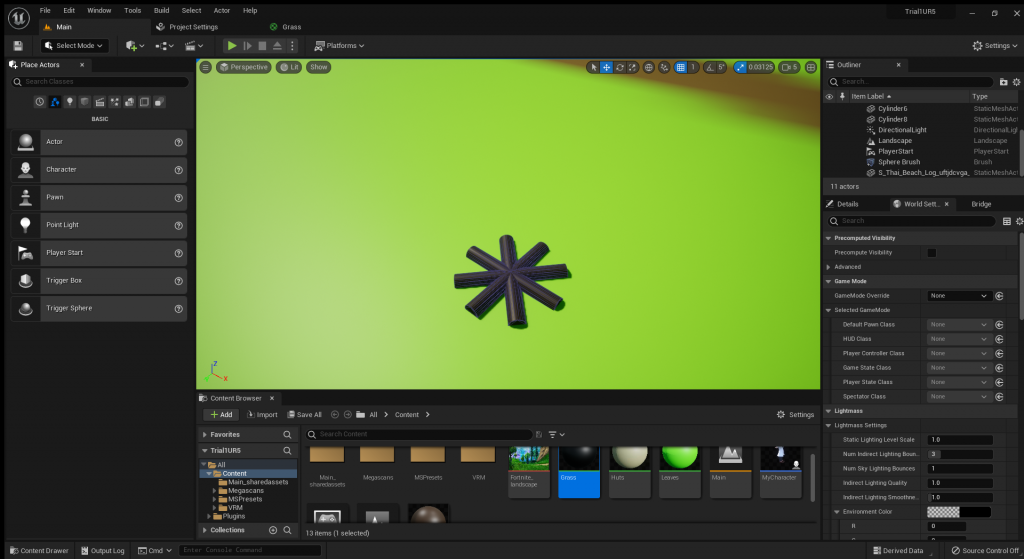
I later moved on to something much simpler, a campfire. Although managed to create the campfire I struggled turning it into a static mesh due to the new Unreal Engine.
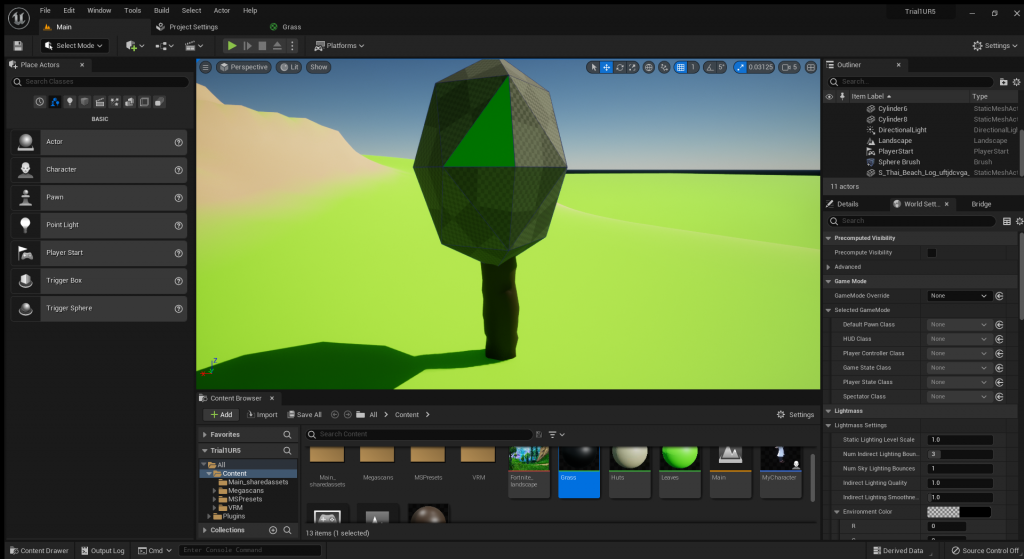
I then tried creating a tree, which was created using standard sphere block and cylinders as the leaves. I later wanted to make it more realistic so I looked into UE5s new features and found Megascans. Although I found it difficult to find tree models I managed to find a log that suited my environment and connected it with a sphere geometry block to make a tree, which I believe is really good and would be perfect for my game, but I struggled creating a static mesh tool as they would always be separate meshes. I then decided to stop worrying about it and move on to the scripting.
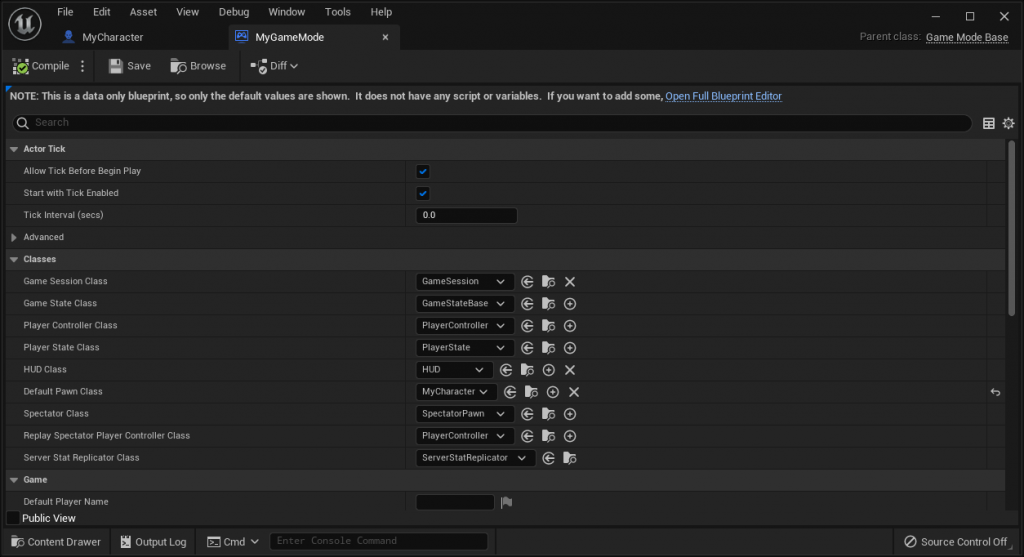
I created a gamemode in order to set MyCharacter as the official character/Player 0. (Also to later change the gamemode in order to simply restart game)
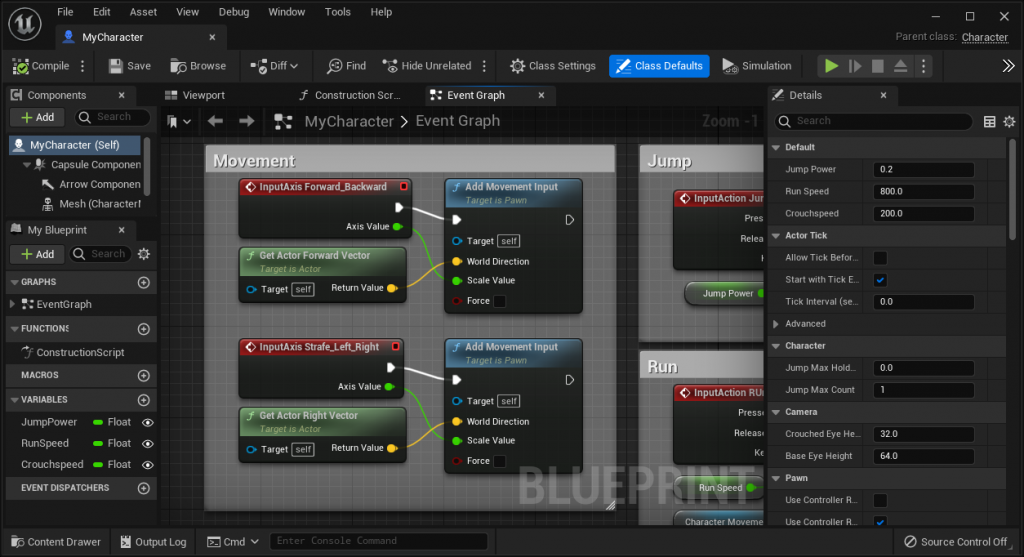
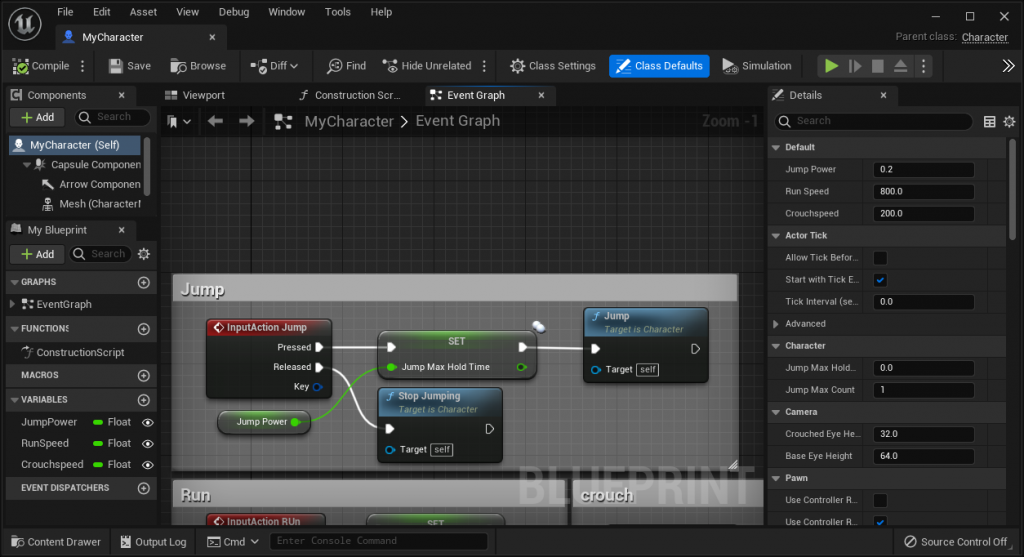
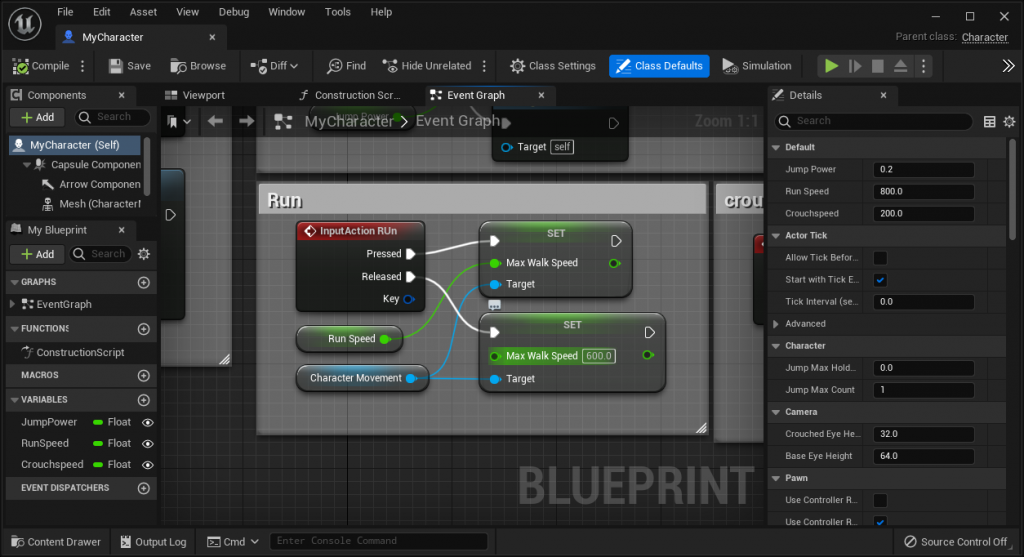
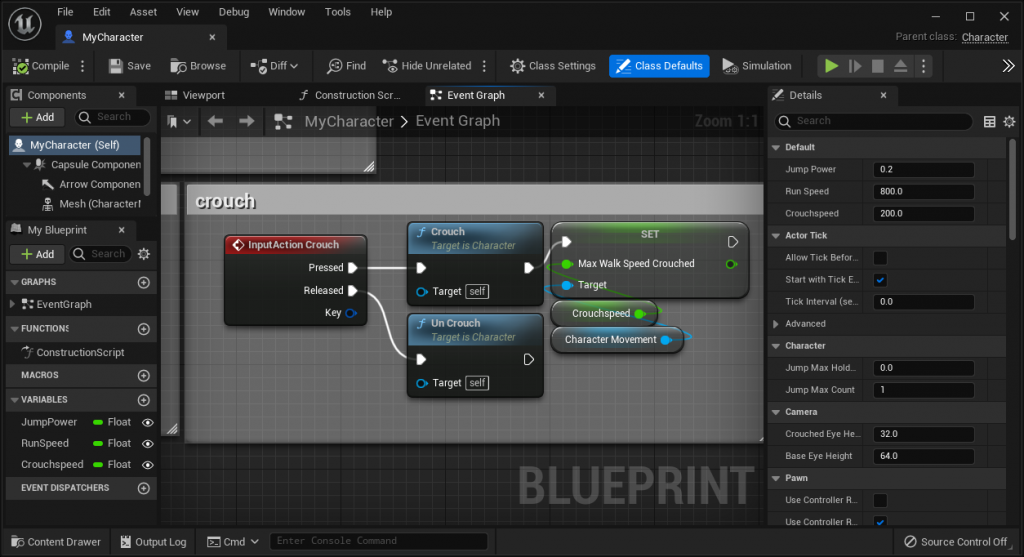
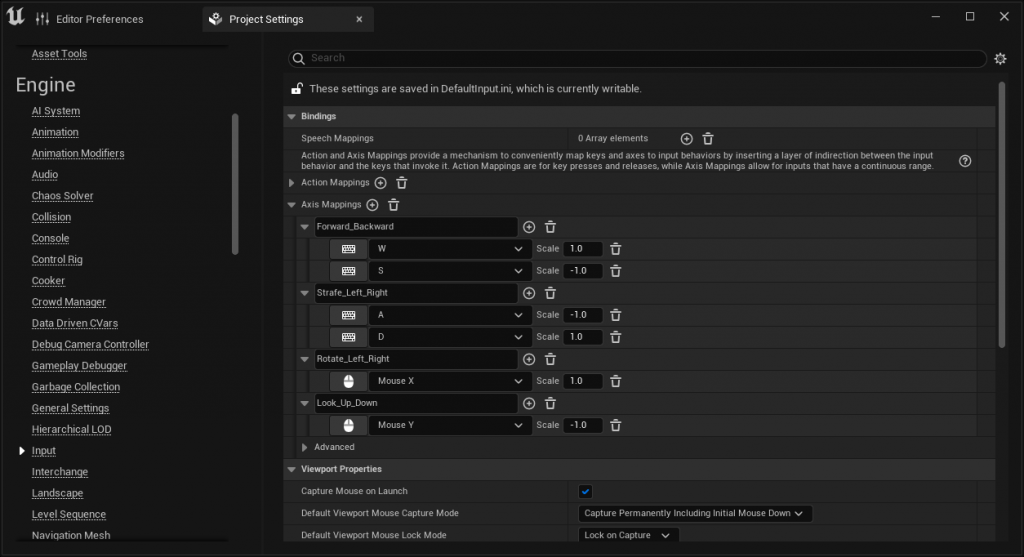
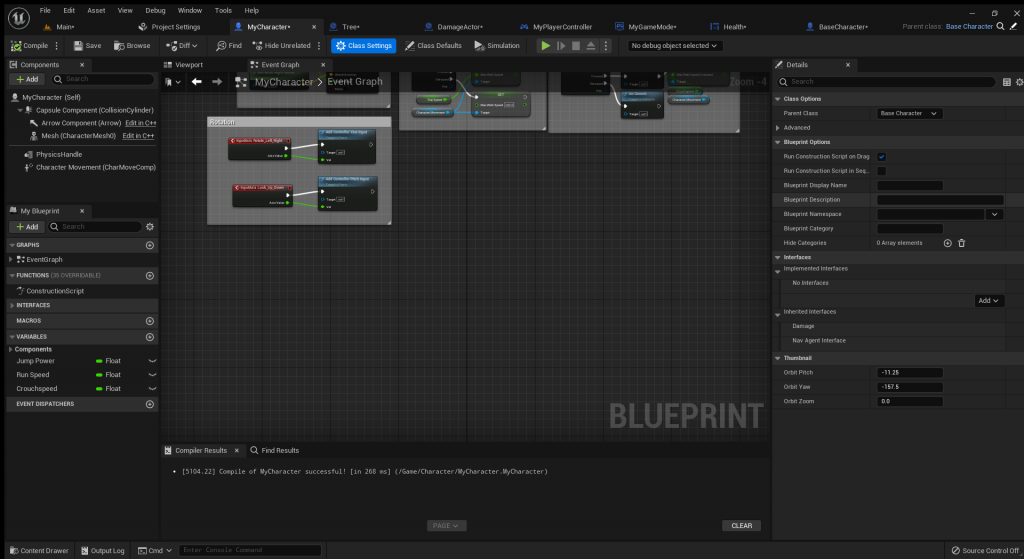
I have created movement/action commands for my character using axis mapping and blueprints script. I started by mapping the commands in project settings using 1 the first direction and -1 for the opposite direction. I then moved on to the blueprint called MyCharacter. Within MyCharacter I added the InputAction for each command, which is used to say when the binding is pressed or/and when released.
Although each command is created with separate visual script they generally are made in a similar way because of how commonly they are used. Unreal has made it easier to create the commands by creating pre-made scripts such as get and set run, jump, crouch and walking scripts for developers. Which set the speed/action created by the command. It would be connected to the input action showing it would only be used once pressed. I would then connect the green coloured text to a newly made float (Numbers with 2 decimals) Variable (Set of values), which would allow me to change the speed of the command (I then made the variable public which is option allowing you to change the value out of the blueprint). Finally, I set the target to the character movement, which tells the game that this command is in order to move the character.
I would sometimes need to create an action script, which connects the movement to an animation. — Go over with Jake–
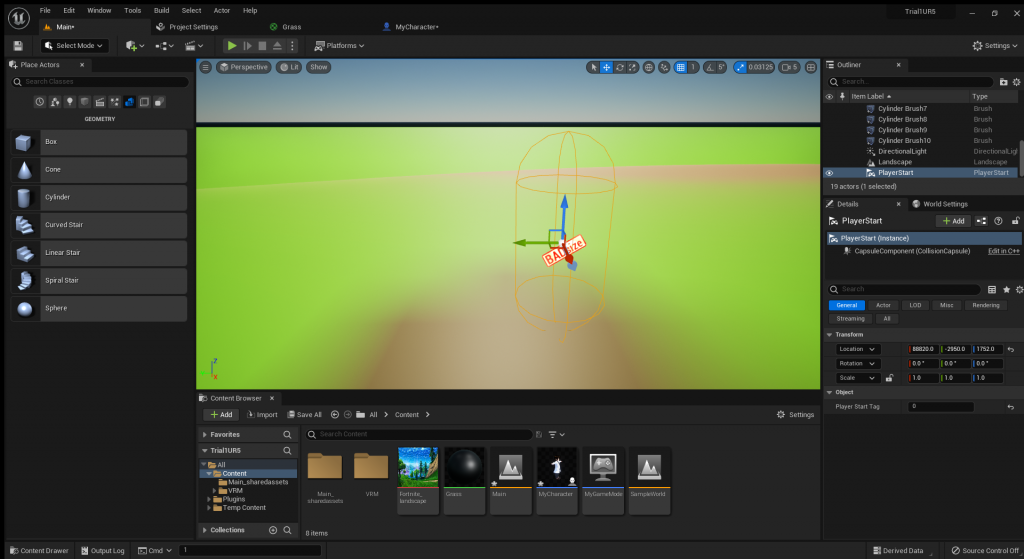
I created a spawn point for my character in order for him to spawn at a set point within the sample rather than at any point such as (0,0,0).
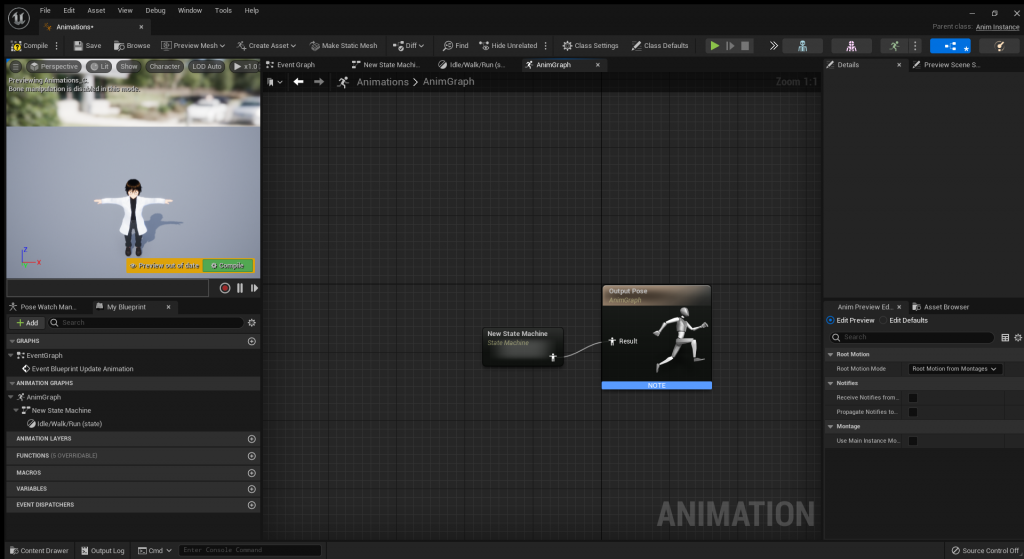
Animation Blueprint is where all the animations are linked together and scripted in order for your animations to be synced a not overlap/override one another.
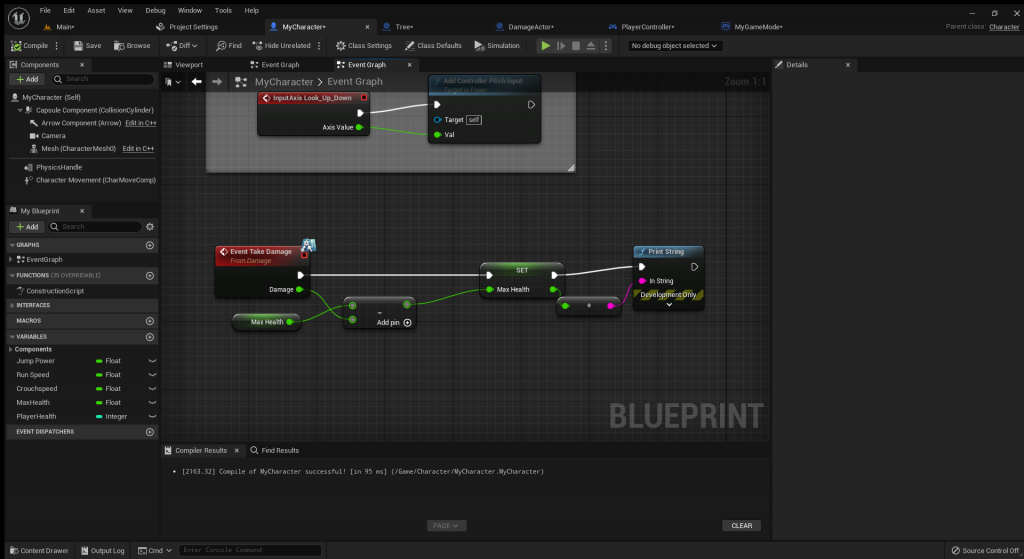
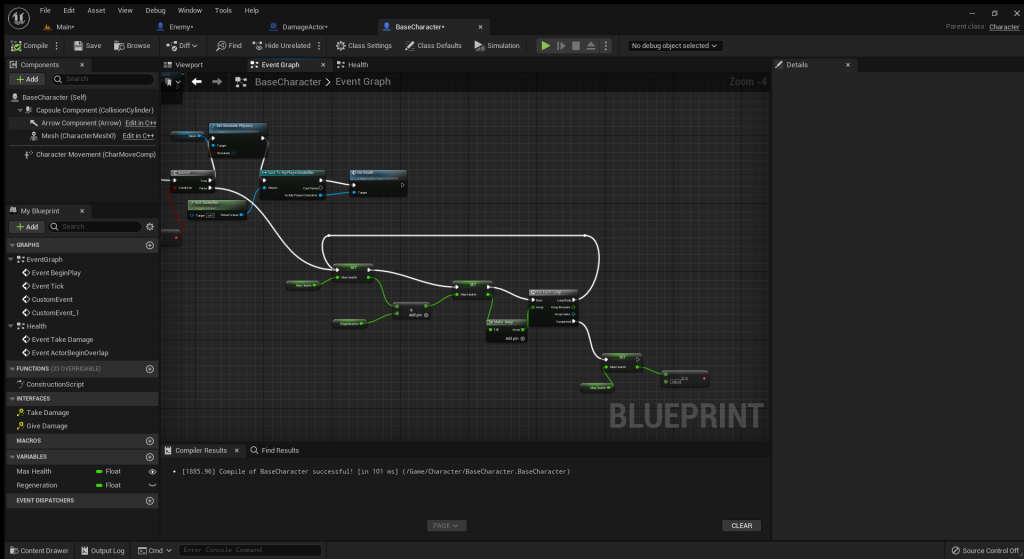
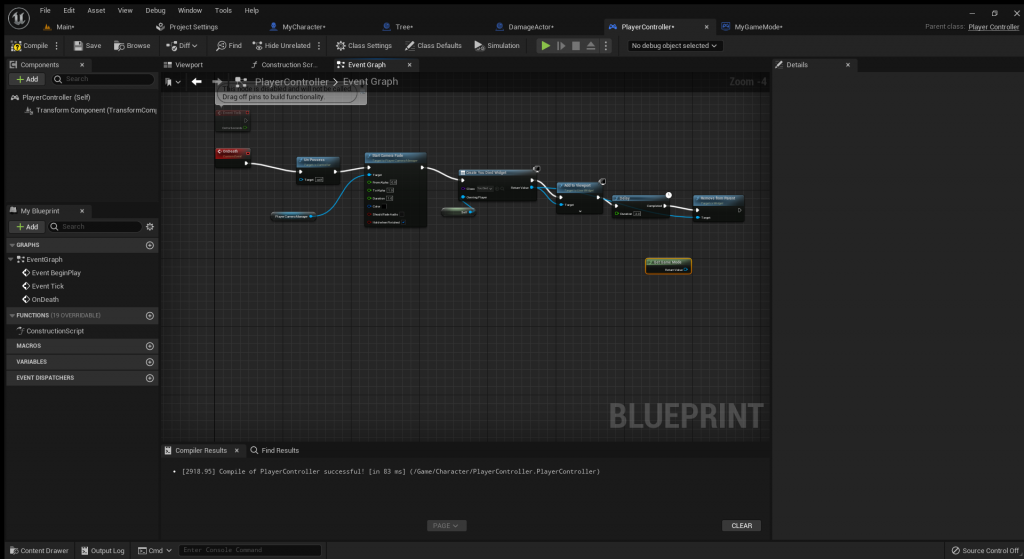
The event Take Damage was created within a Blueprint Interface, which I named damage.
At first this method of creating health was surprising, but it is the most efficient and easiest method I have found so far. Using the TakeDamage event I made the health (100) equal the health – damage. This not only sets the health, but updates it whenever you take damage. While the print (Message in-game) String (Allows you to type) tells you in-game your new health every time you get damaged in game.
(Note – Try to recreate the function and script while swapping the subtract health script to add and create a regenerative function)
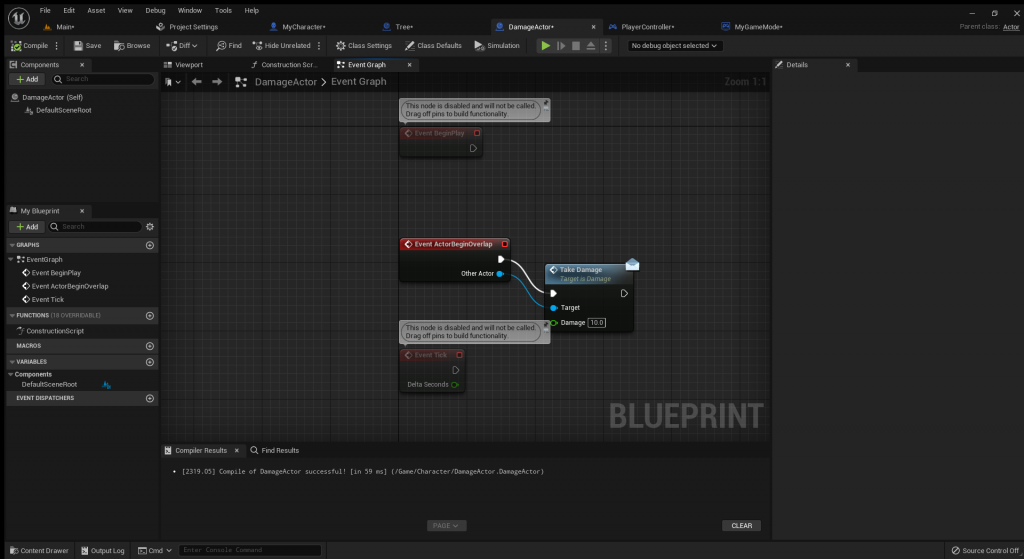
The DamageActor is used to give the event a command. The TakeDamage function is used rather than the event because it is being told what to do.
(Note: use the same method to create regenerative system.)
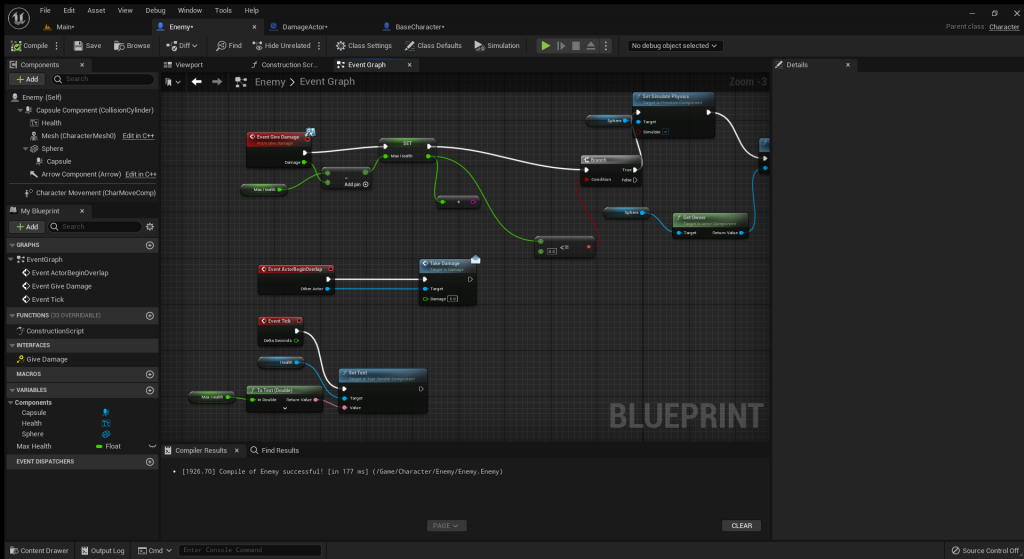
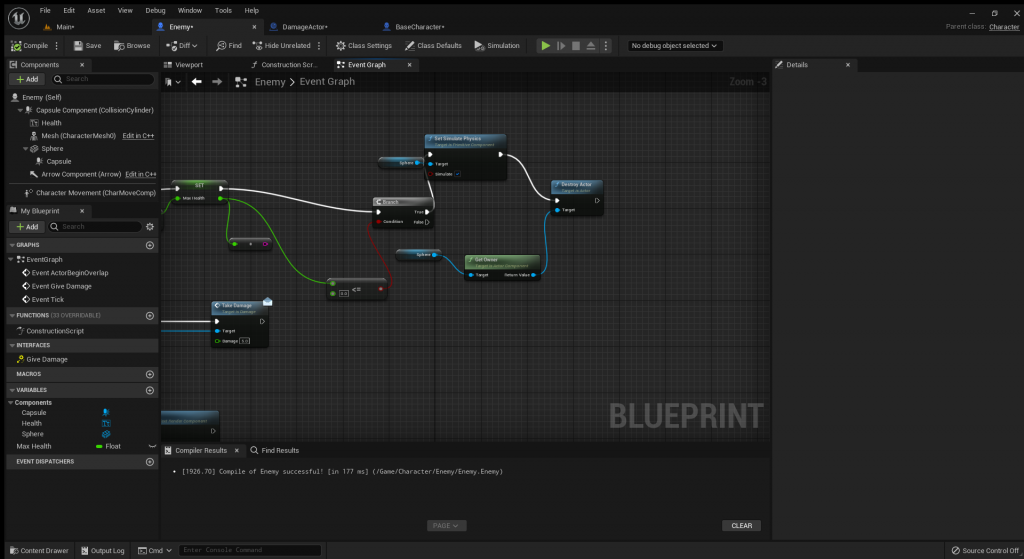
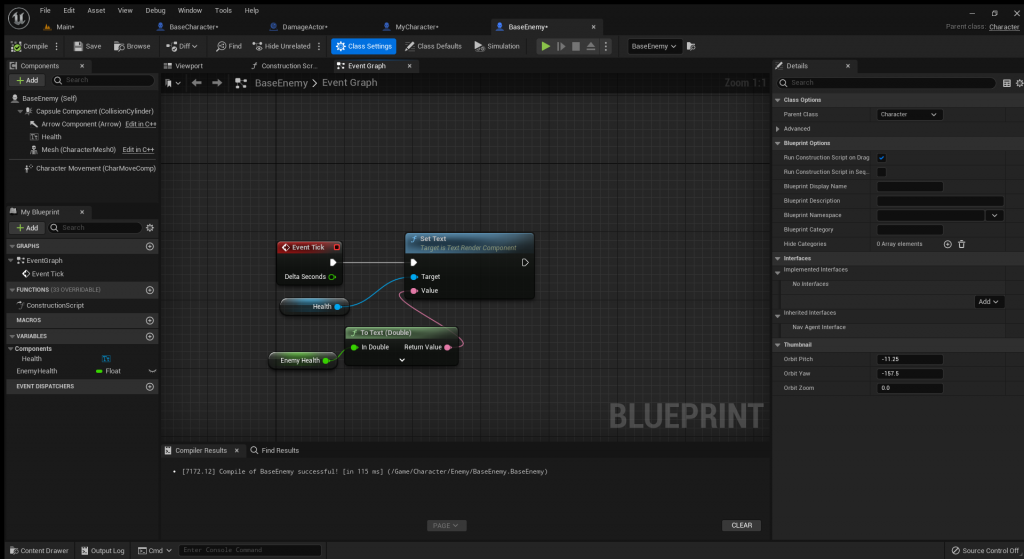
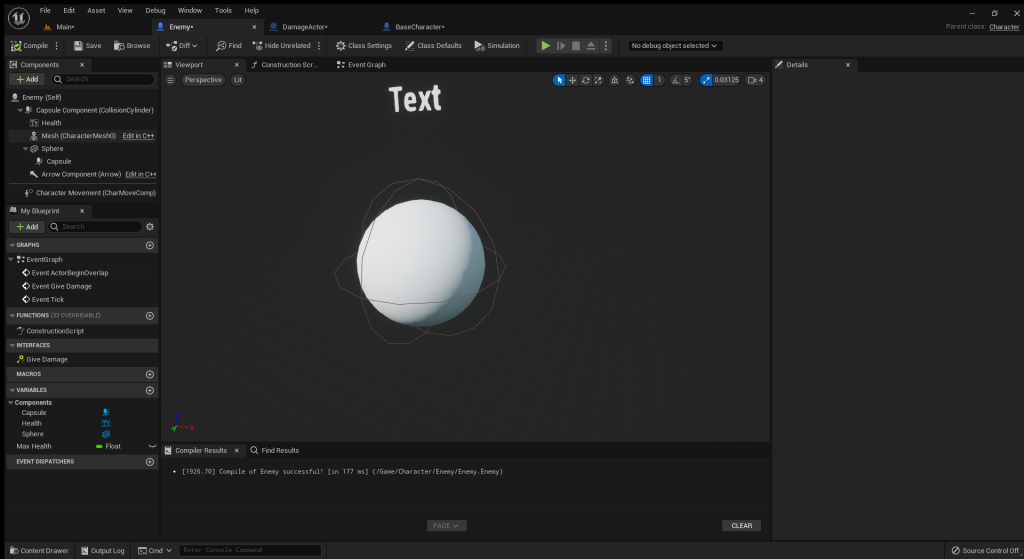
For my enemy system I decided to recreate my health system using a separate function. I planned on using the same interface for the functions until I realised it created a Logic error within the scripts. I then decided to use separate interfaces called “Give Damage”. I then recreated the event overplay and take damage using the give damage function within “BaseCharacter”, which makes it so the function decides who and how much damage is given to the character with the function as an event. I then finally added a “textRender” on to the character and made it call out the health and used a tick so it continuously updates.
I tried to recreate the the health system creating a new variable for the regeneration where I would normally connect the event. I then attached it to a loop constantly regenerating the health until completed, which is when health is equal to 100, but it turned into a infinite loop and did not work.
This is the official character script showing that it is being used as a child class with the parent as the Base Character.
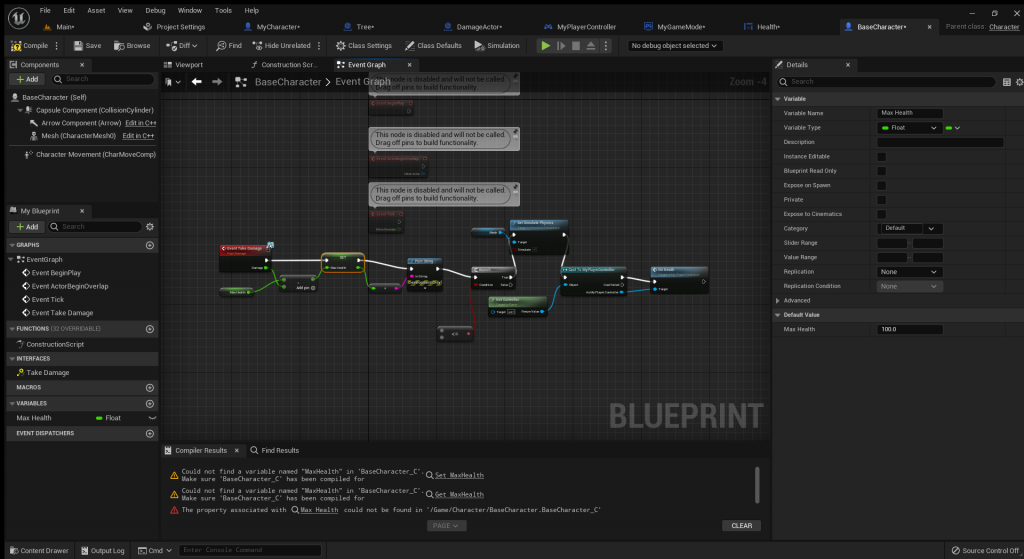
Here I moved the health script onto BaseCharacter and recreated the variable.
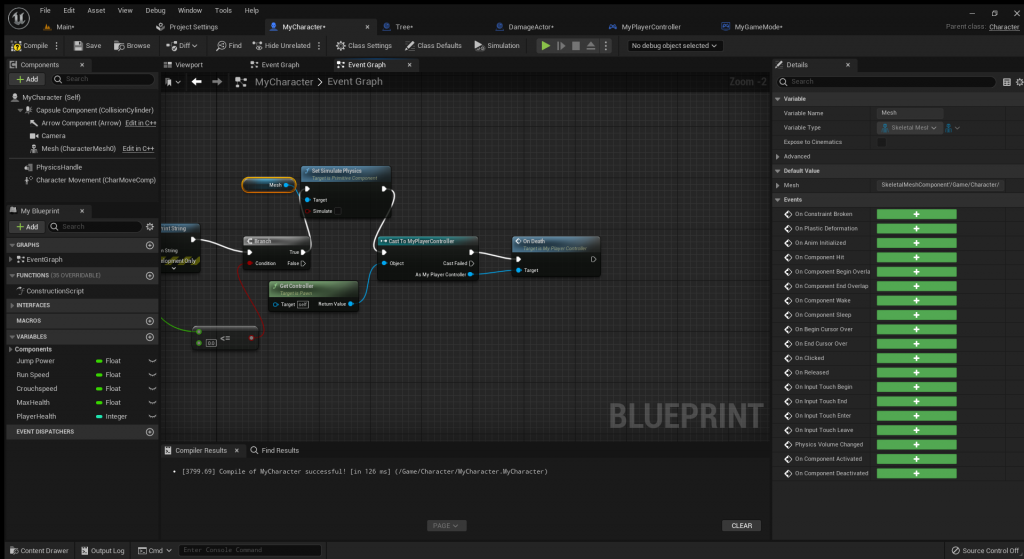
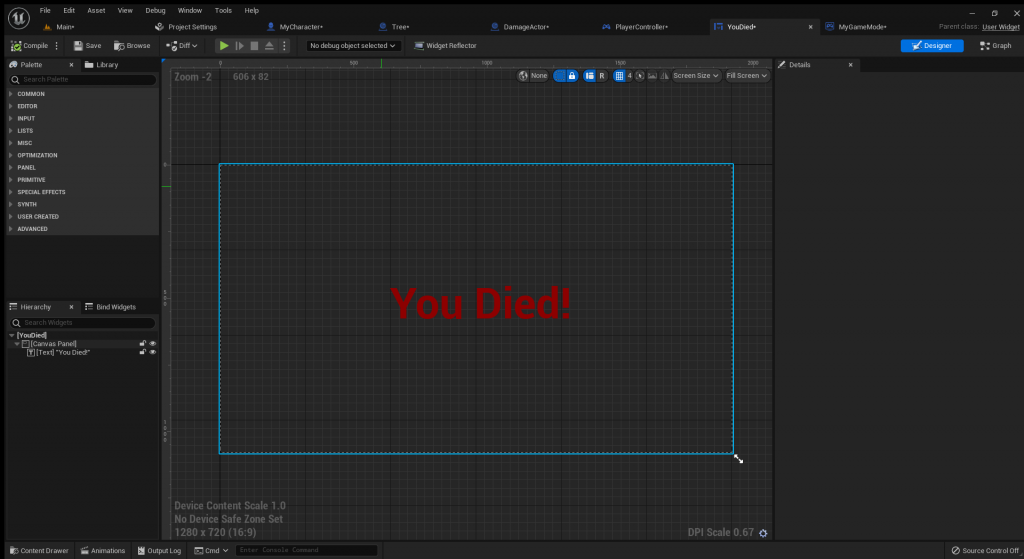
Here I created a branch which is only true if the character loses his health, where at that point a Death UI will appear on the character.
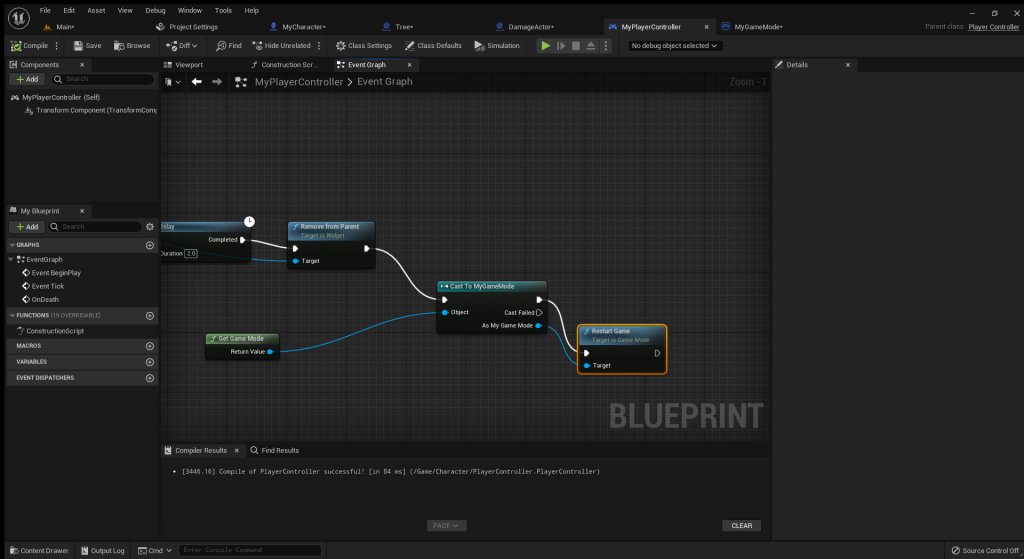
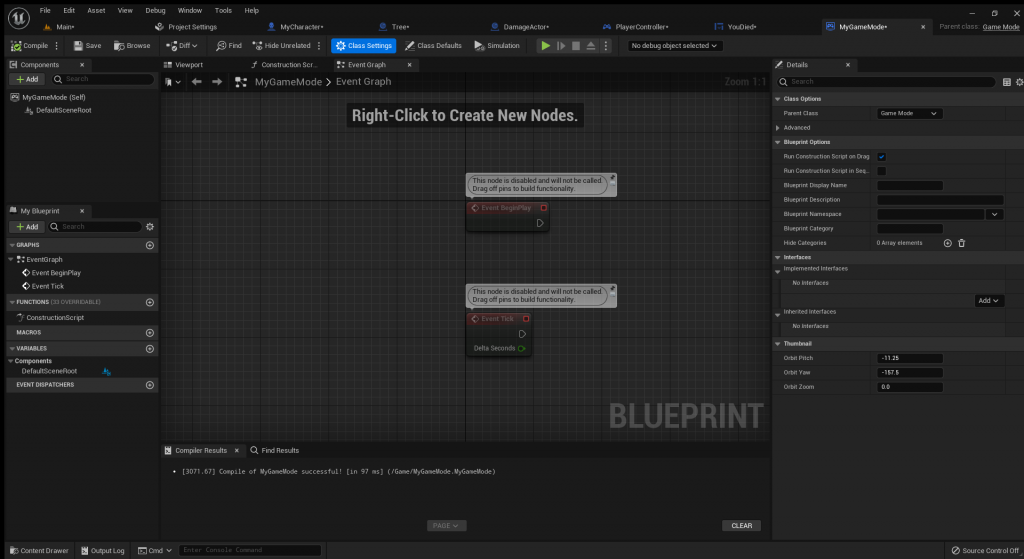
I later changed the game mode in order to add restart game as it was in another class.
https://www.youtube.com/playlist?list=PLz1quiEwfSHfzYxomng–f87lz4DWBY6x
All the videos I have researched into in order to create my game are within this playlist.
^^^ College accounts only
All my UE experiments
References
Zelda – Minecraft – The forest – Deiland Pocket Planet – Survival games (Google) – Doodle God- SimCity Builtin
Link to all FMP onedrive
FMP Final Piece Video Link
I can’t upload the video