My first project of Level 3 Extended is to create six individual looks; four that are self-lead and based on what we might choose to specialise in when we progress to degree and the final two being the work experience part of the project where we create a look for an event at The Light Cinema (“Fright At The light”) where I will be creating looks for Nightmare On Elm Street and Hocus Pocus. This project will allow me to understand my strong points as well as my weaker areas in both styles of makeup and make it easier for me to decide which style I will specialise in for my degree.
Context:
For my first look I will be creating a look inspired by the character Tomie from the horror book series of the same name by the author Junji Ito:
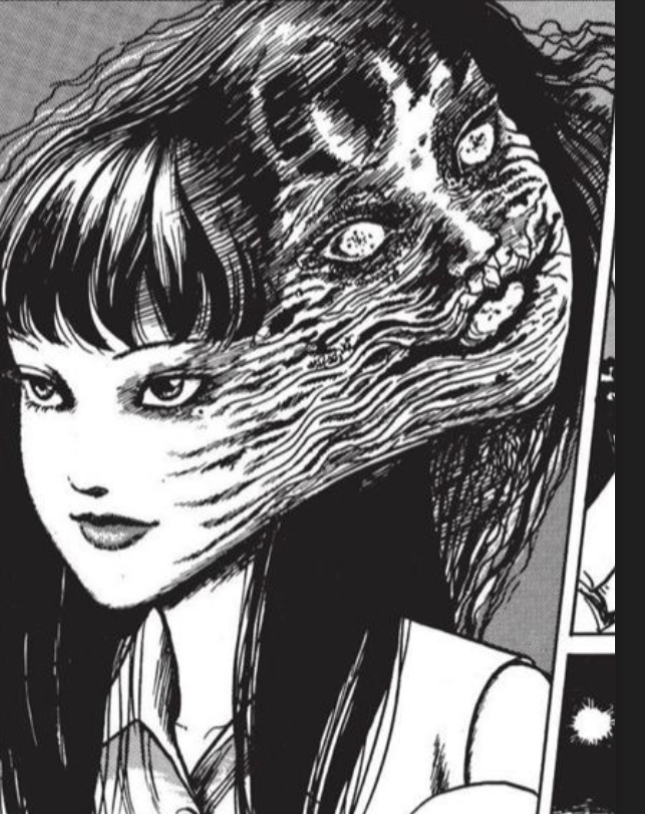
The book series Tomie was created by Junji Ito and first published in a Japanese magazine in 1987. It is one of many installments of Ito’s work and I find Tomie, as well as Junji Ito’s many other works to be extremely unnerving yet very interesting and unique as an art style.
For my Tomie inspired look, I will be creating a basic prosthetic of a second face using a mask, art supplies and clay. Her second head will be the only inspiration as I do not want to copy her design for my look. To make my look unique I will attempt a mix of straight/editorial makeup and special effects. I will also make the second face have the eye falling out to improve my skills in creating more basic gory prosthetics so that I am more familiar with it in the future. The second face will be applied using liquid latex and also used to create the effect of “melting” skin to tie everything together.
Research:
Just after starting Level 3 Extended, I was very lucky to have been able to make my work digital with an iPad. Having my own iPad gave me the chance to improve my face charts and mood boards by using the app ProCreate and I have noticed a significant improvement in the quality of my work- I am using much less paper and I can easily fix mistakes without my face charts staring to look rushed, messy and unprofessional. Being in Level 3 Extended has also given me a lot more time with my tutors, which has allowed me to have my questions answered quickly and to get the best advice on how to best execute my ideas. My Junji Ito inspired look is a good example of this, my idea was to create a second face using a mask as I cannot create big prosthetics or flat moulds yes but I wasn’t sure if this would count as special effects. Luckily, I was able to check with my tutor and I quickly found out that I could do this.
The first thing I did after being given my brief was create a spider diagram of my idea, this was the starting point of my look that I definitely adapted over the short time I had before my assessment:
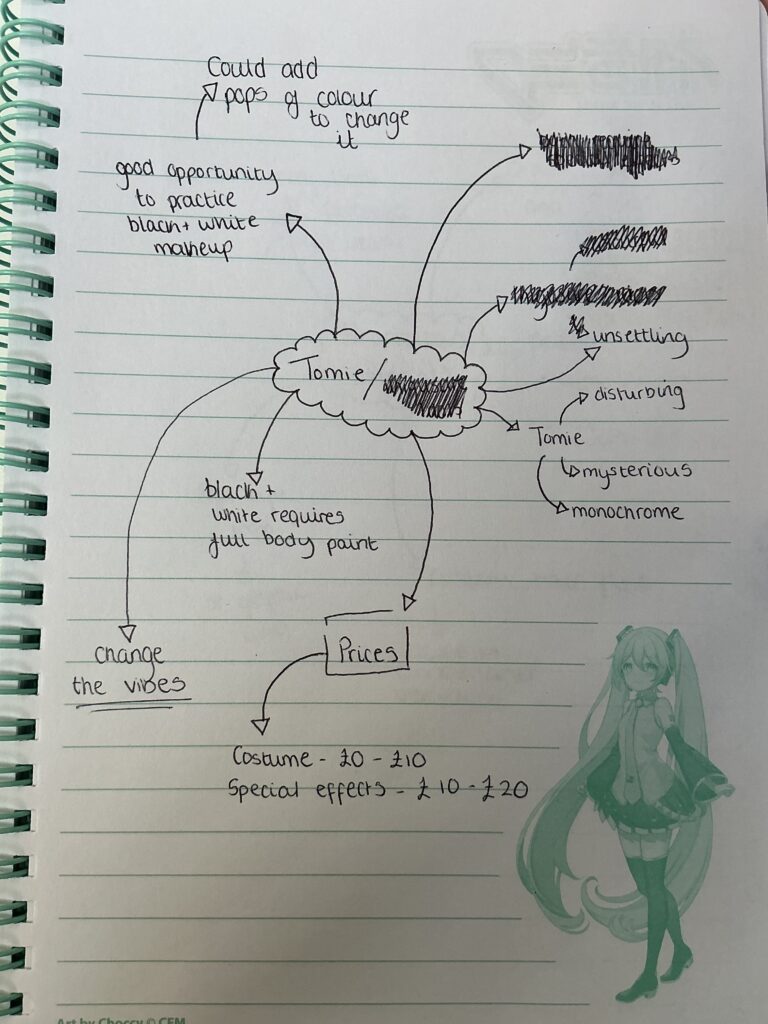
As I mentioned before, I didn’t want to copy the original Tomie design so I didn’t use a lot of these notes in my final piece. This spider diagram was only my starting point but it definitely helped me in the long run.
After a tutorial, I was given a list of research tasks and refresher tutorials that I would be given in order to make my work as good as possible. One of these tasks was to research straight makeup and products used in the Film and TV makeup industry. One way I chose to research into this topic was to watch a video posted by Sephora on YouTube called “Lady Gaga’s Favourite Makeup Hacks”.
https://youtu.be/9EgagwFwSNc?si=sFoFA1w72leE299j
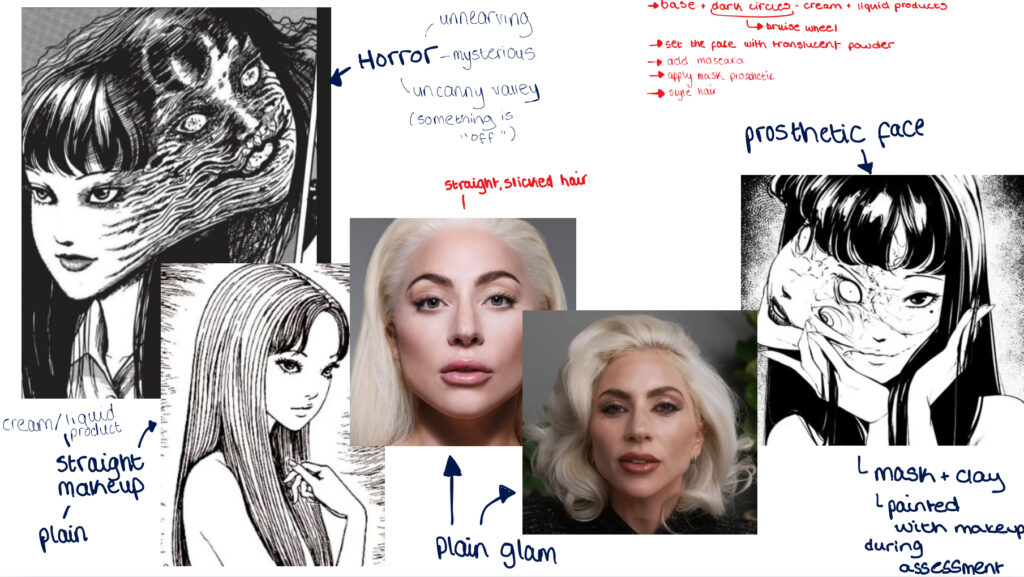
I found the video very useful in my research. I learnt that it is important and always possible to layer your makeup on gradually rather than putting lots of product on at once. I also learnt that I should also prioritise the neck, collarbones and shoulders of my model while I do my makeup look. Doing this tied the makeup together and makes it better in quality. Lady Gaga’s makeup is my main inspiration for the editorial part of my makeup look.
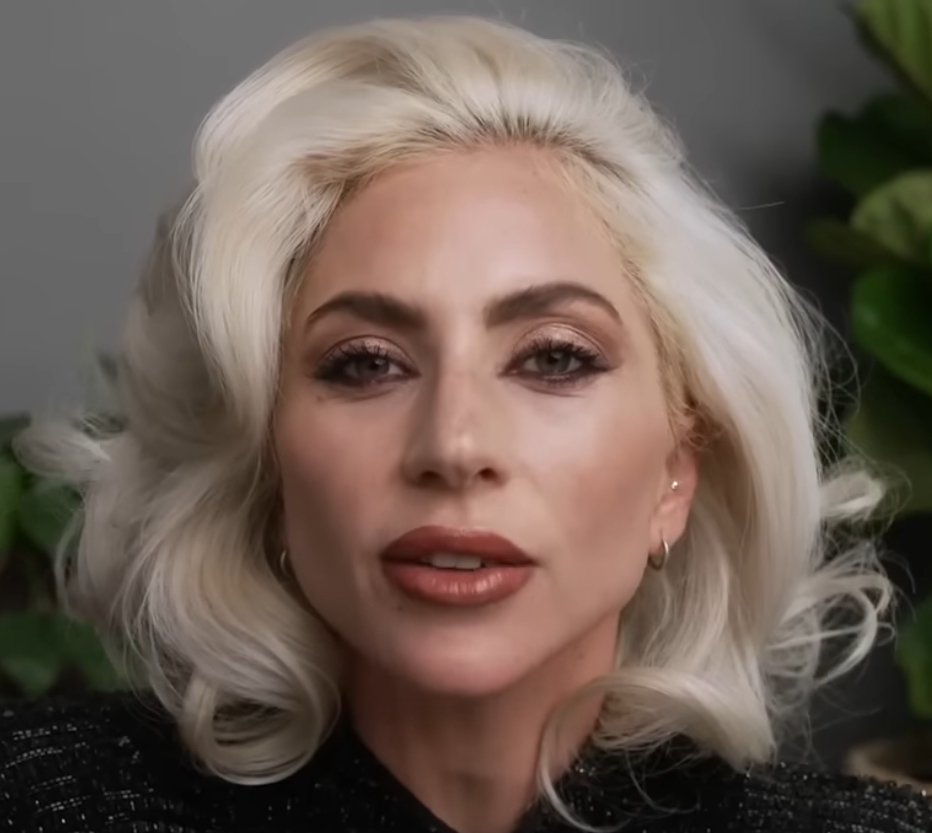
This was the look Lady Gaga created in the video using Haus Labs products.
I found the face chart on Pinterest and used procreate to create the first look of my assignment, this was the final design that I came up with before I had seen the video of Lady Gaga’s makeup tips (I changed some of the details of my face chart during my assessment) :
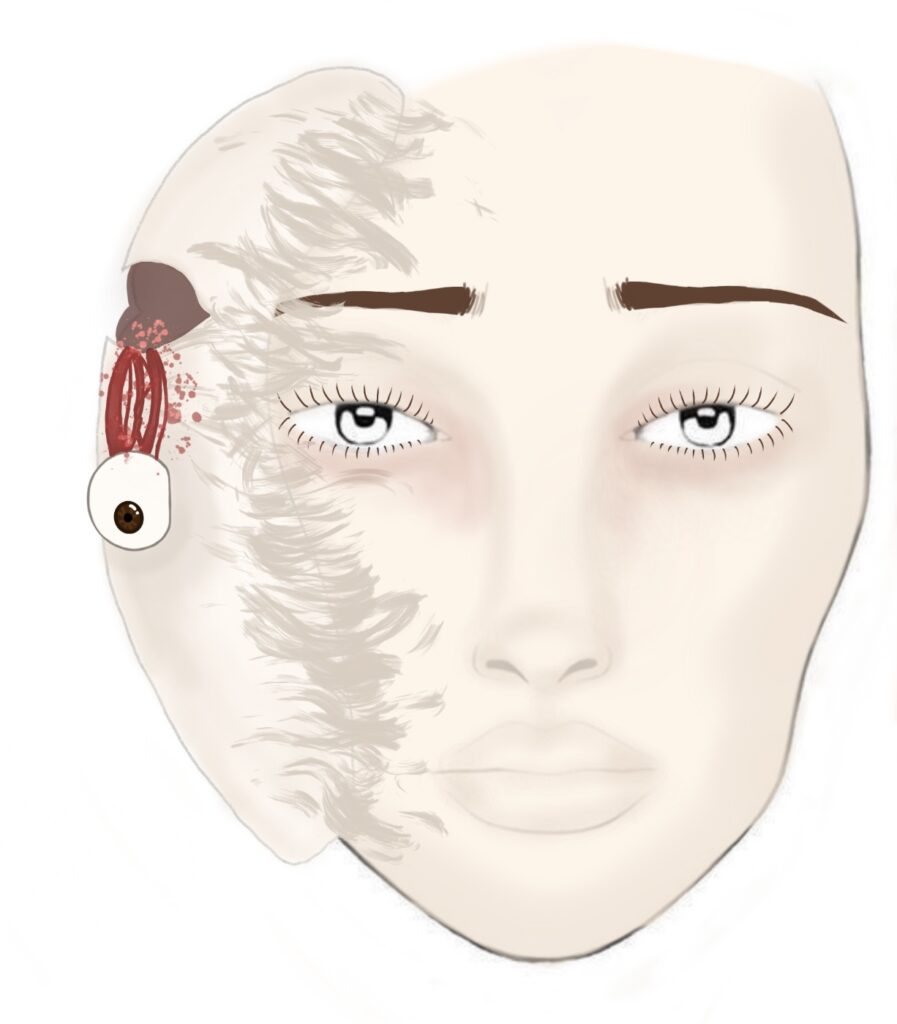
Problem Solving: Originally I had an idea to create a colourful traditional goth makeup on both my model and the prosthetic, but I came across a problem afterwards because it looked far too messy and it just didn’t work. To fix the problem I thought about what my tutor had said about creating straight makeup and how refined makeup can be just as good as a big makeup look if it’s done correctly.
Having read my notes as well, I redesigned my look and I thought that this was a lot better than my first design (shown on the “design”page and above); I would be able to make sure that the design was refined and still done to a high standard. I would also still be challenging myself because I would be making, applying and removing my own prosthetic. Originally I wanted sculpt gel to hide where the prosthetic is applied because it would also challenge me since it would be my first time using it in my work, I changed this as well because I didn’t know how to use sculpt gel and didn’t want to risk doing something wrong during my assessment.
This project cost around £15 but I used my student discount that the shop (HobbyCraft) offered and some rewards I had on their app. These ended up only costing me around £8 with discounts.
| Mask (2) | £2 (all together) |
| Clay | £3 |
| Paint Brushes | £5.50 |
| Glue | £3.50 |
As I am creating a prosthetic look, it is important to make sure that my model has no allergies. I asked her and she had said that she had been patch tested for spirit gum and latex (two products I considered using) and luckily she had been successfully tested a couple of weeks ago behind her ear- and had no reactions. Regardless I will still be very careful and make sure there are no reactions while I complete my look. I also asked my model to wear black or white as it relates to the original black and white images.
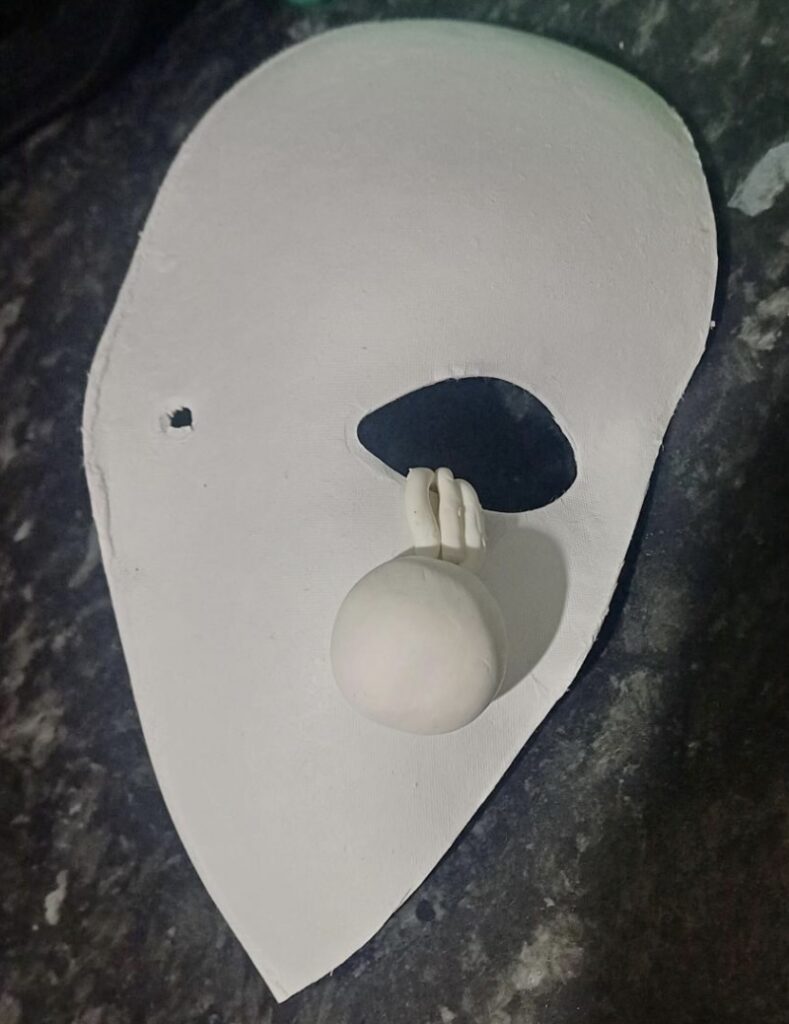
Before my assessment, I created my prosthetic by first cutting up a paper mask. I then used oven bake clay to create the eye and veins before using super glue to attach them to the mask:
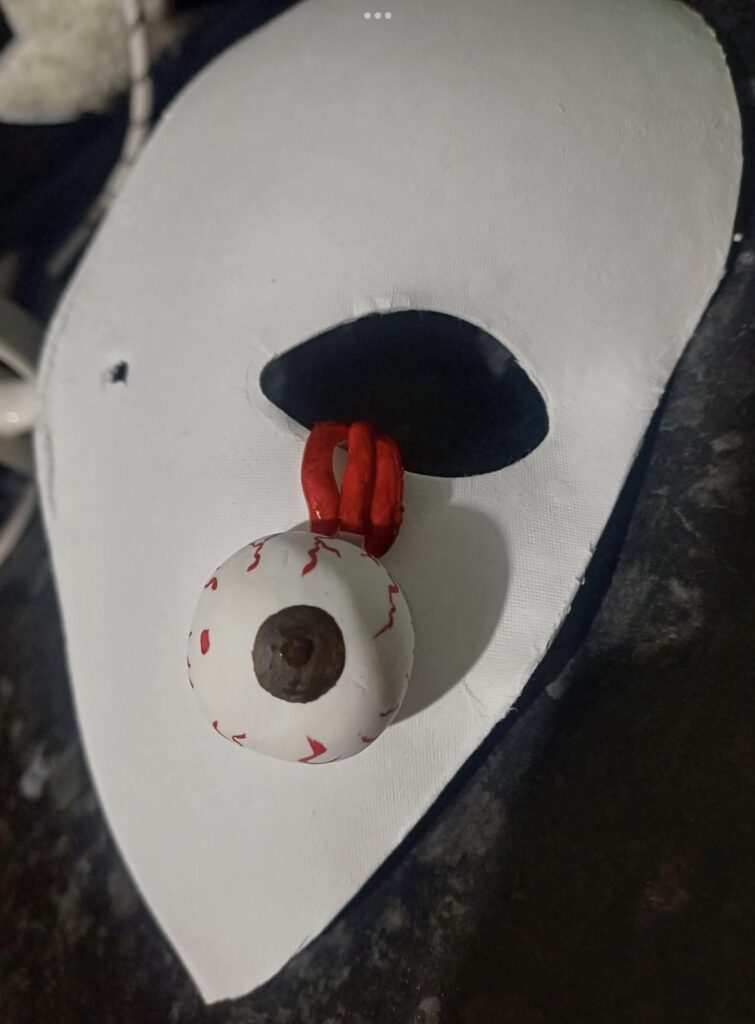
Then I used my acrylic paints to add details to the clay. I didn’t paint the rest of the prosthetic because I wanted to use makeup for it so that it best ,arches my models skin tone on the day of the assessment.
These are my final annotated mood board and face chart that I will display on the day of my assessment. I found the images for my mood board online on YouTube or Pinterest:
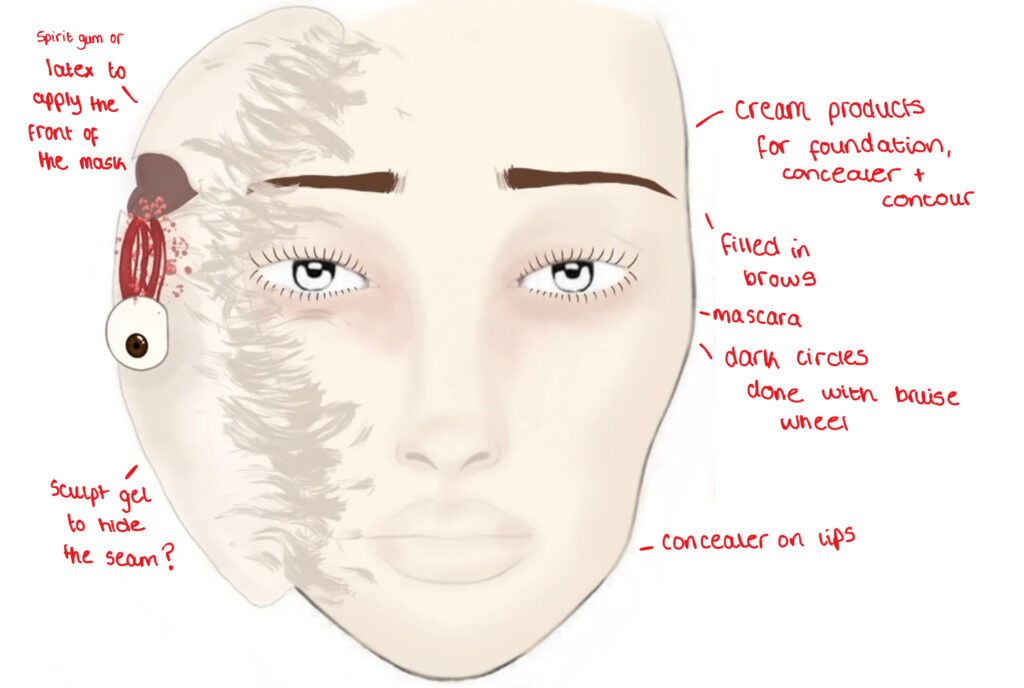
I ended up changing the lip and eye makeup during my assessment to better fit the editorial part of my look.