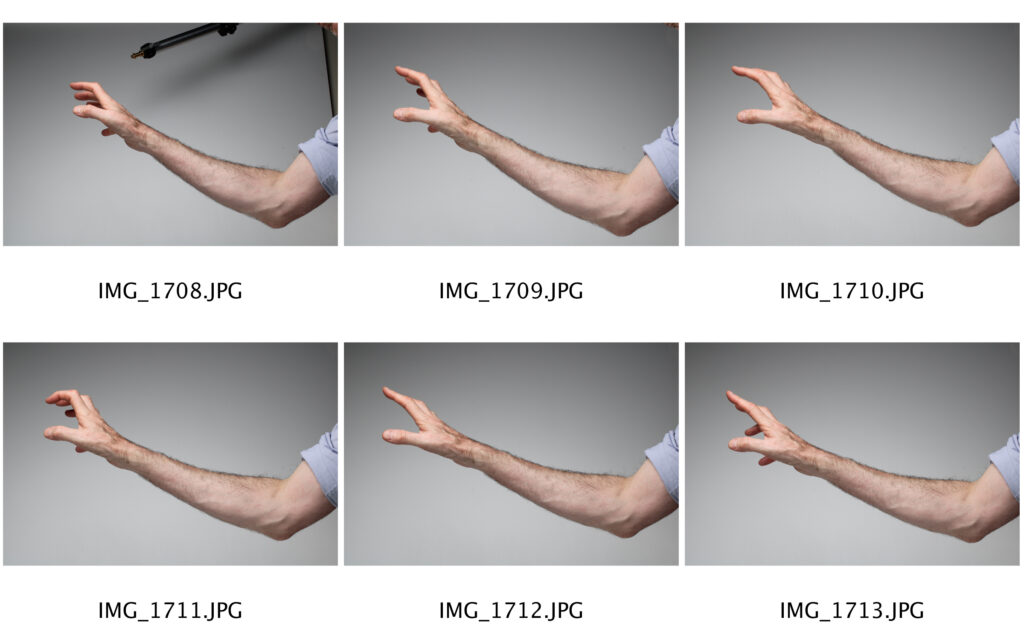
To develop my final piece from the Antoine Geiger shoot further, I took pictures of someone’s arm in the studio so I could use them to make it look like a hand was coming out of the laptops screen about to grab the model.
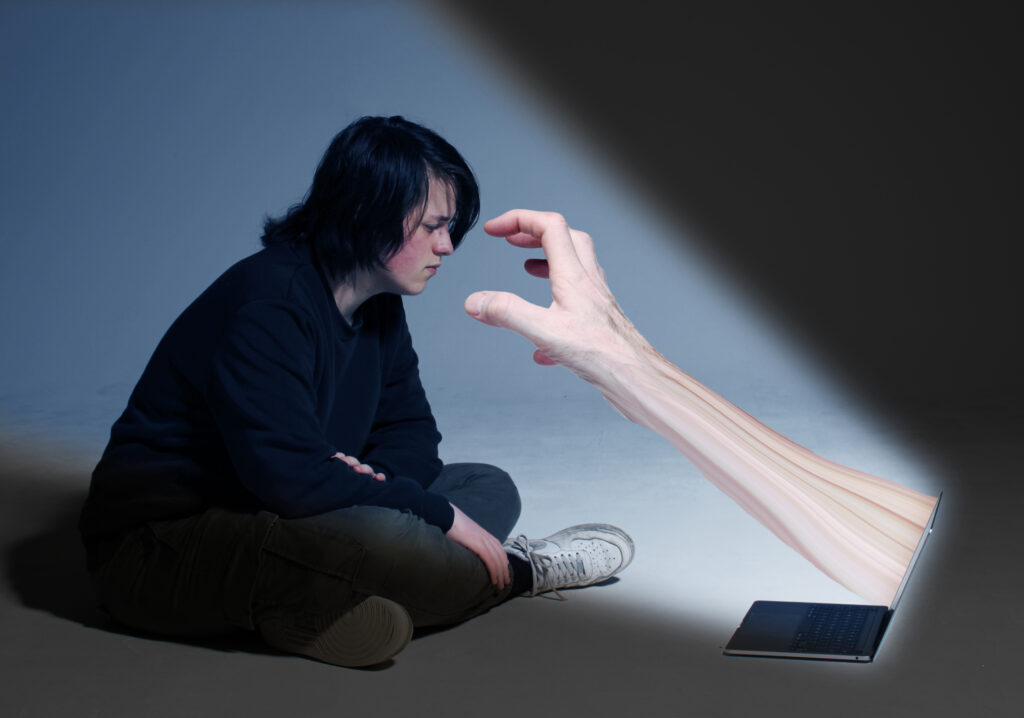
Using the original picture, I started off by using the object selection tool to create a copy of the laptop on a separate layer. I then removed the white background from the selected arm picture and positioned the hand/arm to look like it was coming out of the laptop.
I still wanted to include some aspects inspired by Antoine Geiger’s work, so I stretched part of the arm by copying it, creating a clipping mask, and distorting most of the arm using the liquify tool. I then erased any of the remaining arm that was behind the laptop, used the spot healing tool to make the background cleaner and cropped the whole image.
I still wanted to do the same thing I did with the last picture by making light come from the laptop so I flattened the image, added a new layer and used the polygonal lasso tool to make a gradient going from white to transparent. After that I used the overlay blending tool and colour balance to make the light look slightly blue. I also used levels to make the background look darker.
I’m positive that this is a very good photo to use as my Final Piece as it links with my chosen concept greatly, along with the theme of the Future. I believe it illustrates the negative direction society and technology’s relationship is heading in, really well.