Plan:
Because it fits in well with my public transport theme, I am going to recreate another Hockney Joiner at a bus station or any location related to buses. The last one I did was good but to make it better, I am going to make sure that there is something to focus on, such as a bus in the photo so it is more obvious where it was taken and what the main focus of the photo is.
I am going to use the same technique as before but this time I will try to purposefully leave some gaps around the edges of the frame when the photos are put together to make it look more like an actual Hockney Joiner.
Shoot:
I decided to stand outside in a place where there are a lot of bus stops because the bus station was closed. I used a focal length of 55mm and took photos from when the bus had stopped there to when it was leaving. Most of the pictures I took had an aperture of F/8 and a shutter speed of 1/10 second. I didn’t think this would be a good joiner when I was taking the photos but when I put them all together, it actually ended up looking a lot better than the first one I did at the bus station.
I joined all the photos together using Photoshop and made one with one of the blurry photos in the background and one with nothing in the background. I couldn’t decide which one looked better so I got different opinions on which one to use for exhibition.
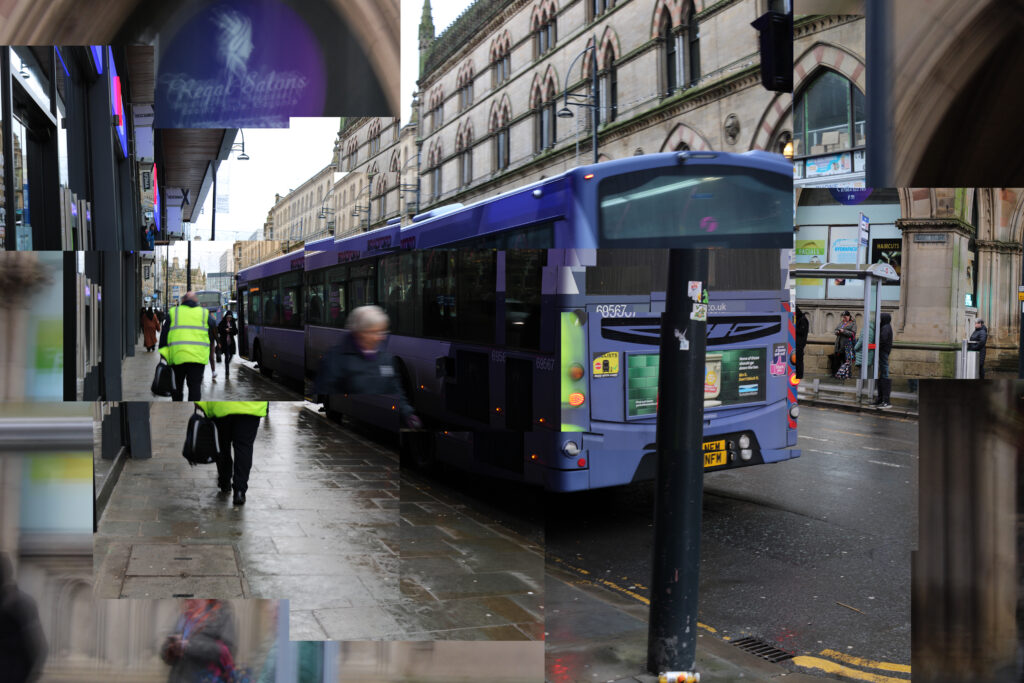
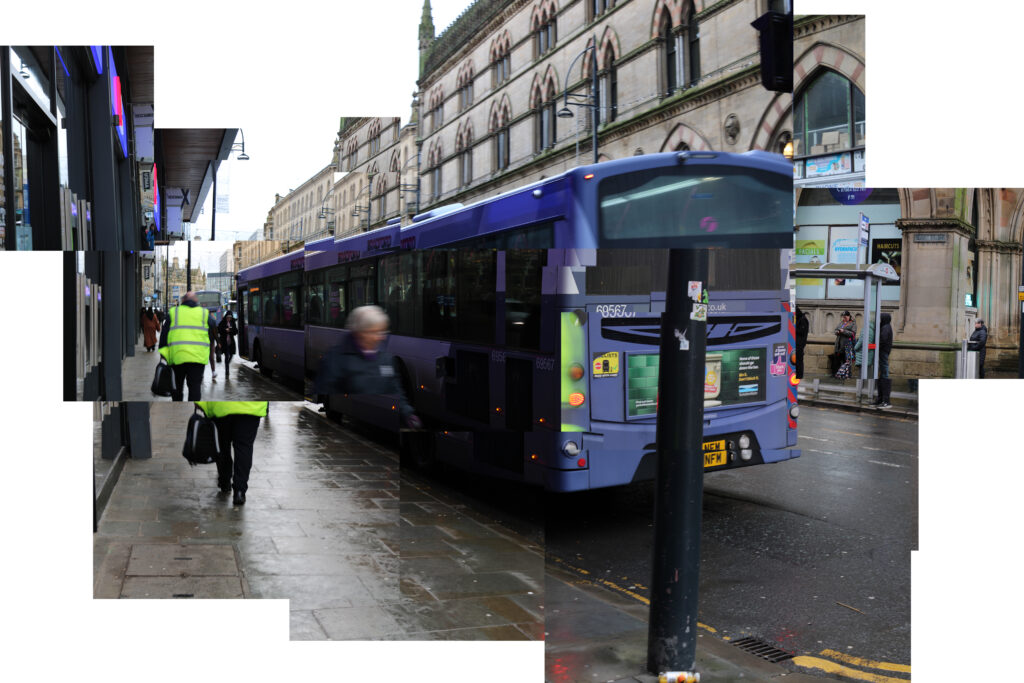
I have decided to use the Joiner with no background as it makes it clearer that it is a picture made up of a series of different photos put together. The lasso tool was used to adjust the levels on the left side of the bus so it wasn’t as dark in that area.
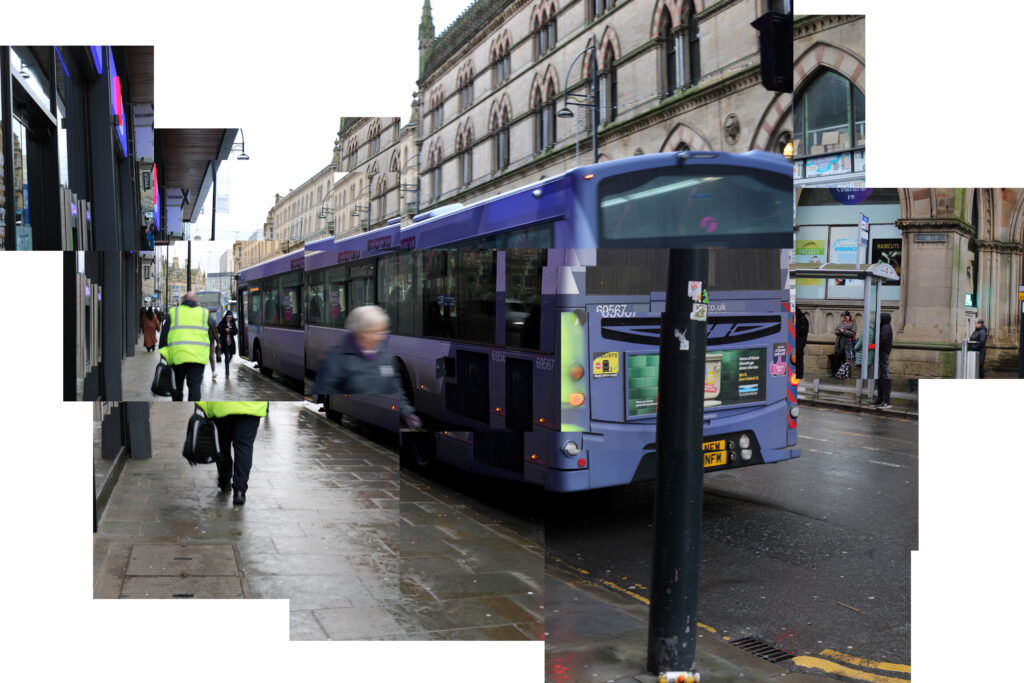
I think this is a really good photo to use for my final exhibition as it captures the theme of journeys and public transport very well. It can also link to the idea of 4D photography as some time has passed in each image and they have all then been put into one frame.