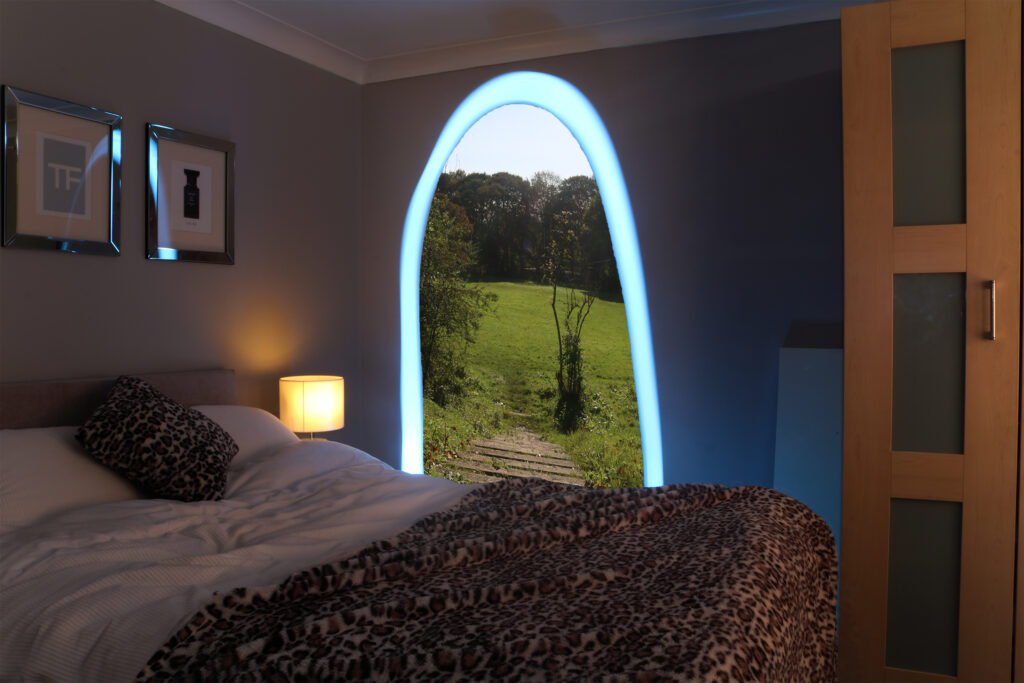
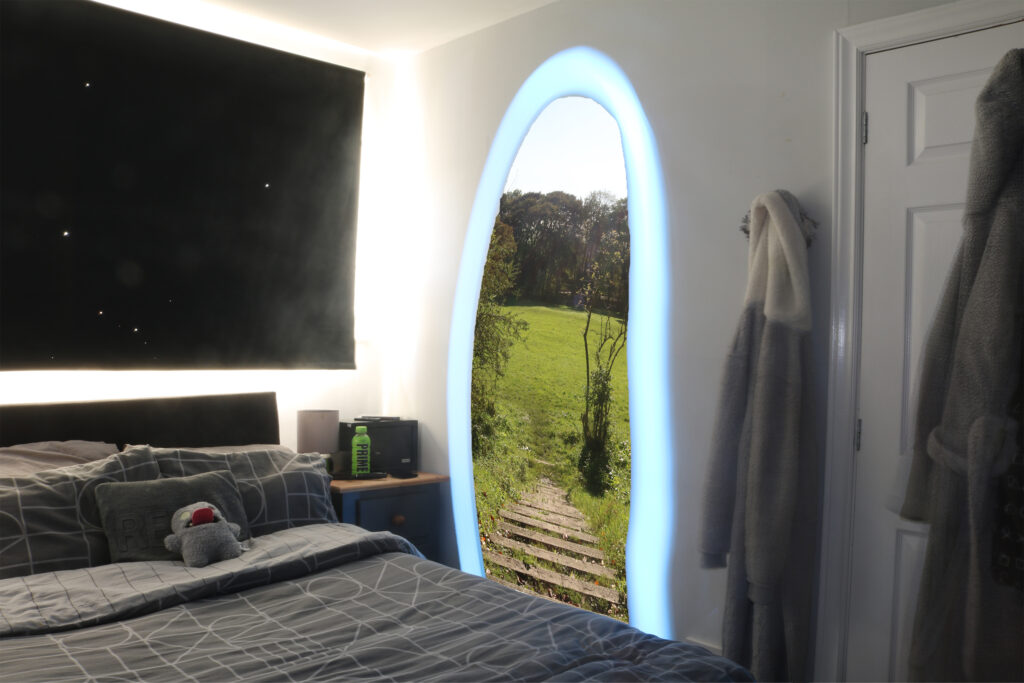
I took the original image and took out the inside of the portal by using the quick selection tool and smoothing the edges out. I then placed the image into the portal and created a good fit for it by resizing it. after this, I used the free transform tool and made it 3 dimensional to make it look more natural. I then tried this with 2 other pictures, with all the finished versions shown below.
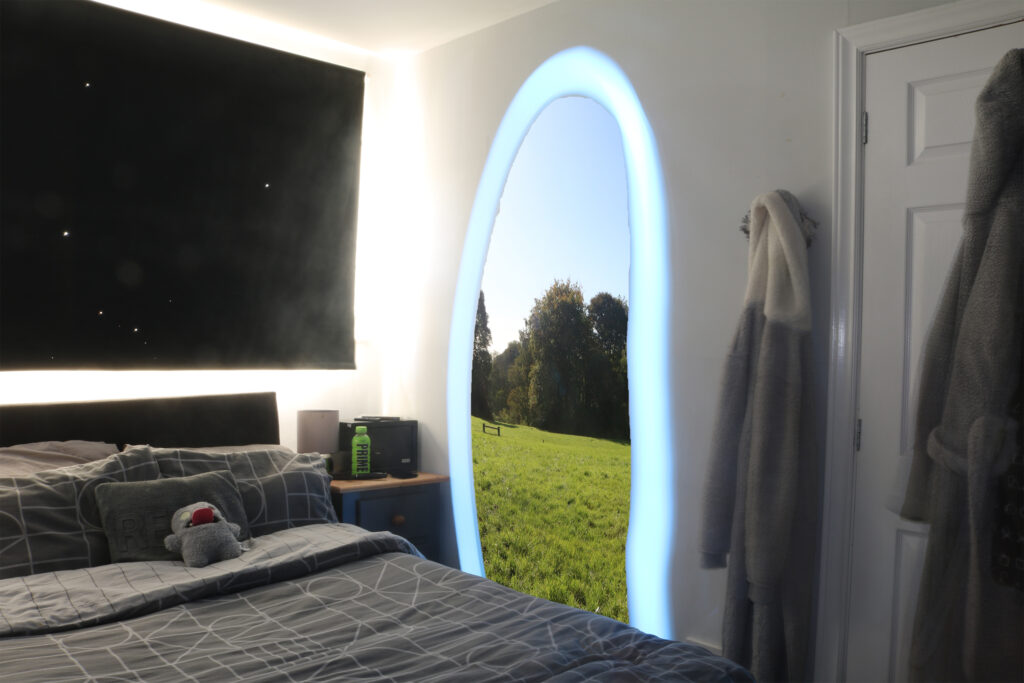
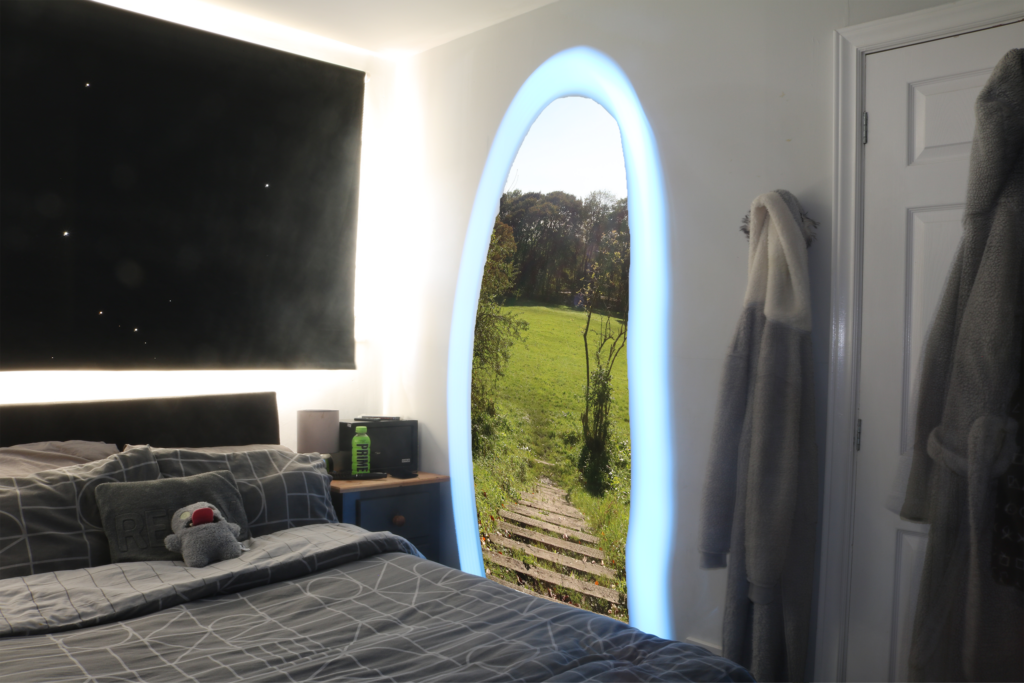

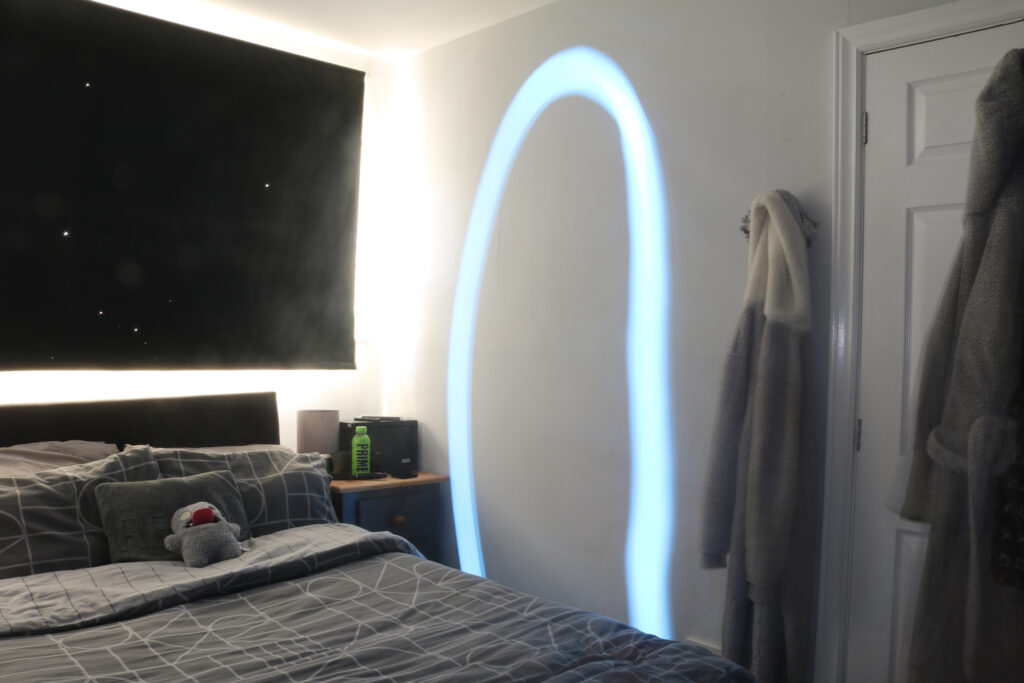
After editing these, I decided that the bedroom didn’t fit because the shoot was done during the day and I couldn’t prevent the light from coming in, so I redid the shoot and the process with a different bedroom during the night. The final edits are shown below.
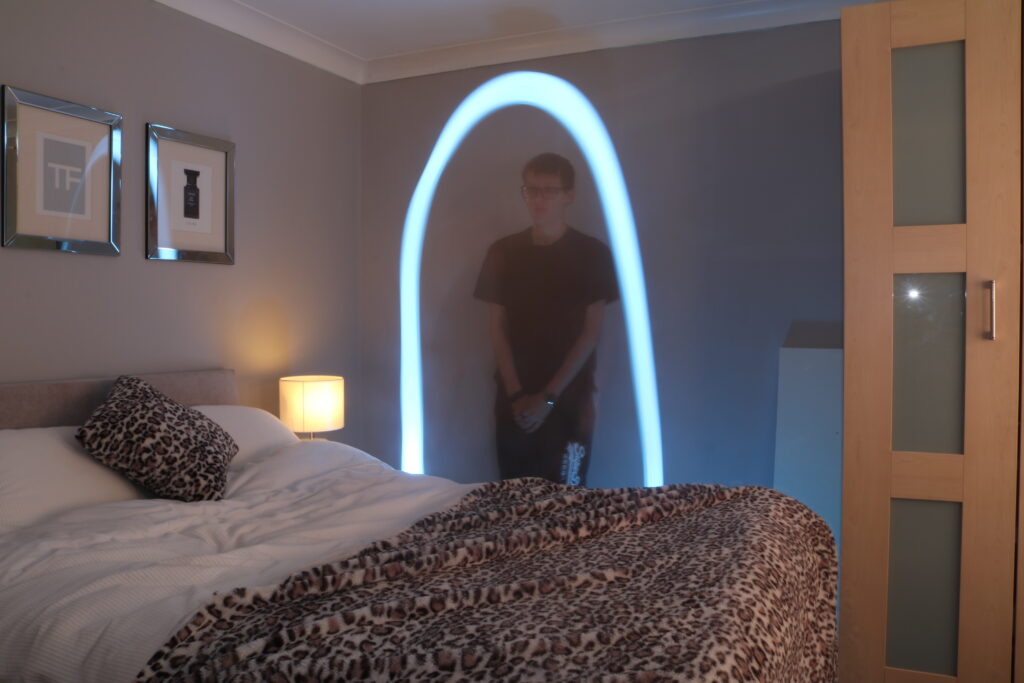
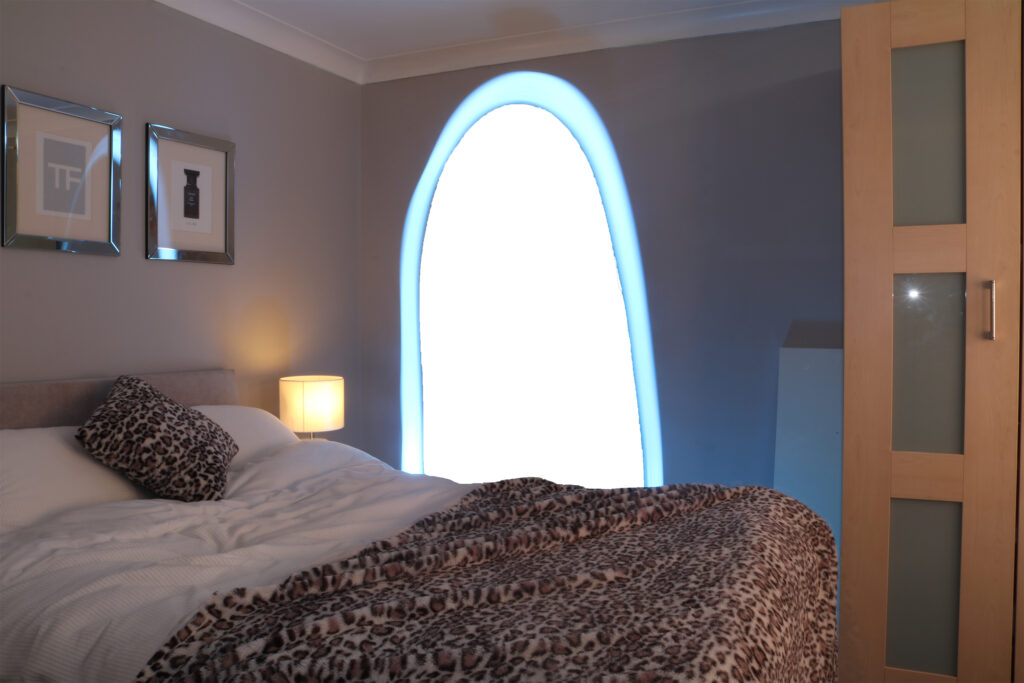
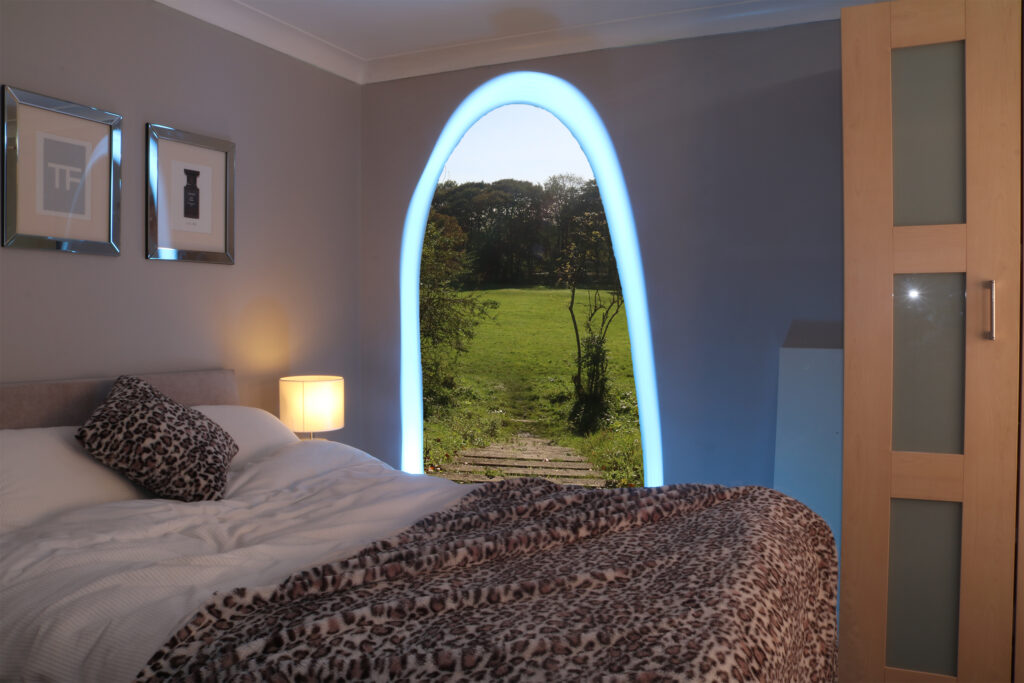

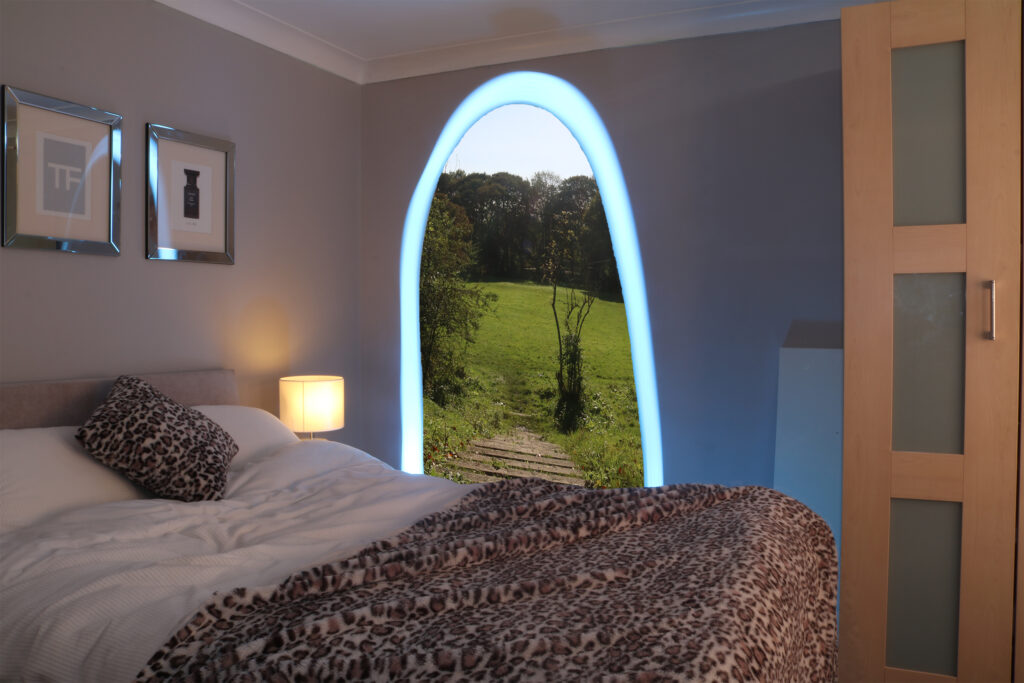

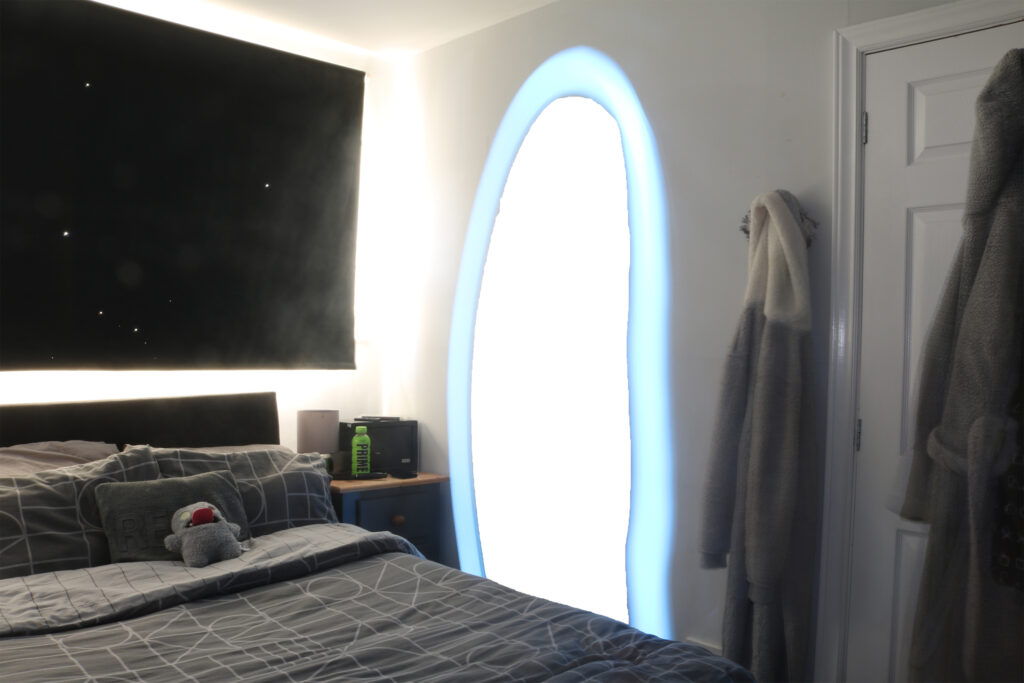
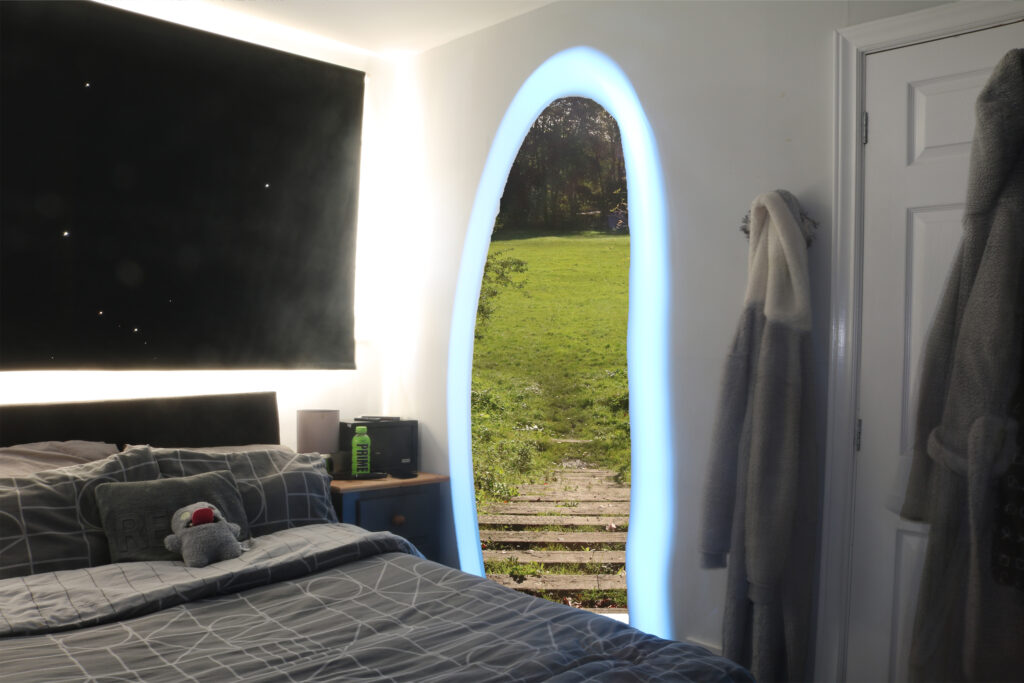
To create the picture I used the lightbar to draw out the portal and stood there to make sure someone’s whole body could fit in the portal. I also added a lightbar inside of the lamp to make it look like it was on while providing less light because the lightbulb from the lamp was too bright, so I used a lightbar which could be tuned to be darker to compensate for the 10 second long shutter speed. I first took the picture and cut out the inside of the portal. After this I added the image of the path going down behind the cut out part of the portal. Once I had sized it to fit the portal I used the 3D free transform tool to move the perspective of the portal to make it blend. I then used spot healing to remove the glint on the wardrobe to the left and finished up by burning the shadows and mid tones of the image to make the portal stand out more and to make the room look darker. This created my final image shown below.