Layout Difference
Before I started mixing properly, I had to organise everything so each track made sense to be where it is to make it easier to follow. Some tracks were duplicates of others or different takes of the same thing, so I chose the best takes of them all and organised accordingly.
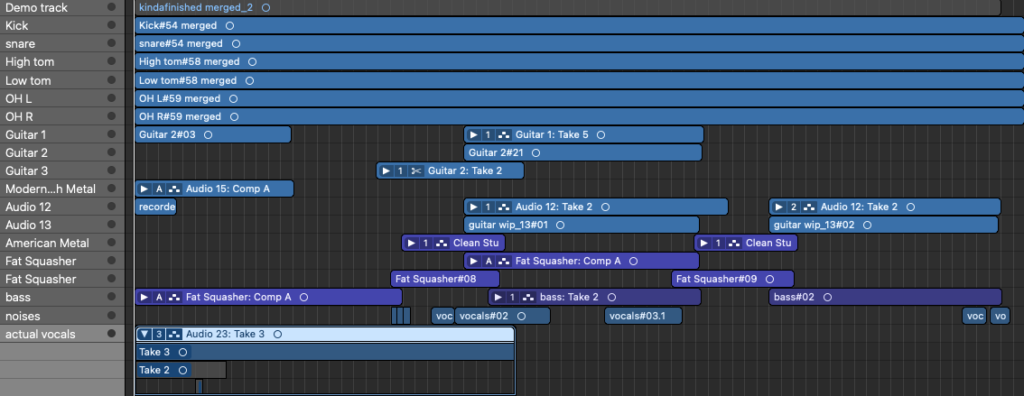
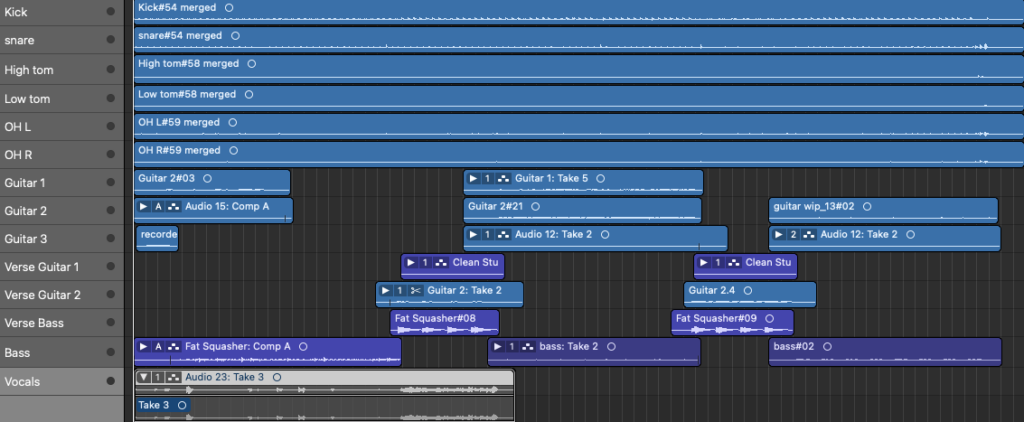
All tones are the same, despite being moved out of tracks that determined tone. Instead of having them separate, I made tracks specifically for the verse which were the tracks that needed amp settings and ensured everything was together and categorised by part.
Levels
The next step was to adjust levels to my preference to set me up for an easier time for mixing.
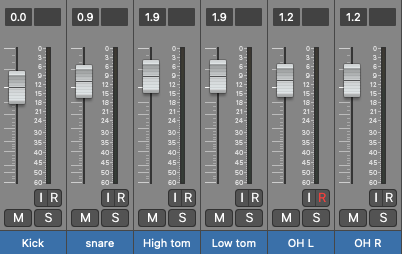
For drums, I set them up like this:
Everything else looks like this:
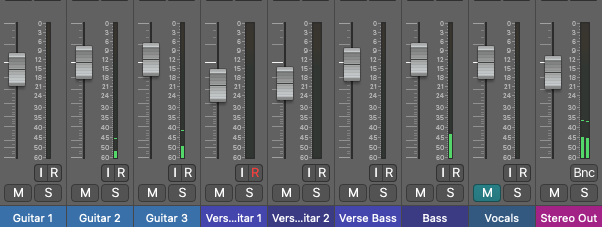
The levels are so sporadic with the guitar and bass because they were recorded at home over a few nights. The bass was recorded in different places with a different set up, and I wanted the bass track to be louder than the verse bass as that includes the introduction bass part, which I hope to be a main feature to emphasise the funk side of the song. The verse guitar was DI’d, while the other guitar parts were recorded at home through a condenser microphone next to my amp, as that’s all I own and I preferred the natural sound of my amp. I think the gain was too high for the guitar parts that were DI’d.
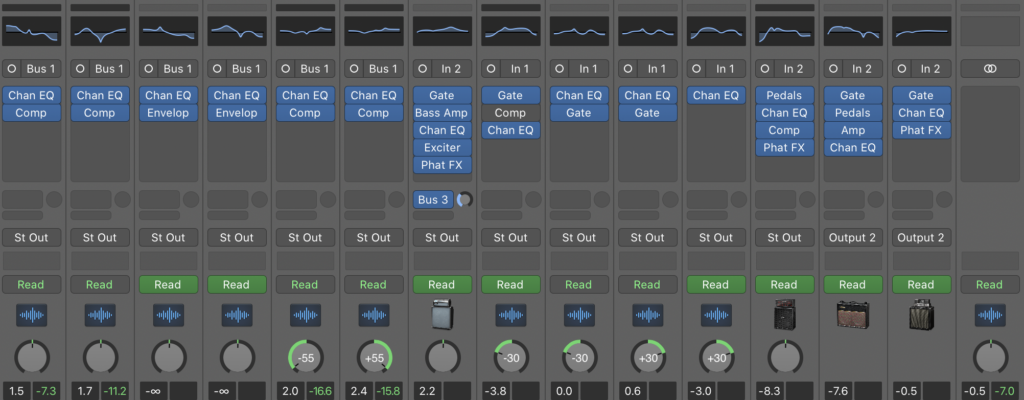
EQ for all with information
EQ
Drums
I started mixing the drums having in mind that I want a clear, impactful snare, bass-y kick, slightly bass-y toms and a clean overhead sounds for any symbols.
The first thing I did was EQ each track. I did this by listening to them individually, then with overheads, then with everything. The only time this changed was with the kick and snare where I would also solo them together to make sure neither had too much bass and both sounded clean.
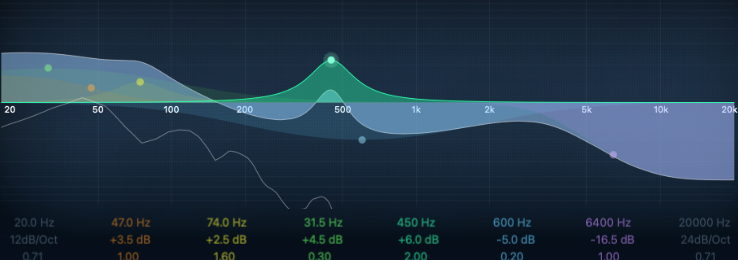
The kick without EQ sounded decent but needed emphasis on the bass and the impact sound. I lowered anything beyond 5k significantly as anything there was noise. There’s a dip around the 200-350Hz mark to dampen the higher end of the bass, followed by a raised section which highlights the sound of impact.
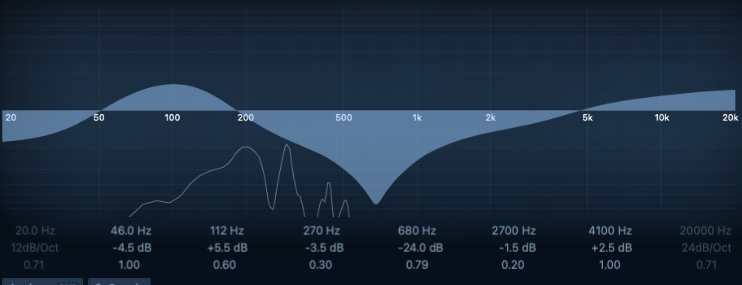
I wanted to raise the EQ from 50-200Hz to emphasise the bass value in the snare, as the snare without EQ sounds tinny. The impact sound was too prevalent and the snare overall needed to be dampened, so the mid range was dramatically lowered. The 5k-20k area was raised slightly to brighten the overall sound as lowering that seemed to make it sound boxy opposed to bright. This is especially seen when the snare is hit with more impact.


The high tom needed a little boost in the impact sound and bass but needed to sound less tinny so I brought down the high end quite a lot.
The bass in the floor tom is quite important so I raised that, but lowered the 1k range to lessen the impact sound as it was overpowering. The range following that between 2k and 5k didn’t need much change. This section let the tom sound bright. After 5k, most noise was heard there so I reduced that.
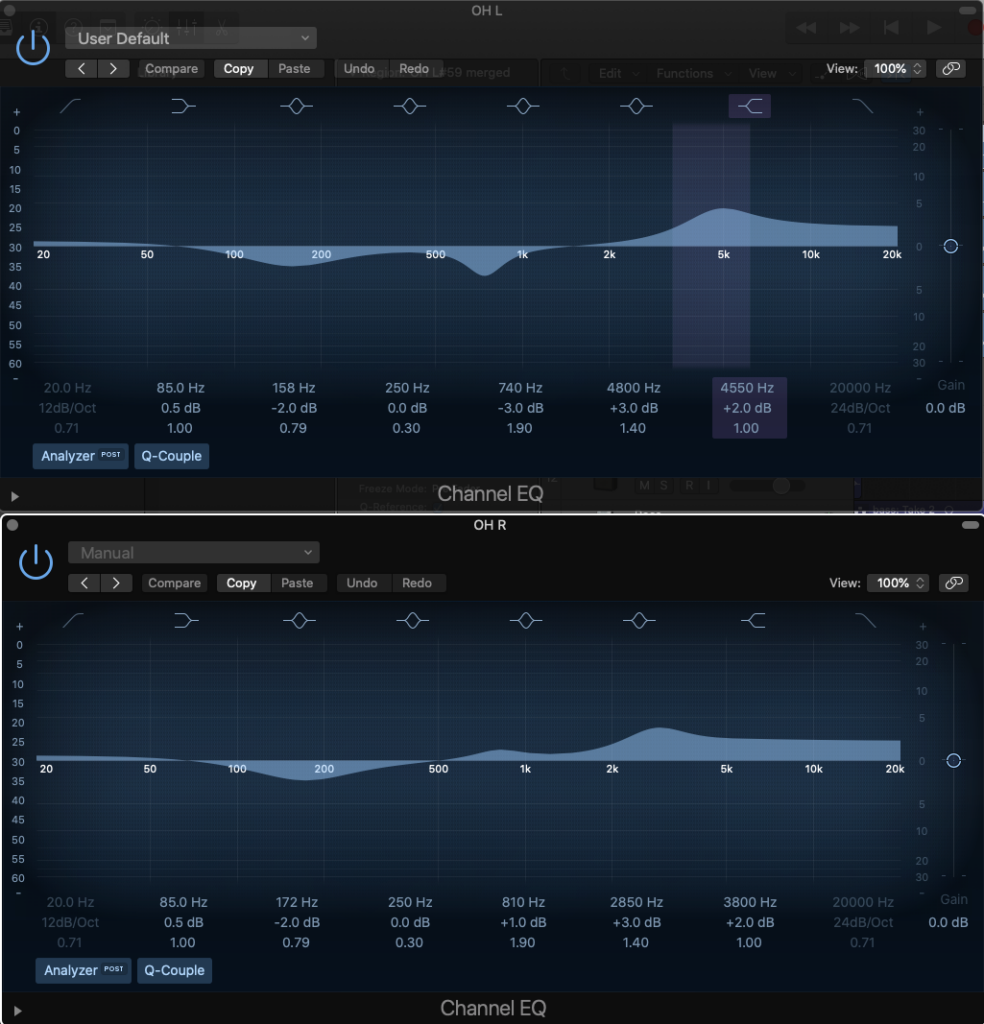
The two overheads were very similar, so there are minimal differences. I tried balancing the bass in the kick between the overheads and the kick itself, so the dip between 100-280Hz is reducing the kick. The left overhead has a dip between 500 and 1k, while the right overhead has an incline in the same area. From soloing each together, separately and with the kick and snare, this way sounds balanced. I think it’s because the overheads weren’t centred to the snare properly so the left overhead was possibly closer. Both overheads’ EQ was raised after the 2k range at different points to create an overall brighter sound.
Verse Bass
This is the bass part:
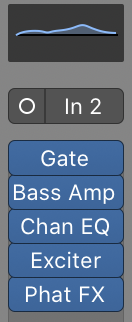
The exciter means that devices with low bass output capability can hear the bass as it adds harmonics. The Phat FX means it has more overall bass, the bass amp does the same job. The gate was to reduce scratchy noises made from me playing. The EQ looks like this:
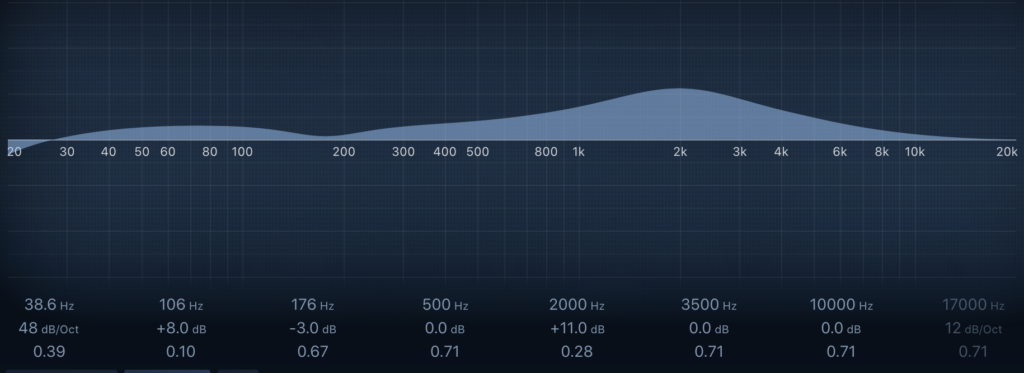
I chose to raise the 2k range to brighten it up.
Chorus Bass
The chorus bass is similar.
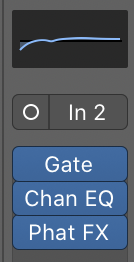
The gate is for the same reason as the other bass part. Phat FX is for the same reason again. The EQ varies quite a bit.

The low end is cut out and the rest has minimal change. I think the original recording was too boomy again.
Verse Guitar
Guitar 1 is on the left. This consists of the G to F# pattern and the stabby chords that change and layer over the same chord. The EQ for this emphasises the mid to high range with a large bump on the low to mid end. The compression should be on, that looks like this:
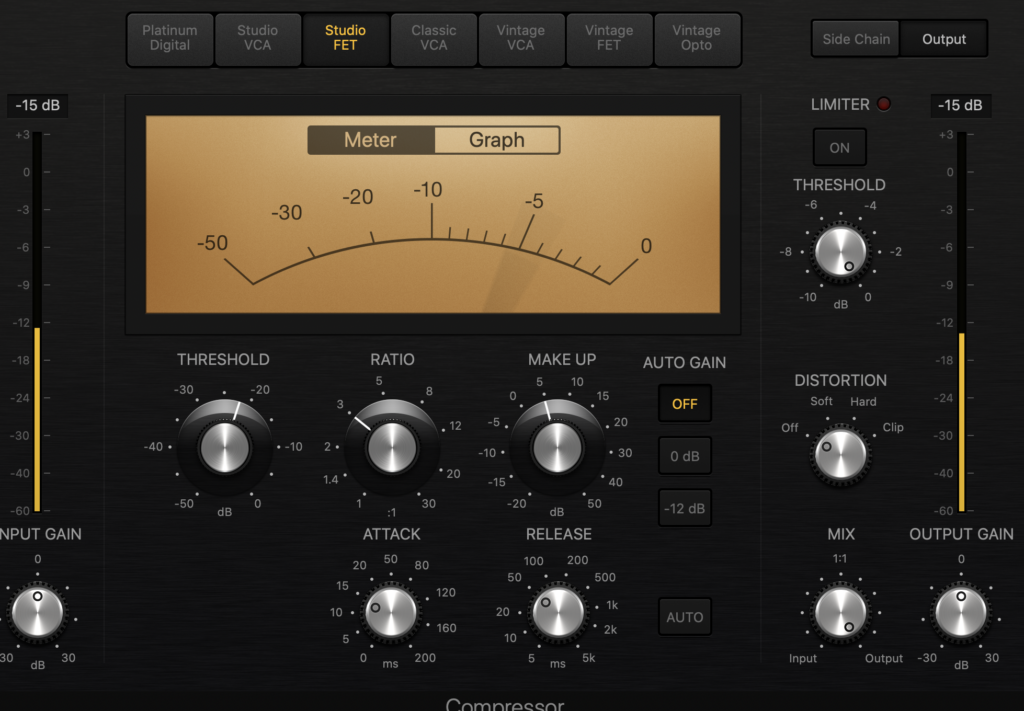
I used a noise gate, too, since I recorded it through my amp, that reduced any noise that was audible.
Verse Guitar 2
Guitar 2 was duplicated and panned slightly out of sync. This was the guitar part that stayed on the same chord layered with the changing stabby chord. I used noise gates on these, too. The EQ looks like this:
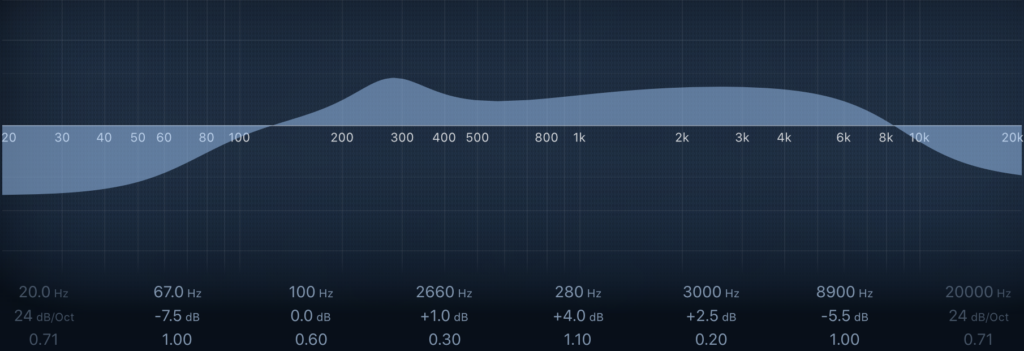
It has the most emphasis in the low to mid range and dips in the low and high end.
Verse Guitar 3
Guitar 3 just has EQ, that looks like this:
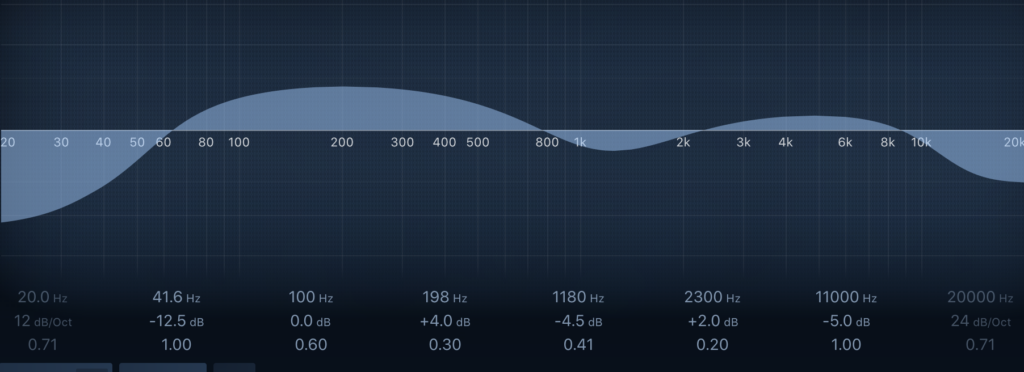
I think the original recording was too boomy so I reduced the low end, raised the low to mid range, dipped slightly between 800Hz and 2k Hz to reduce the tinny feel and dipped drastically in the 10 to 20k Hz range to reduce high end noise.
Chorus Guitar
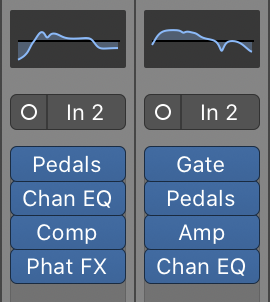
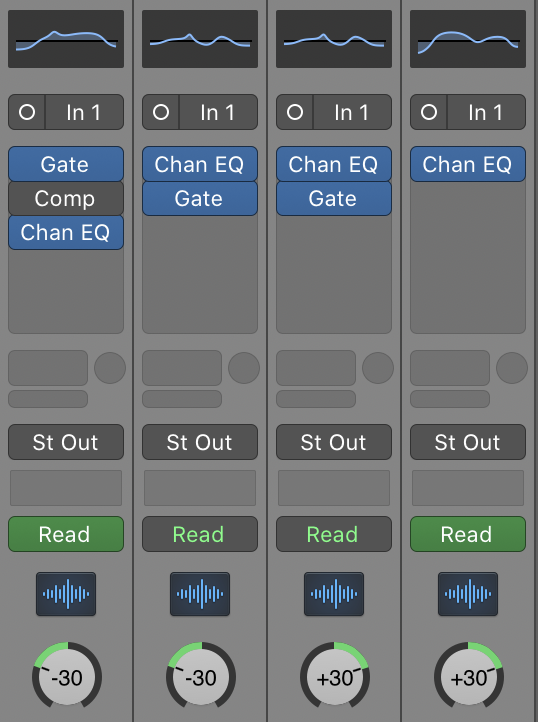
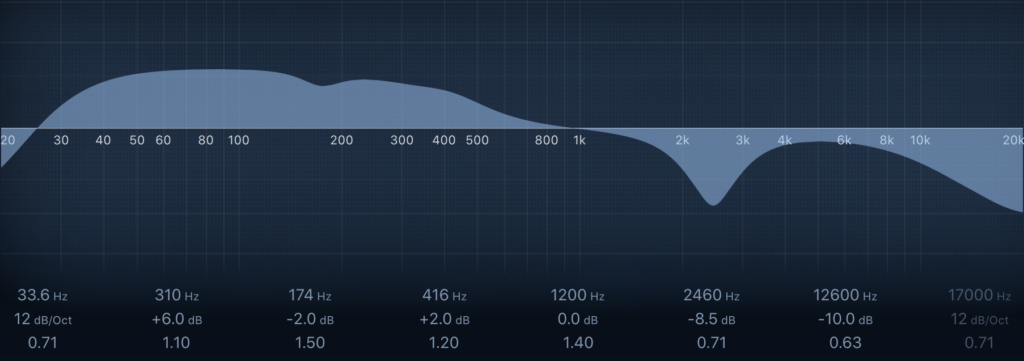
The chorus has two guitar parts, one which layers with the bass and the other the featuring guitar part. Guitar 2, on the right, is the layer on top of bass.
Both EQs are drastically different.
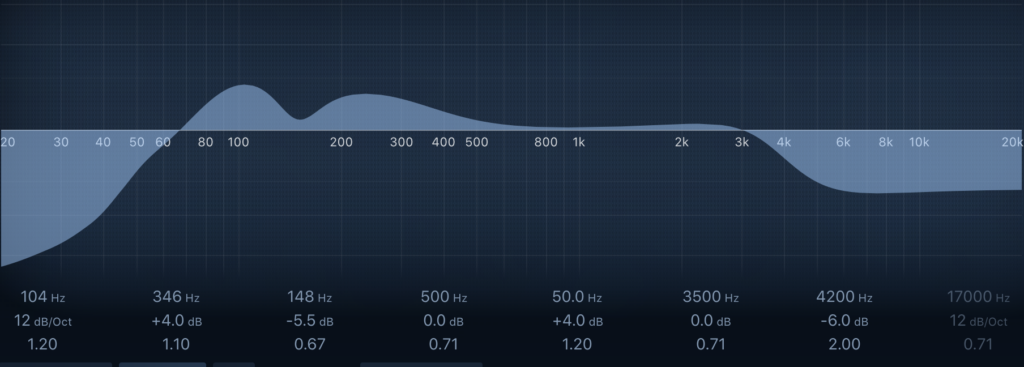
Guitar 1 has a raise and dip in the low end, likely to reduce the tinny sound and emphasise the bass. The low and high ends are cut out.
Guitar 2 does the same over a larger area, starting from 25Hz and ending at 800Hz. There’s a drastic dip in the 2500Hz range because it was too scratchy and the high end is cut out for the same reason.
Overall
This is the track after just EQ. I’m happy with it, but in my free time I experimented with other effects, so it sounds like this now: