

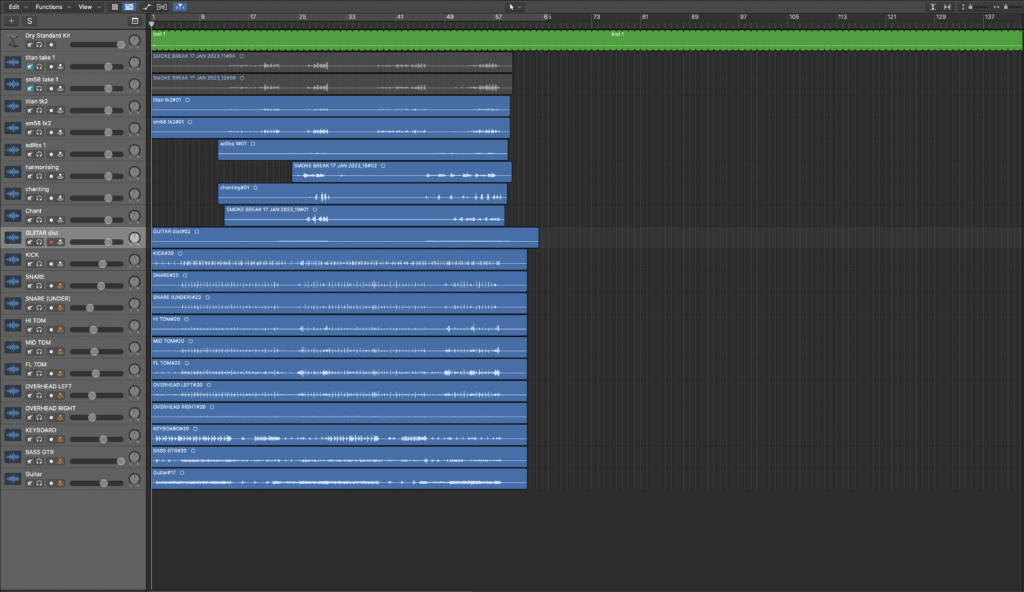
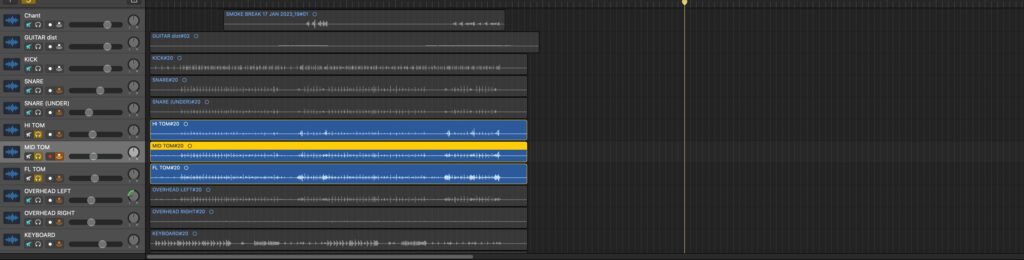
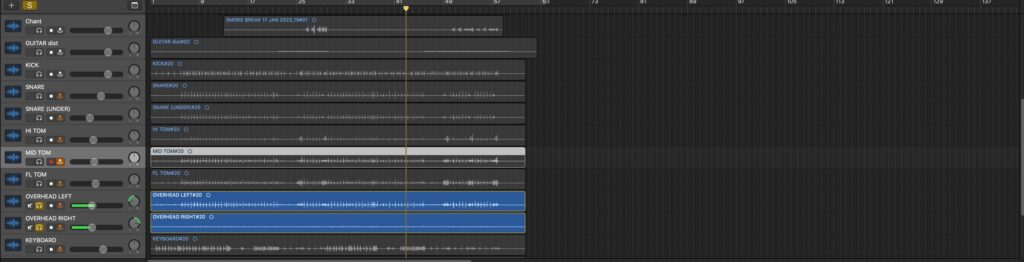
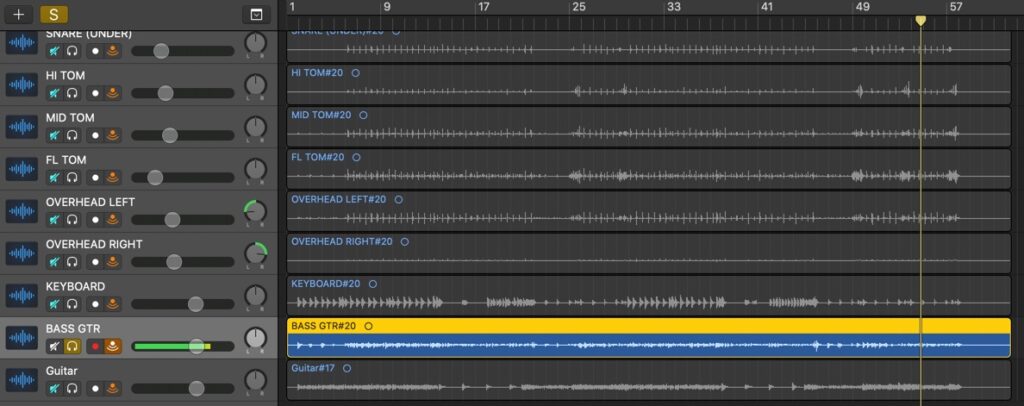
This is the first thing I saw when I opened the project file. These are all of the stems that we recorded in our studio session. We recorded each drum individually, each guitar, bass keys and each vocal take separately. This is what I had to work with. at this point I like to listen to the track all the way through. I then make some notes and that’s where I start my mixing process. The first call of action was the drums. They sounded very messy and that needed to be fixed straight away.
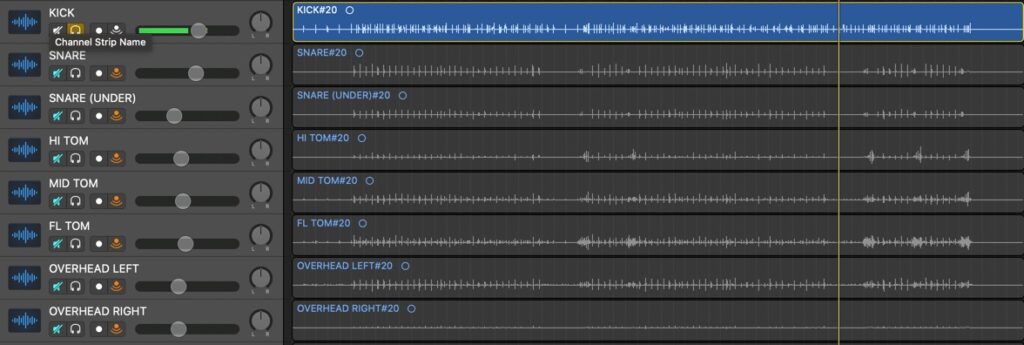
This is something I always do. If I am mixing one of my own tracks or mixing someone else’s I always start with the kick. It is one of the most important parts to the track and must be treated with respect. I will spend a lot of time listening to solely the kick. After all, the kick and the bass are the backbone of the whole track.

This is the EQ that I put on the kick. It is really simple as there is not that much that needed changing. I boosted the fundamental frequencies of the kick and then also boosted some of the low end. I removed some of the noise from the higher frequencies as it did not need to be there. You could hear some of the other instruments through the kick mic so I did my best to remove the sounds from this stem.
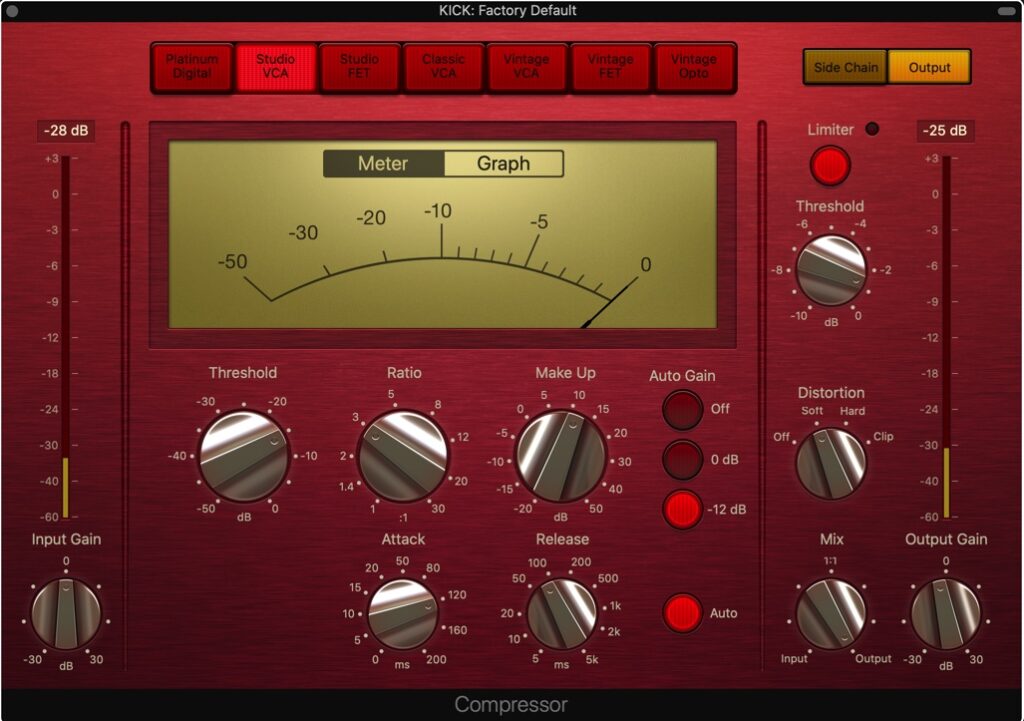
I have never worked with this compressor before so it was a little hard to get my bearings. However, most of them are the same. I had a fast attack and a slow release for the kick. This gave a punch to the drum and allowed it to poke through the mix. I have lowered the gain a little bit to make sure it is not clipping as well.

This is a similar process to the kick. I am just going through and soloing each drum to make sure they sound correct, if they don’t then I will alter them. In this case, the snare was poor, so it needed some serious work.
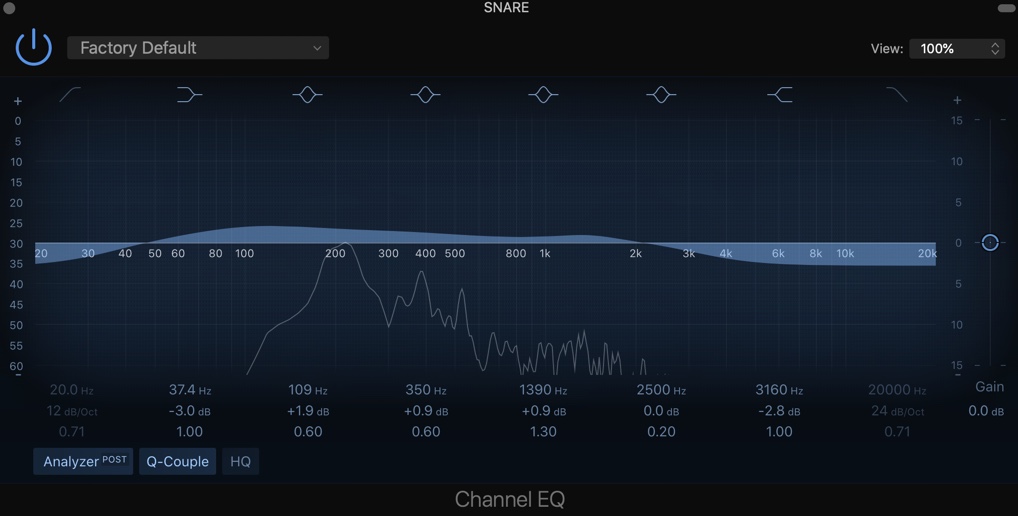
This is the EQ for the snare, it is similar to the kick. This is because i followed the same blueprint. I boosted the fundamental frequencies of the snare and then took out some of the low end. I also took out some of the higher frequencies to remove any unwanted noise from the recording. This is important to make the recording sound clean. If the samples are messy, the mix will end up sounding messy.
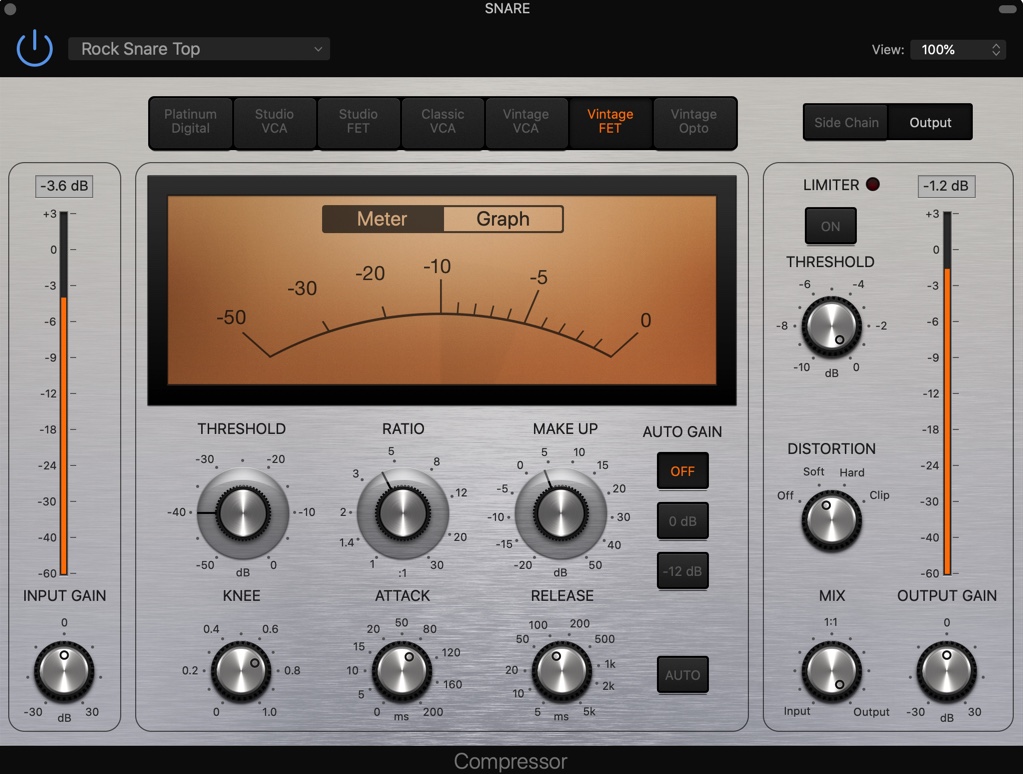
This is the snare compressor. I decided to try out a present to see what it would sound like. It turns out that it was actually quite nice, it just needed a few tweaks. I sped up the attack a little bit while also slowing the release. I increased the make up and put the ratio up slightly. The snare was now sounding nice.
I applied similar mixing to both the top and bottom snare. An EQ and a compressor. I needed to mix these rather similarly as they have to sit next to each other in the mix. I later made them the same volume and panned them left and right. This added space to the mix and allowed the snares to have their own space in the final mix.
We are repeating the same process once again, soloing the drum that we are mixing next. I didn’t solo each tom individually as need to make them sound nice all together, not just by there self.
Very minimal mixing going on with the toms. This is because I was focusing on having them all sound level and glued together I removed some of the unwanted noise with an EQ and added a compressor on some of the toms for added power. I would pan these left, right and leave one going down the middle.
Same process, soloing the hats so I can listen to them with no distractions.
The hats do not need compressing, so I just added an EQ to remove any unwanted frequencies. The main aim with the hats was to glue them together. I did this by having the same volume and having them phase together. The hats ended up sounding really nice and cutting straight through the mix.
Having piano in a rock song is not unusual, but I didn’t want it to be one of the main things you here. The piano needs to be mixed carefully and pushed further back into the mix.
As i said previously, the piano wasn’t going to be a main feature of this track. I followed the same process of using an EQ to boost the fundamental frequencies and remove some of the other noise that was not needed. I then used a compressor to give the piano some more power. I turned down the volume to sink the piano further back down into the mix. The piano is really just there for texture, nothing else.
The bass is the most important part of the song, so I really wanted to get this right. A good chunk of the time that i spent mixing this song would be spent solely on the bass.
I added lots of effects on to the bass. These include EQ, distortion, compression and a bass amp. The bass needed to be really powerful and drive the song. The kick and the bass are typically the back bone of any track. There was no panning going on here as the bass needed to be straight down the middle. However, I did widen the bass using different effects.
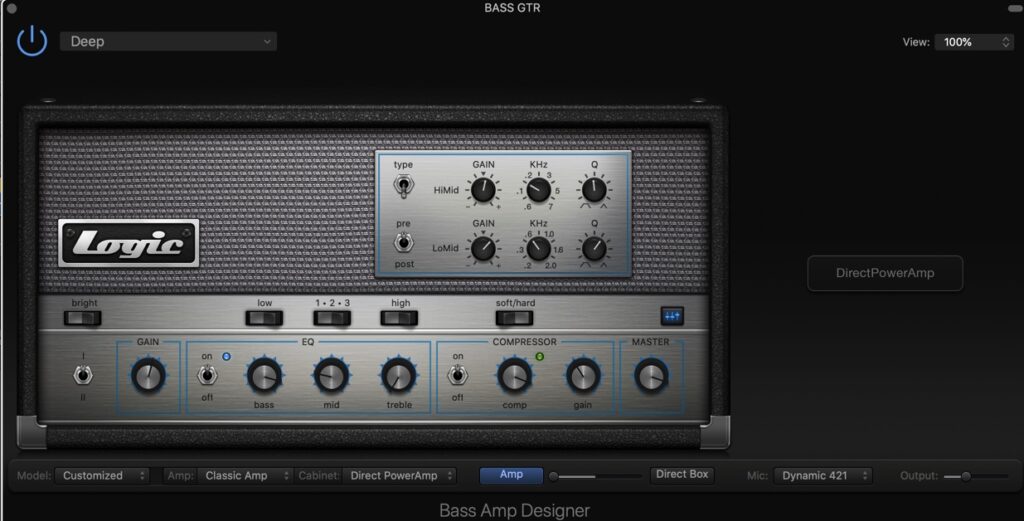
I have never used an effect like this so it was entirely new to me. I used it as a compressor but also used some of the other effects given to me. I selected the deep bass amp as that is how I wanted it to sound. I used the EQ within the amp to do some further cutting and boosting, and the rest was already done for me.
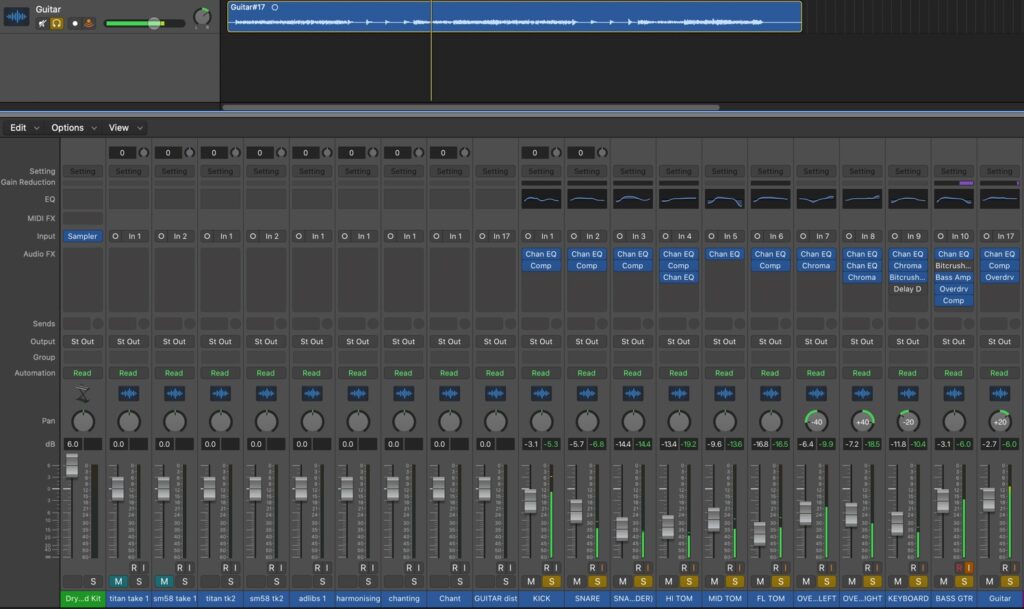
The guitar recording was way less than satisfactory. I had to include some heavy mixing to make it sound how I wanted. The guitar is where I started to add some reverb and delay. I had to make the guitar sound fuller and also give it the texture that was missing. Again, I used an EQ to remove unwanted sound and make the guitar sound clean. I also used compression to give the guitar some more power and also take down the gain a little bit. Distortion was very important to give me the desired sound. The fuzz of the guitar was very important. Especially in the heavier parts of the song.
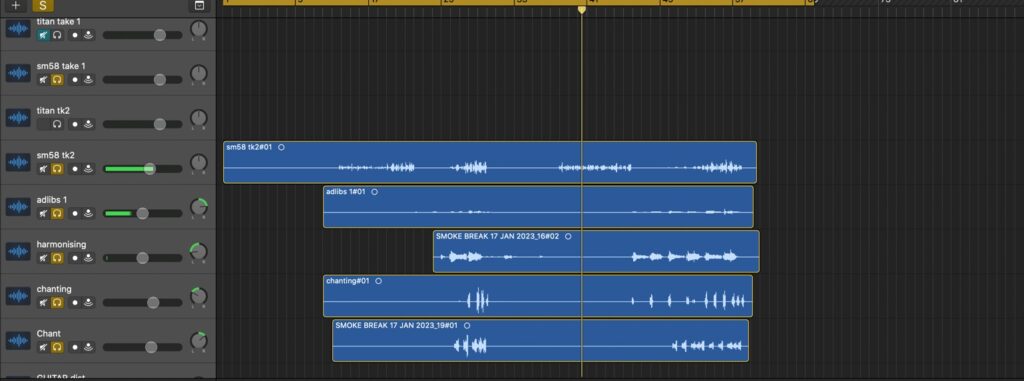
The vocals were rather straight forward. I removed the adlibs and harmonies as they did not sound very good. I was then just left with two verses and two choruses. However, I did keep one set of adlibs as I had a plan for them.
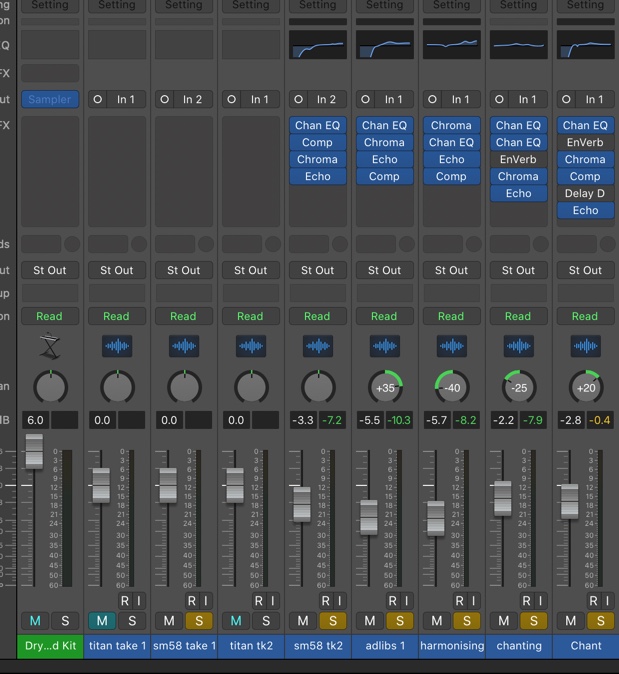
I mixed the verse and the chorus very similarly. I used a compressor for added power and reverb and delay to bring the vocal forward in the mix. I was very careful with my EQ when mixing the vocals as I didn’t want to remove the natural frequencies of the voice. On the Adlibs that I kept, I gave them a low pass which pushed them very far back into the mix. I then added lots of reverb and delay to these to make them sound big and wide. The last thing I had to do was to get my levels right. After this I panned my vocals and my mix was ready.
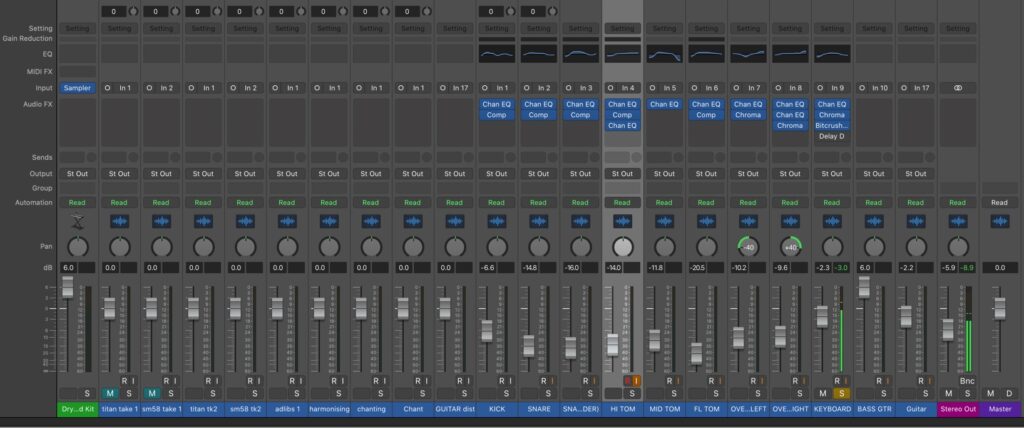
This is the final mix of our bands song. It is not bad for my first time ever mixing a live recording. I have never had to deal with the problems of recording and mixing a live drum kit or mixing raw vocals. I am very happy with how it has turned out and I think I have learnt some great techniques that can help me going forward. Once I have a master finished then the track will be complete. I am interested in doing something like this again.