

On this page I will show the mixing process for this track. I have grown to learn that a good mix drastically changes the quality of the final product. I have spent more time than ever working on mixing and trying to learn the craft. It is not an easy job, but I have given it a good go, as this track deserves to be the best it can be.
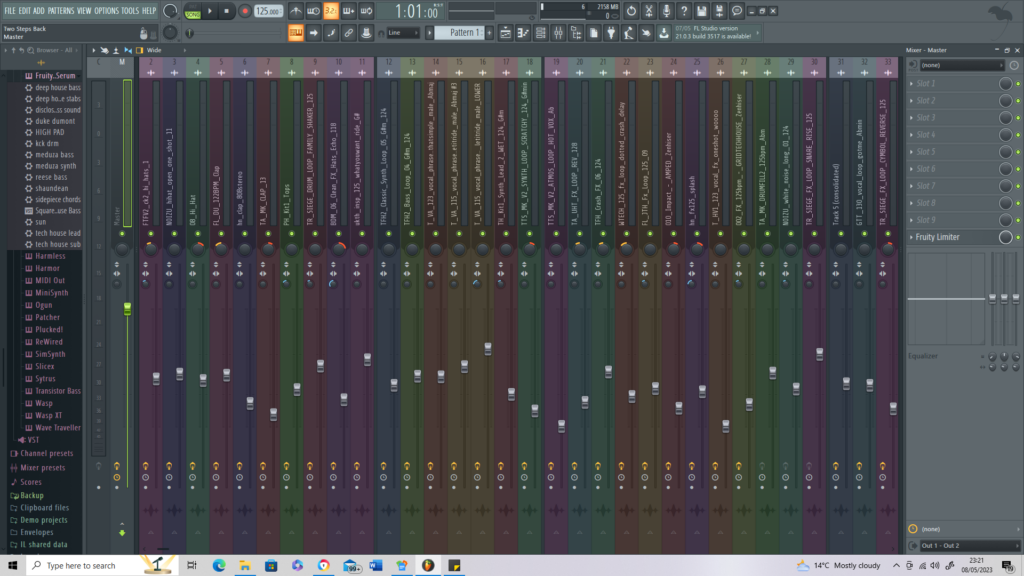
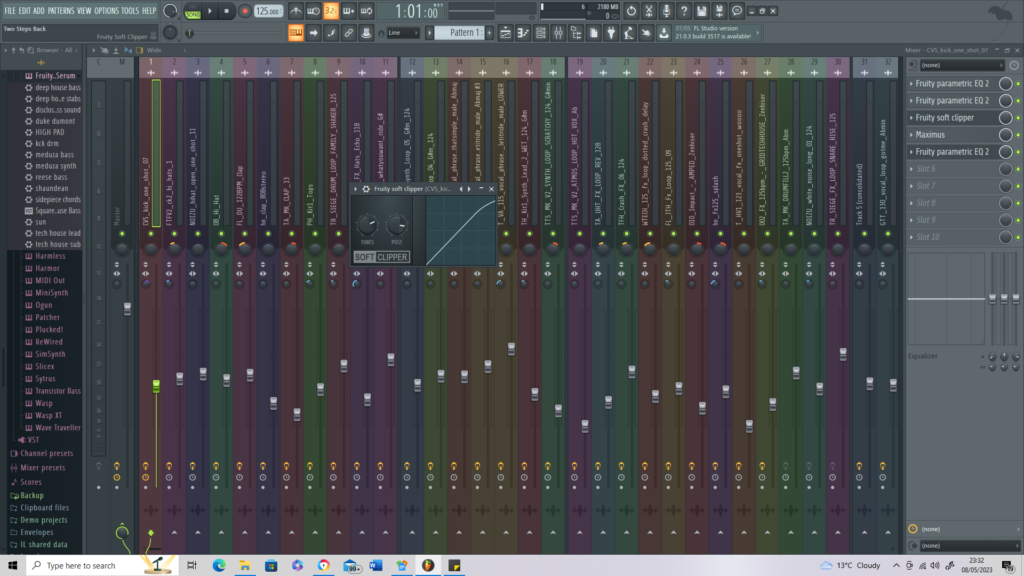
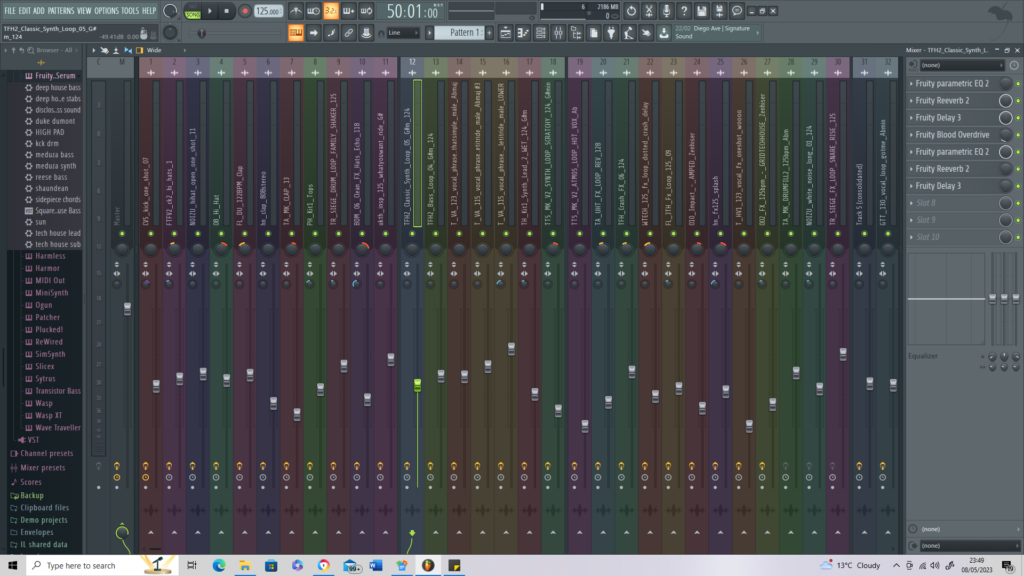
The mixer track only just fits into one screenshot. As you can see, there are quite a few different elements within the song. Everyone of the has been mixed carefully and with precision to ensure they are the highest quality they can be. I have used an array of different plugins and effects to shape this track into what I wanted it to be. I hope I have done the track justice.
The first 11 slots of this mixer track are for the drums. I mixed these first as they are the building blocks of a good house track. Each individual sample was mixed separately. However, they all follow the same pattern of effects, such as, two EQ’s and a compressor. I also panned the drums left and right to give them there own individual space in the mix. With them all following the same rule, I will show the kick, hats, and claps so you get the general idea of how I have mixed the drums.
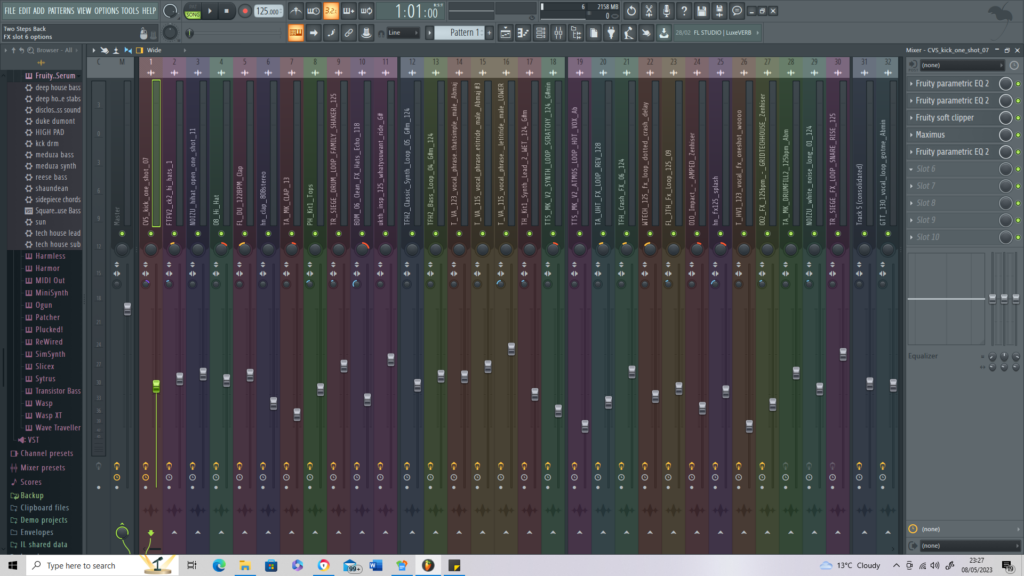
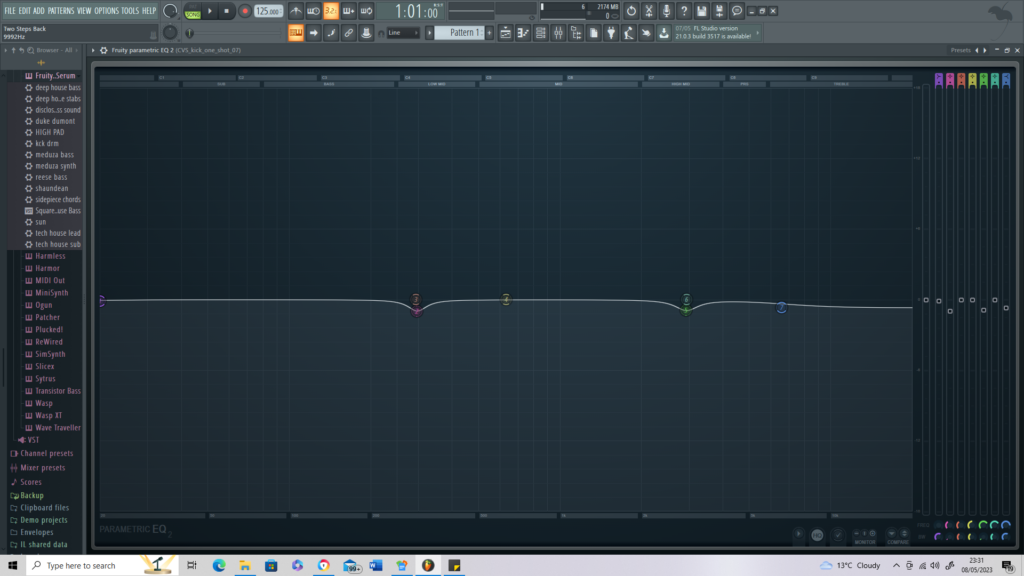
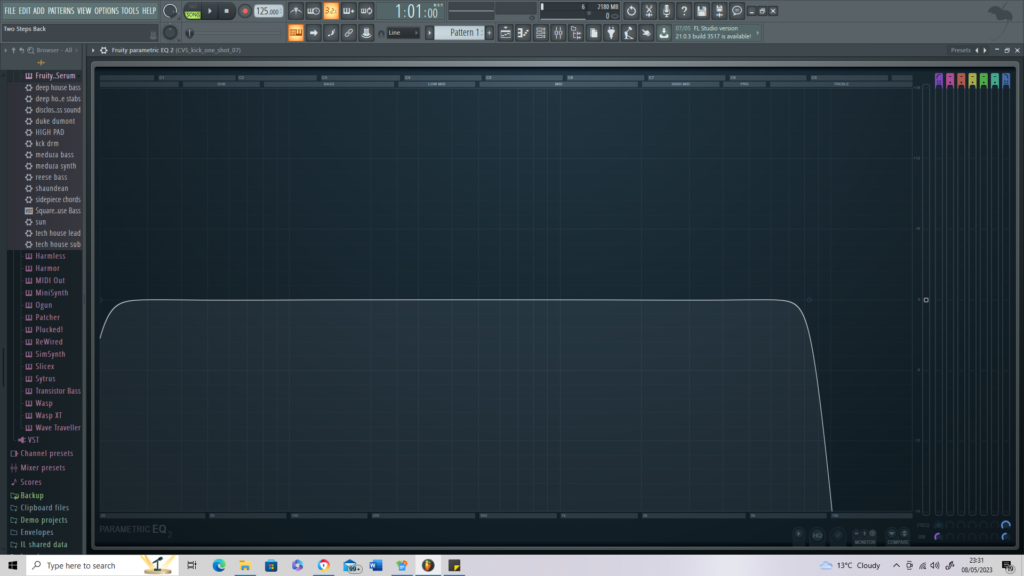
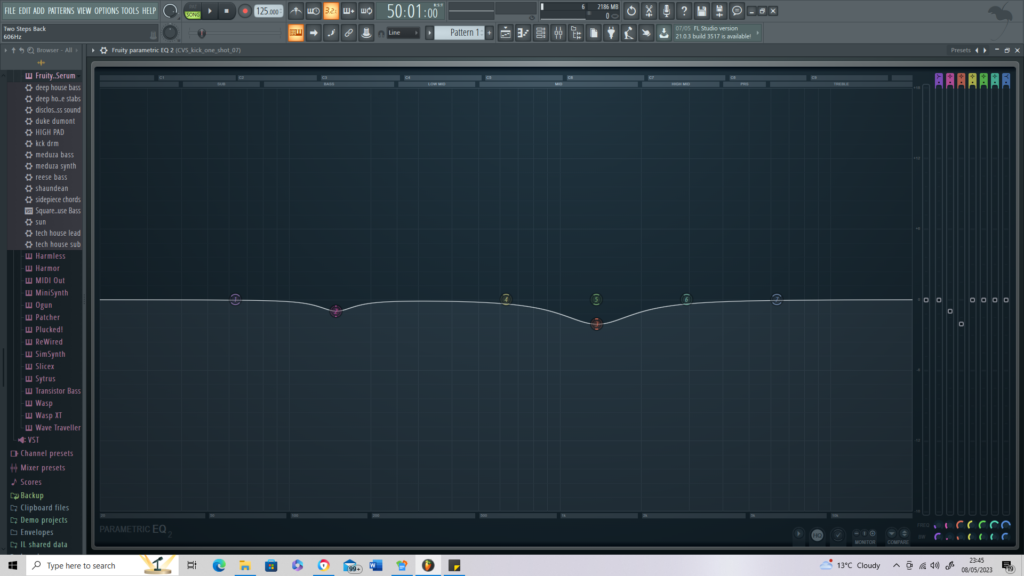
As you can see on the right hand side, I have my effects chain. The kick effects chain consists of two different EQ’s (one of which finely cuts out unwanted frequencies and the other which does a big sweep of all the unwanted high frequencies), a soft clipper, a compressor and another EQ which was later automated. I follow this rule with the kick on most of my tracks, it always seems to work and never fails. Below I will show what each effect looks like.

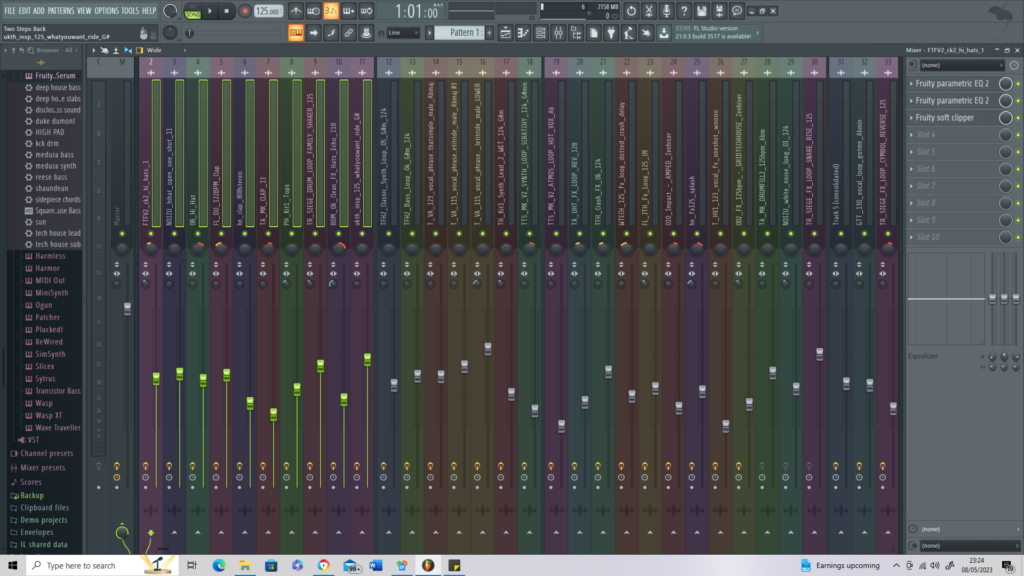
For the hats, I followed the same pattern as you can see. However this time, I missed out the compressor. These were already well chosen samples, so I didn’t have to do that much to make them sound high quality. All I did was add two EQ’s (one for small tweaks and one for big cuts) and a soft clipper. That is all the hats really needed.
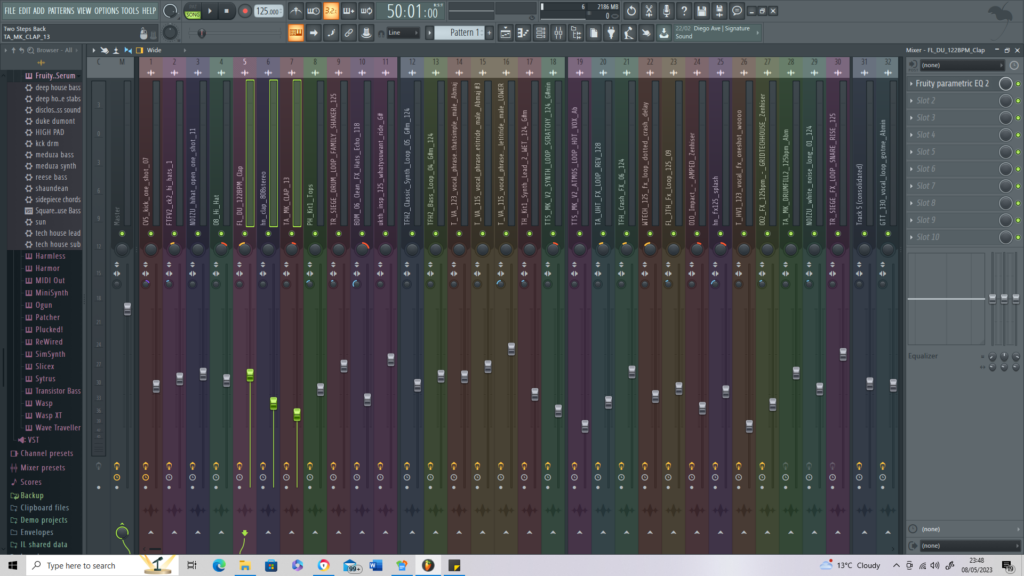
For the claps, I only added an EQ to make small tweaks to the sound. As I said in the paragraph above, these were already well chosen samples, so I didn’t have to edit them much to make them sound high-quality. The rest of the drums followed this same sort of pattern.
As you can see (on the right-hand side) there was a little more added to the chords. In addition to the usual EQ, I added reverb, delay, distortion and added reverb and delay which were automated throughout the track. This gave the chords a whole different feeling and allowed them to move with the track. This is very important if you want the transitions in your track to be smooth.

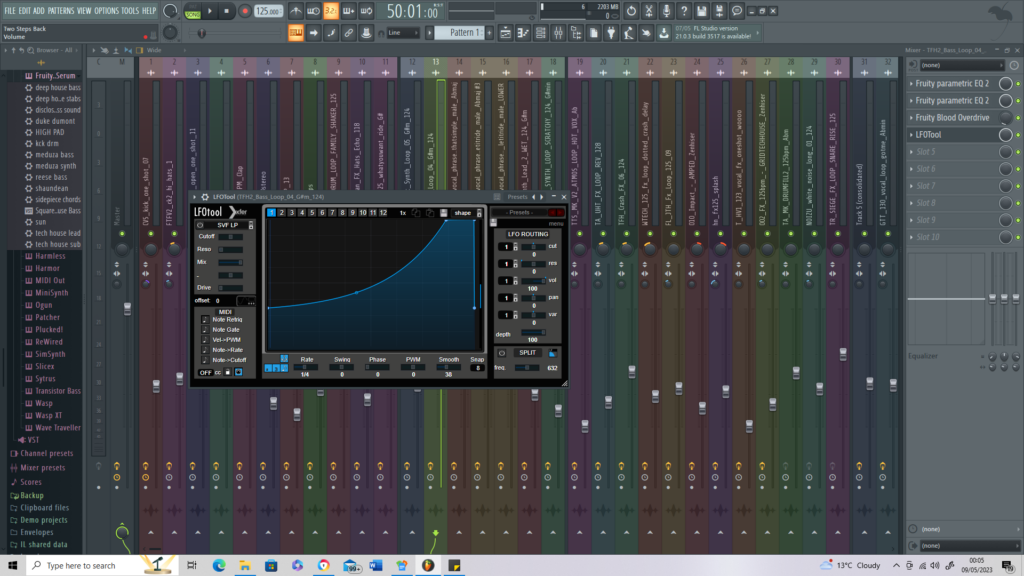
The bass did not need much editing at all. The sound design was near enough perfect as it was, it only needed a few tweaks. In addition the the EQ’s I added distortion and a sidechain. I did not need to add a compressor as that was already done inside the VST. This is one of the only elements of the track that includes a sidechain, so I will show you the settings below.

I used the exact same effects and settings for every vocal sample. I did this because I wanted the vocals to sound comprehensive and consistent. If the vocal samples sounded different, the audience may think that they are different voices, when in reality they are all from the same interview. On this effects chain I again added two EQ’s, Delay, Reverb and a Compressor. I had a fast attack and a slow release on the compressor to make sure I am not taking away any of the human qualities within the voice. I also went easy on the EQ to make sure I am not cutting out any natural tones of the human voice.

Lastly was the FX. I also did very minimal mixing on these as they were well chosen samples. I only really needed to add EQ. Again, I added two different types of EQ. One for small tweaks, and one for big cuts. This just helps each element/instrument find its own space in the mix. I also panned some of these FX, as at sometimes in the song, I would have two are three crashes/risers going at the same time.

These are what some of my automation patterns looked like throughout the song. The automation allowed me to really personalise what element sat where in the mix at what time. Automation gives you the created freedom to be able to move a sound to where and when you want it. A very important and powerful tool.
As for mastering, It is definitely not one of my strong suits. Luckily for me, I have a family friend that masters for a living. He showed me the ropes of mastering and helped me to gain a better understanding of the art that is mastering. I don’t have any screenshots as this was done at his studio. On the master bus he used two different EQ’s. One for cutting, and one for boosting. He also used a compressor, to bring the track back up to radio level volume. After this, he talked me through how I can add different effects to my master bus to really personalise my sound. After this I added very little saturation and also some stereo-imaging. To an unexperienced ear, you may not be able to tell the difference. However, when listening to the track over high quality studio monitors, it really adds another element to the track. The final step was to listen top the track next to a reference track. For my reference track, I used ‘You Little Beauty’ by Fisher. They are a similar style of track, so it was a good reference. After I was happy with the track, I added some finishing touches and here we are now. This was certainly a long process, but well worth it. I have come out with a really nice sounding track, and I am sure it will sound great over speaker or streaming service.