Audio mixing is one of the final stages in music production, it is the process of taking recordings, combining and enhancing them as a complete final package. Various FX, plug-ins, and tools are used in this process but central to this process is adjusting the levels of each track so they are all able to be heard to some degree. A common misconception is the idea that mixing is used to fix subpar recordings, this isn’t strictly true, whilst mixing can improve the overall quality of a recording, it is far easier to get the best possible recording first so you have more room to breathe as well as saving time.
Tools used in mixing:
- Audio Editing – used to remove unwanted audio, as well as alter the order in which audio files occur, cutting and moving them around.
- Volumes/Faders – adjusts the volume levels of individual tracks, or the entire composition in the case of the master fader.
- Panning – this tool moves the audio around within the stereo field, allowing for certain tracks to be more pronounced on either side of a stereo setup.
- Automation – where your chosen DAW performs set tasks automatically, be that adjusting levels, changing pitch, compression, or just about any number of other effects.
- Dynamic Processing – another area in which the dynamics (volume) of the tracks are altered, but this does so more specifically using various tools such as compressors and noise gates, as opposed to simply adjusting the main fader.
- Much more such as EQ, reverb, distortion, etc.
Kings of Leon – “Sex on Fire”
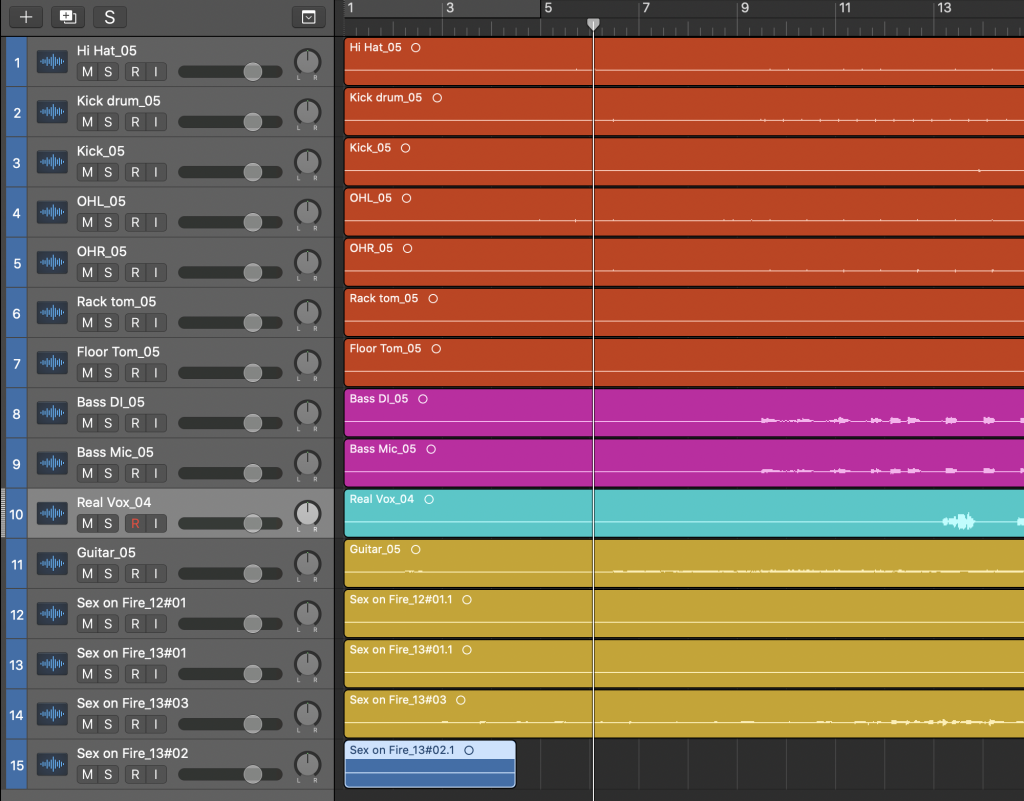
The first thing to do was to get our DAW – in this case Logic – set up to allow us to work more efficiently. This began with ordering tracks into groups, drums together, guitars together, and so on; colour co-ordinating these groups helps visually.
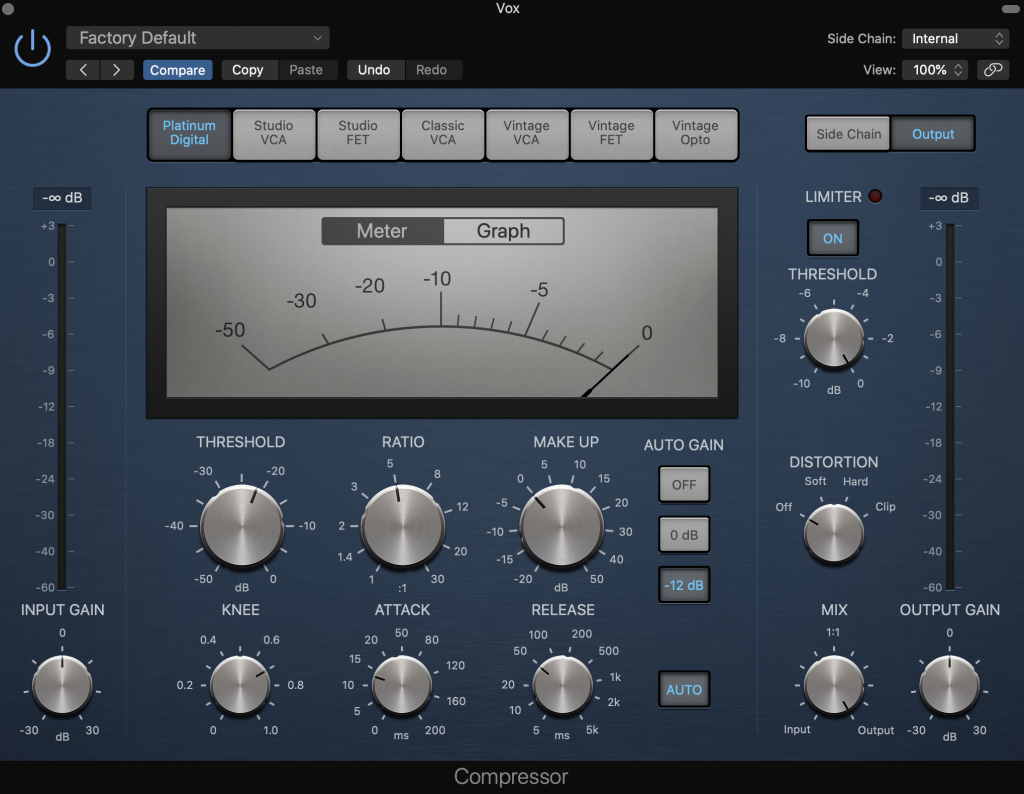
The first track we set out to work on was the vocals, and, as there is a great deal of variety in the levels with vocals, we needed to use a compressor. This tool essentially boosts the quieter parts and reduces the louder parts, this creates a much more even mix. When using a compressor on vocals, however, you need to be aware of just how much you are boosting the quieter parts, as you don’t want to boost it so much so that every breath, lip smack, and tap of the microphone is heard in the final edit.
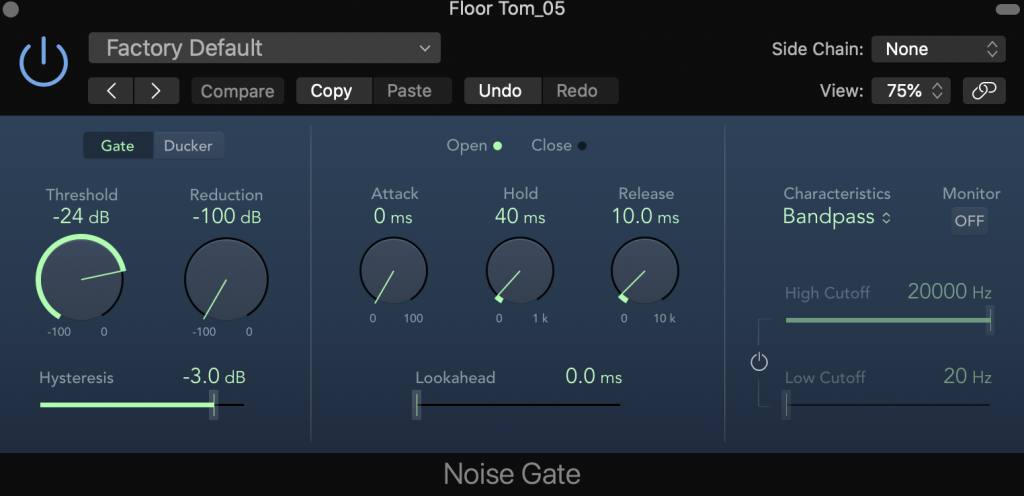
Next up: drums. We have several different tracks for the drums, some recording specific components of the drumkit and two overheads recording a side each as an overall cover, these two overheads don’t require the use of a noise gate like the more specific recordings. A noise gate is used to remove spill (where audio from other sources is picked up when unwanted) and is particularly useful for mixing percussion as drumkits are miked up very closely and will spill into other recordings. A certain decibel threshold is set and any sound which is below that threshold is completely silent, anything above that threshold is heard as normal. This means that we can eliminate the unwanted spill and leave ourselves with a cleaner mix.
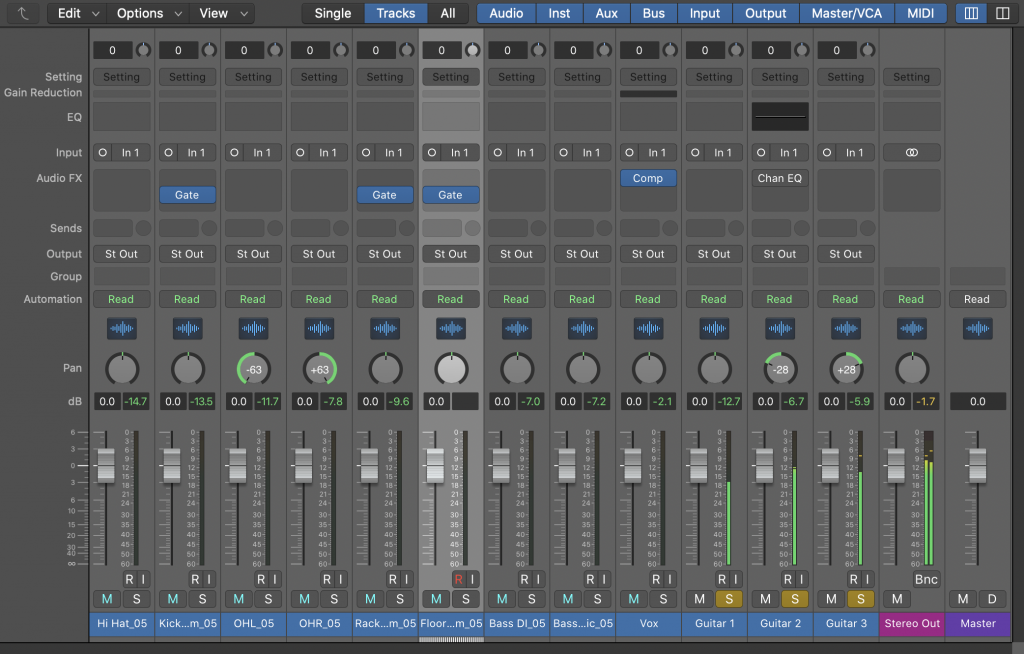
Above is the current state of the inbuilt mixing desk; as you can see I have panned the overhead drums to the sides they need to be, implemented some noise gates on some drum tracks, as well as the compressor on the vocal track. As of right now, I haven’t altered any levels within the mixer, as I’ll be using that at the end to finalise the mix rather than constantly adjusting them throughout the process.
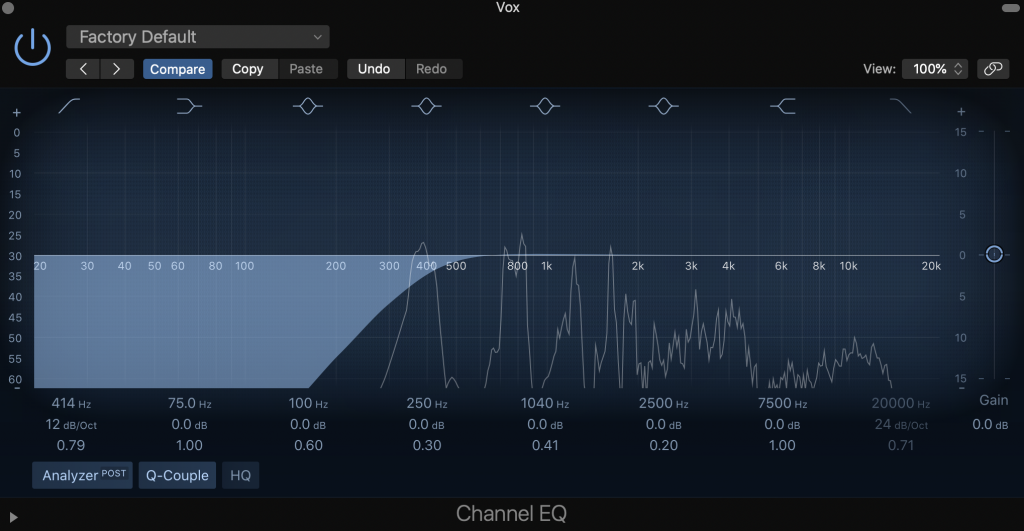
When editing the vocals, it helps to remove some of those bass frequencies to ensure the vocals are cleaner and more satisfying to the ear; it also allows for more room in the bass frequencies, letting other instruments/tracks use some of that space.
EQ is also used on other tracks. For example, in most tracks that aren’t bass/low drums, I have removed bass frequencies using a high-pass filter (HPF) and then boosted those same frequencies of the bass/low drums. The reverse is true in regards to the tracks and the use of a low-pass filter this time instead.
Later on, I also boosted the treble frequencies somewhat to crispen up the vocals and help it push through the mix at the higher end, whilst being aware of just how much I boost them, as too much treble would result in piercing sibilant sounds, so keeping it below that threshold is what is required.
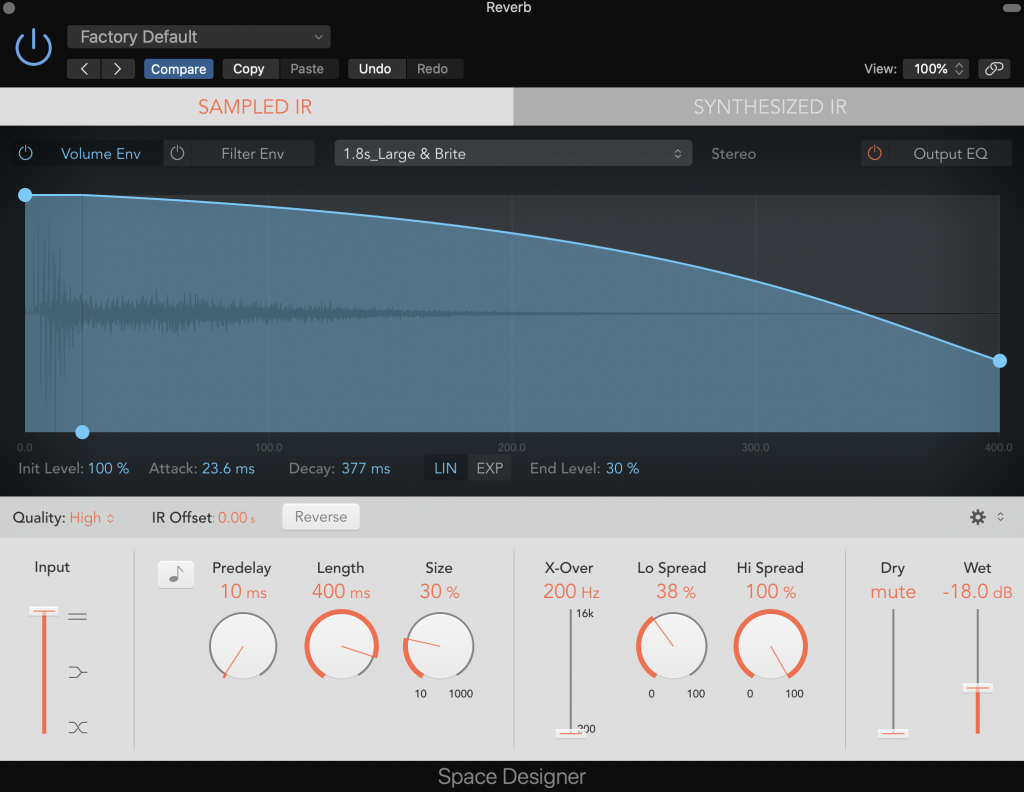
After using the EQ on the vocals, they were quietened by a degree and so could do with a little bit more going on to help it fit in with the mix, this can be helped by adding reverb as it fills out the space, adds depth, and creates a more interesting sound. This reverb is also used on the guitar tracks to, again, fill out some of that space within the song.
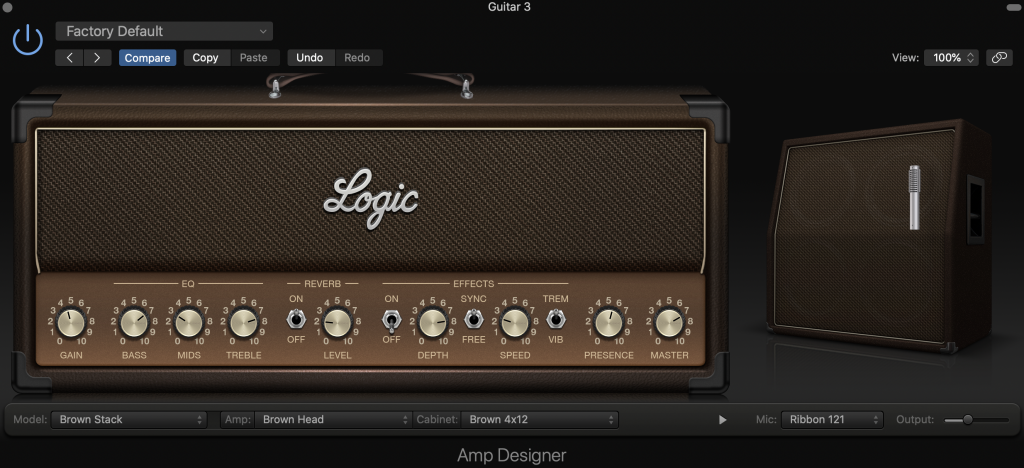
Two of the guitar tracks were recorded “clean” – meaning they have no effect placed on them. Clean recording like this gives us chance to have some fun and distort the sound within Logic using the Amp Designer, which gives us control over everything from the amp we use, to the effects on the amp, even down to the placement of the microphone in relation to the amp (all virtually, of course).

Whilst I still have all the faders on the mixing desk exactly level, it is sounding pretty even but at certain points there is an imbalance – enter the automation feature. This tool automates the adjustments a producer would make during the playthrough of a track, with precision and without the need for human input every time. I used it to
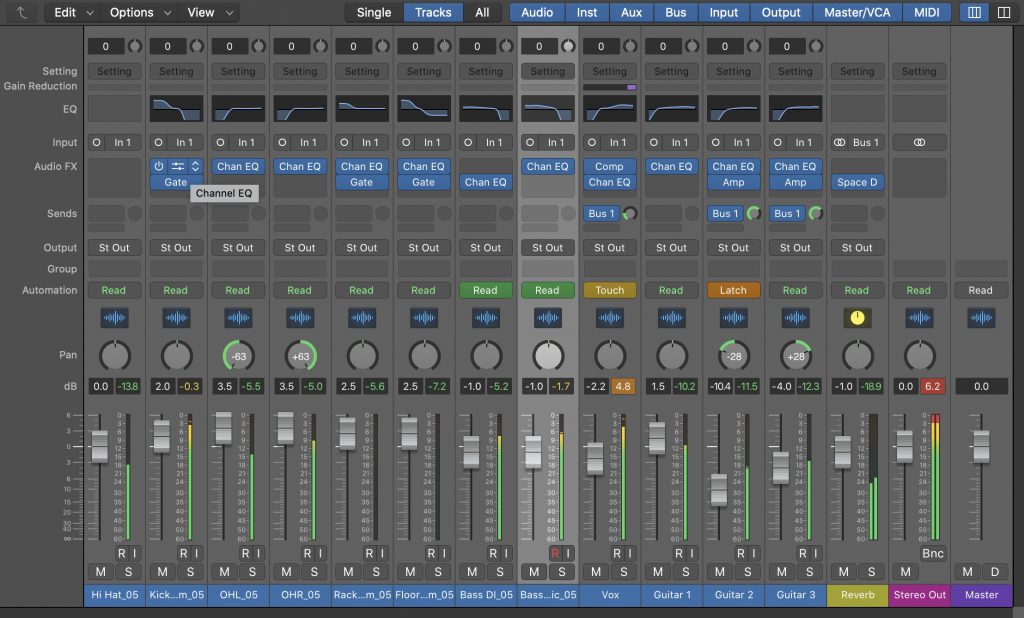
In my final mix (loosely defined as “final”) you can see I have made good use of EQ and compression, this is to remove unwanted frequencies and push forward the ones that I want in the final cut. Also used frequently is the noise gate; as this was a live recording there was some audio spill and this helped alleviate that small issue, allowing for a cleaner mix. Visible here is how I’ve sent three tracks through to the Reverb auxiliary channel, with the reverb being used to a different degree on each track to fit what I found to work. Finally, I have also adjusted the levels after listening to the full track thoroughly, several times over. This has given me the levels that I feel work best with the mix I’ve developed over the course of this process.
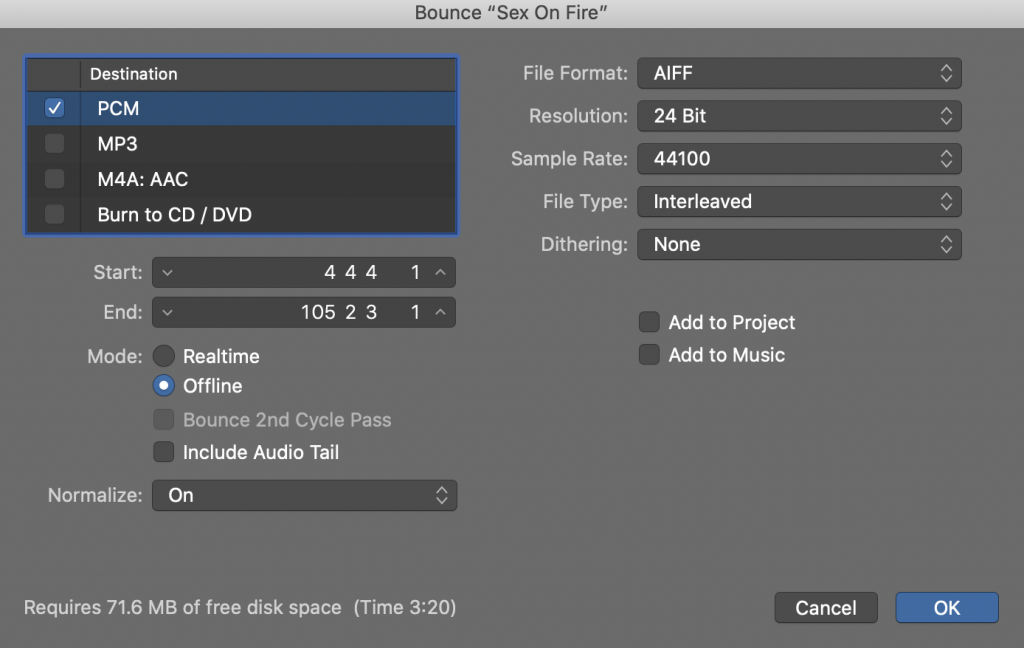
The last thing now was to bounce it out so we can export the track wherever we would like. It is important to remember to export using the correct file type (WAV/AIFF for higher quality, MP3 for lower quality), to select the correct resolution and sample rate, and to bounce out what you want to – this means putting the markers in the correct place (not cutting out reverb etc.) and ensuring no tracks are soloed or muted.
Attached is the final product of my first dive into mixing. Overall, I’m pretty content with how things went; there were points where I was a little lost on what to do but I pushed through and used all the tools/techniques I needed to, leaving me with a decent end product. The compressor is something I could’ve handled better, I was rather lost during that part of the process as I couldn’t hear a great deal of difference when fiddling around but that could just be down to a lack of experience and not knowing what exactly to listen out for. I am pleased with how I generally handled the levels throughout the process, I don’t recall a point where anything was obviously too loud or too quiet, I was simply making little adjustments quick and often.
Indecisive – “Snake Eyes”
The final part of my first foray into mixing was our band’s original song entitled “Snake Eyes”. It is a simple but effective song that shouldn’t require an arduous amount of mixing as our recordings were good and the composition isn’t particularly complicated; using what I’ve learnt already, I should find this a bit easier than the Kings of Leon cover whilst still being given a good exercise.
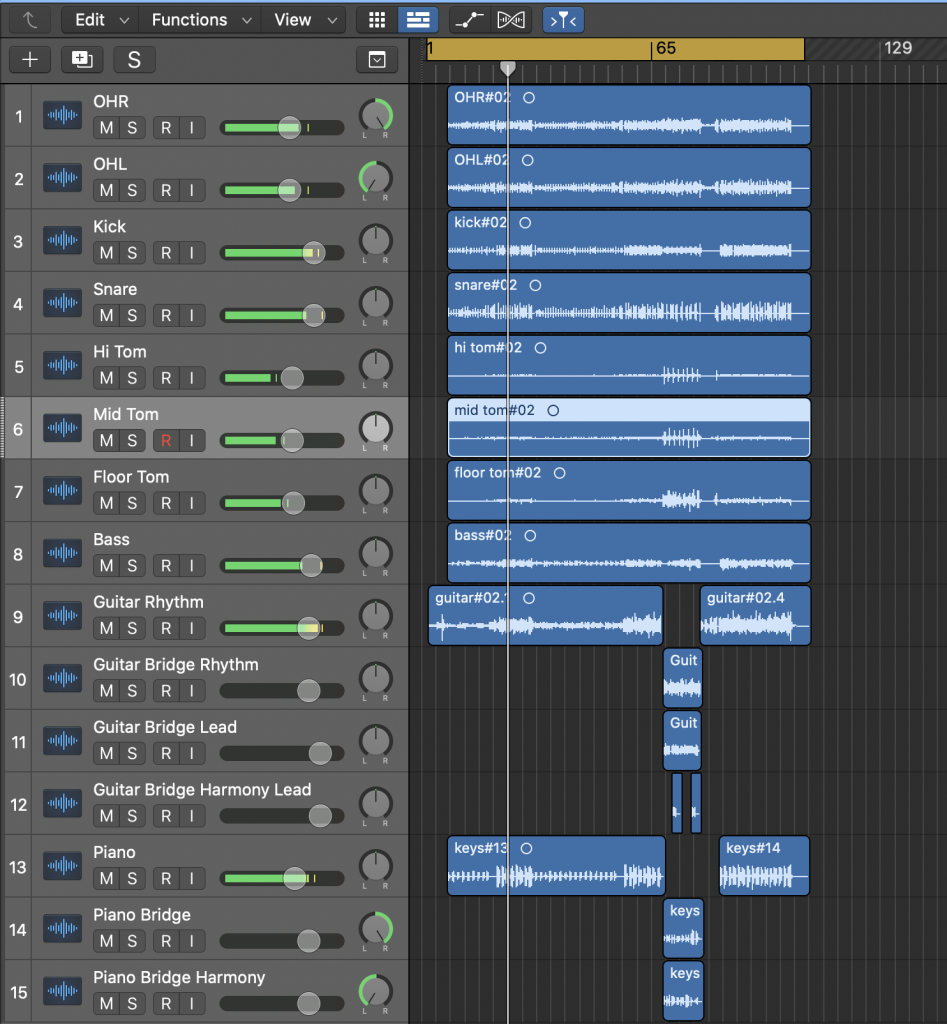
This is the first thing I saw when the piece was first introduced to Logic. As we recorded intelligently, all of the tracks were in a sensible order, as opposed to having a random assortment of instruments for me to organise, all I had to do in terms of prep was colour them how I wanted to make it a bit easier to understand when isolating certain instruments.
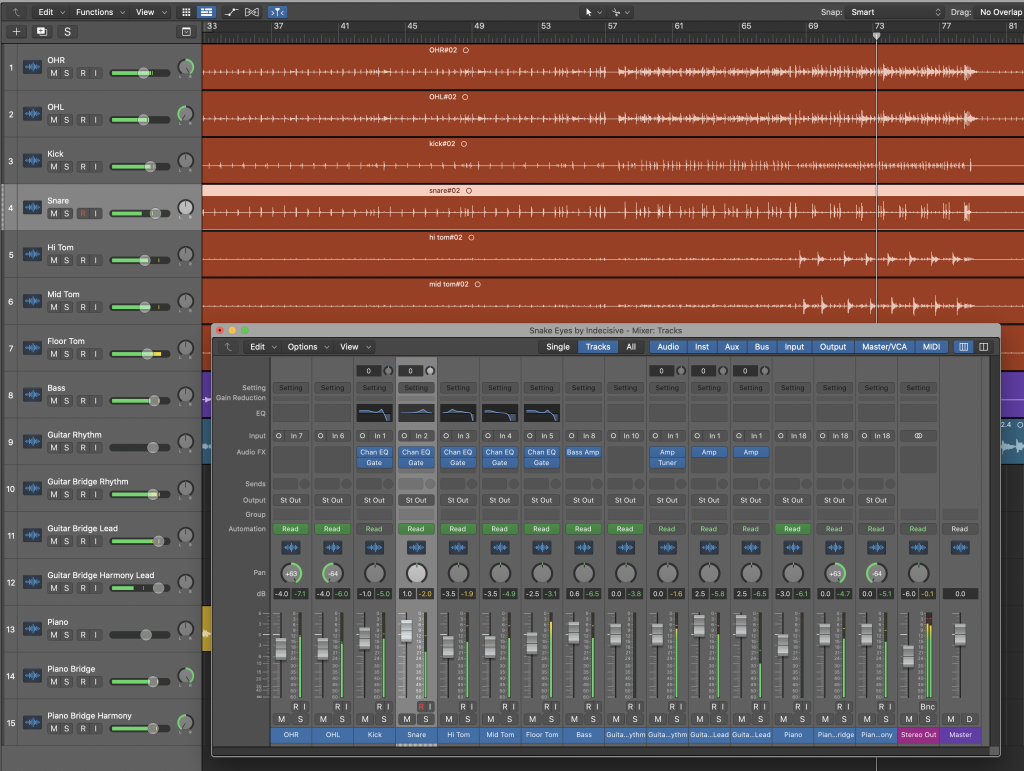
By this stage I had worked on the drums to give myself a good foundation to work from. This involved attempting to remove audio spill using a noise gate and a bit of EQ, although my EQ usage was mostly dedicated to enhancing the impact that the drums have, especially with regards to the toms during the bridge. One thing I learnt here relates to the kick drum; when starting out I fell into a trap which most beginners find themselves victim of and that trap is using EQ to remove the high frequencies. The kick drum is at the lower end, it’s rather bassy, so it makes sense at first thought to remove those higher frequencies and boost the low, but with that you find that their punch is diminished and they don’t have the same feel. That initial hit of the drum is impactful and relies on some higher frequencies, so whilst I still did remove the very, very top, I kept some of the high mids to ensure that the kick drum maintained its power.
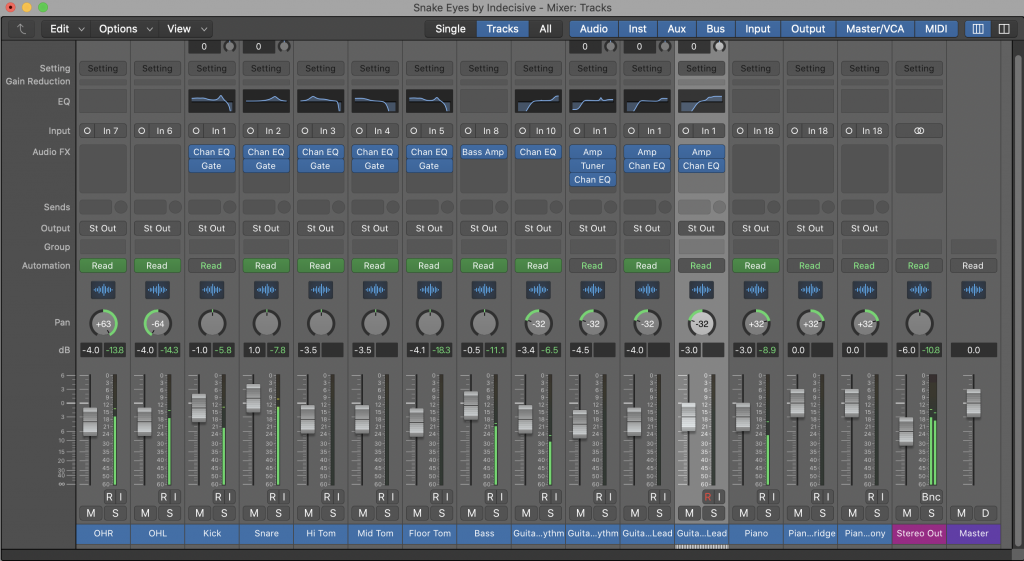
Next we have our strings section: guitar and bass. I initially went to bass and had a small fiddle using the amp where I unfortunately became a little sidetracked mid-mix and moved on too soon. I will revisit this error later on. As for the guitars, they already had same nice sounds on their respective amps so I didn’t feel the need to alter any of that. What I did first with them, however, was pan to each track to the left (and pan the piano tracks to the right) as this utilises the stereo sound space nicely, it adds a level of interest whilst being functional in the sense that it opens up the centre for other tracks to step forward in the mix. I also used EQ on these guitar tracks to remove the lower end, too much lower end can sound somewhat muddy and on these guitar parts it’s unnecessary, removing the lows and boosting the high mids brought out a much nicer sound for me in this instance.
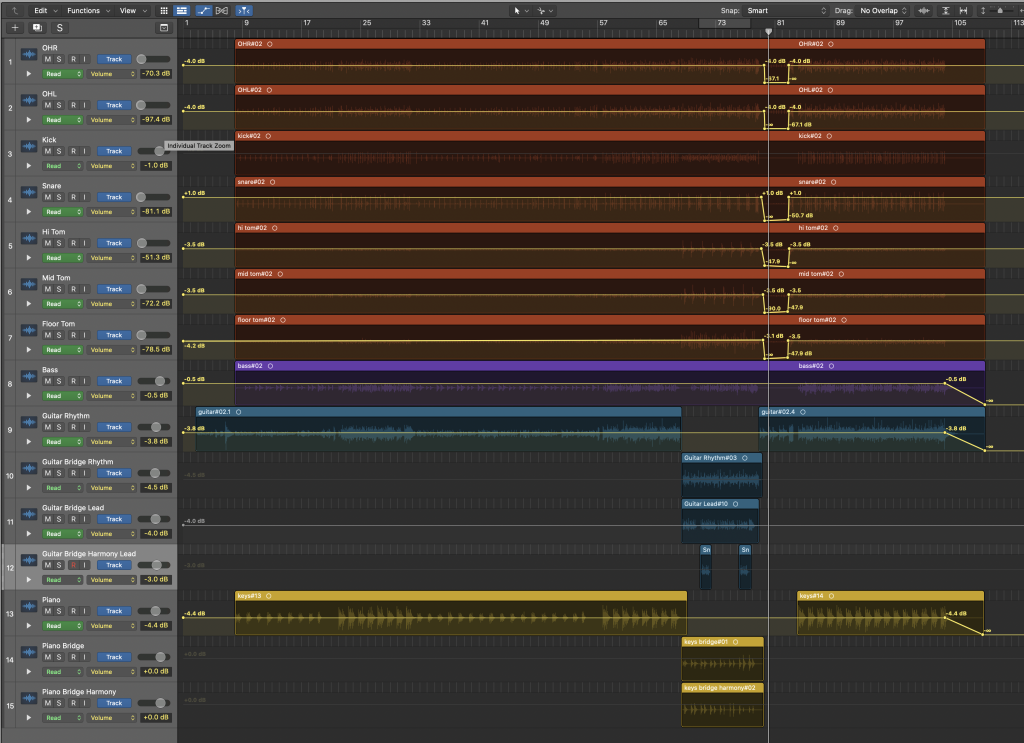
In terms of the song’s arrangement, automation is a key part. We needed to use this tool to ensure that the back part of the bridge was perfectly silent bar some guitars to increase how impactful the final chorus is. Fading out the song during that final chorus is how we decided to end the song, and so we used automation to make that a reality, easing the song to the finish line.
This is my final mix. Ultimately I am underwhelmed but relieved that I managed to pump out a final mix given the time constraints I was working within. I’m happy with parts and really unimpressed with others, there’s lots to learn from!
The major issue I found was with my bass. When listening back using the headphones in the Mac suite, they sounded fine, but once I played them on my dad’s HiFi system, it was evident that the bass was far too prominent in the mix as it wasn’t necessarily too loud but that bass was too strong. This is an oversight in two senses: I didn’t go back and revisit the bass after being sidetracked, and I didn’t listen to my bounce on multiple devices/systems to ensure it works on more than one output. Both of these are simple mistakes which I can avoid by sticking to a checklist perhaps.
On a more positive note, I feel that my mix had some highlights, I was happy with the toms in the bridge, the panning worked as expected, and it sounded relatively even when you took away that pesky bassline. I only wish we could’ve had some vocals on the track as that would be something I would’ve loved to get stuck into, I feel confident enough to do so.
Overall, mixing has been an enjoyable experience! Getting to grips with new concepts and ideas wasn’t the easiest thing at times but I stuck at it and came out with some decent attempts by a beginner’s standpoint. I can definitely see myself taking confidence from this and putting it into future work that involves mixing. If I am to take on a song or two for my final project, I would use it as an opportunity to really hone my mixing skills