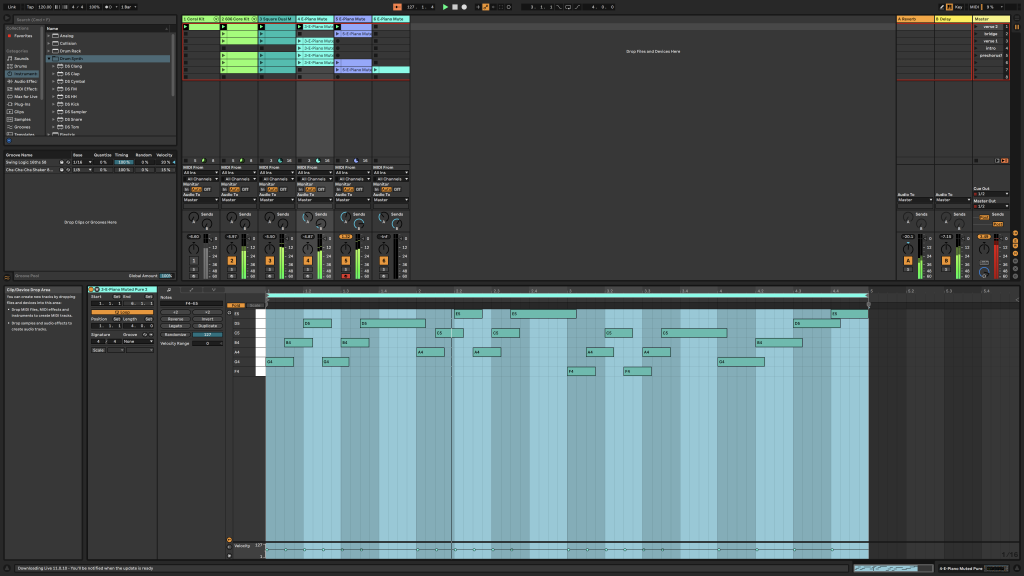
This first week, we started exploring Ableton Live 11 to start the process of sequencing our own compositions. Ableton Live 11 is a DAW (Digital Audio Workstation) which can be used to compose tracks with either MIDI data, audio data, or a combination of the two. Initially released in 2001 to be used as an instrument in live performances, with its users coming from backgrounds of DJing, turntabling, and electronic music, it is also used for recording, composing, arranging, and much more. As I mentioned before, it is a DAW which allows for boundless creativity. A wide array of EQs, filters, effects, and instruments at your fingertips, with the ability to edit in a flash, whilst this may lead to over-editing to an almost clinical level, it would be my preference to have all this flexibility. On a more practical level, having things digital means you don’t require the physical space needed for the physical methods of storing your music.
Many producers/artists use Ableton in their work, either as their primary DAW or for certain aspects (live performance for example). To name a few big artists we have Deadmau5, Daft Punk, El-P, Timbaland, Skrillex, among countless others. A lot of the artists using Ableton come from a techno/dance/electronic background as it said by many to be the ideal DAW for live performance, in many ways you can simply say that it’s just an instrument they are proficient in. As it was built for this purpose, it understands what live performers need and look for. One such function is the “scenes” found in Ableton; one scene is a piece of music – be that a drum loop, a vocal loop, a chord progression, etc. – that can be triggered to play whenever you like. What makes this work so well for live performance is the freedom it allows for, artists can play scenes whenever, chopping and changing throughout, even remixing on the fly through the introduction of effects such as reverb and delay, adding a whole other dimension to a live performance.
We also looked at remixing existing tracks, using the stems of whichever track we chose, for myself I went with The Weeknd’s “Can’t Feel My Face” and had a go at creating a more dance-inspired version.
We then had a go at creating our own tracks from scratch. Initially, I aimed to emulate the drum beats of one of my favourite artists, MF DOOM, hard-hitting, not the typical on beat off beat you hear, yet still simple.
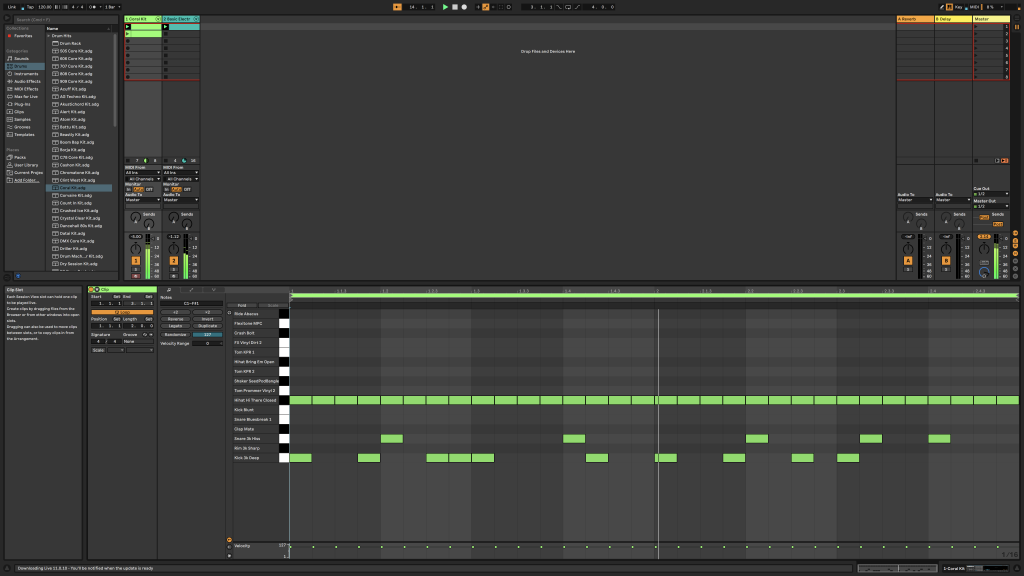
Unfortunately I had issues regarding playing to the tempo/finding the right tempo, I found the drum programming a bit tough so I simplified what I was working towards and instead went for a somewhat lo-fi type of sound with a more typical percussive side to it. Below is what I landed on, it’s a fairly standard pattern but it achieves just what I wanted.
I worked much more on my composition. I had a few separate parts and considered what section of a song they could function as, in an attempt to form a basic structure within my composition. These parts consisted of an intro, two verses, a pre-chorus, and a halftime bridge with a stripped down drum beat.
I seemed to have a few good parts but I couldn’t figure out a chorus that I felt would fit, leading to me abandoning the standard structure and adopting a more freeform style. As the song took on a more electronic sound, I felt it was suitable to lean into this more abstract formation whilst using the session tab, where I took the different sections I had already and formatted them in a way I felt worked.
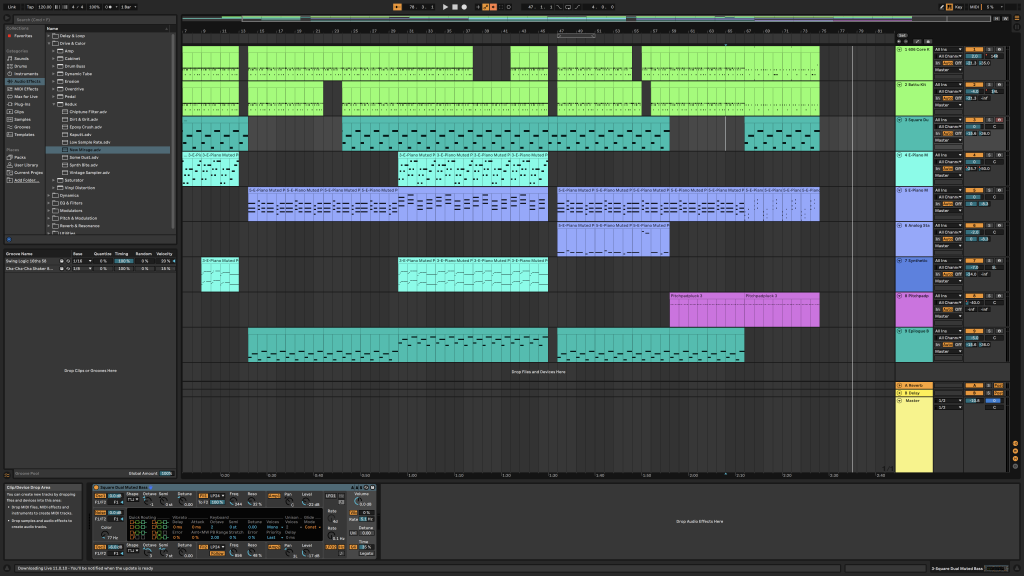
By this point I had introduced a second drum beat to double up on the percussion, helping to fill out the song, adding more interesting rhythms, leaving less empty space throughout the piece. I also added a simple bassline to, once again, fill out the song and prevent the lower end from sounding too empty.
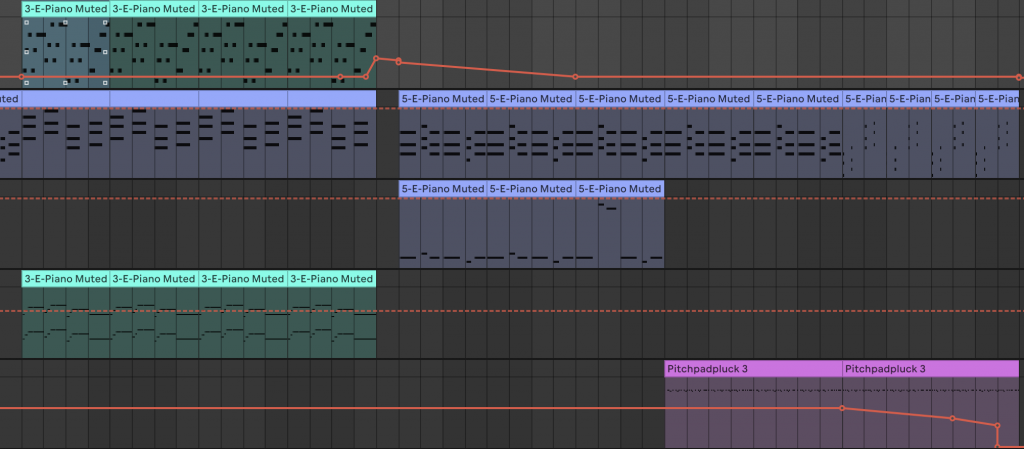
In the latter half I had also introduced a soft “drop”, so to speak, which brings in some higher notes to freshen things up, including a quick octave shift as a nice little hit to pre-empt the very high-pitched pad.
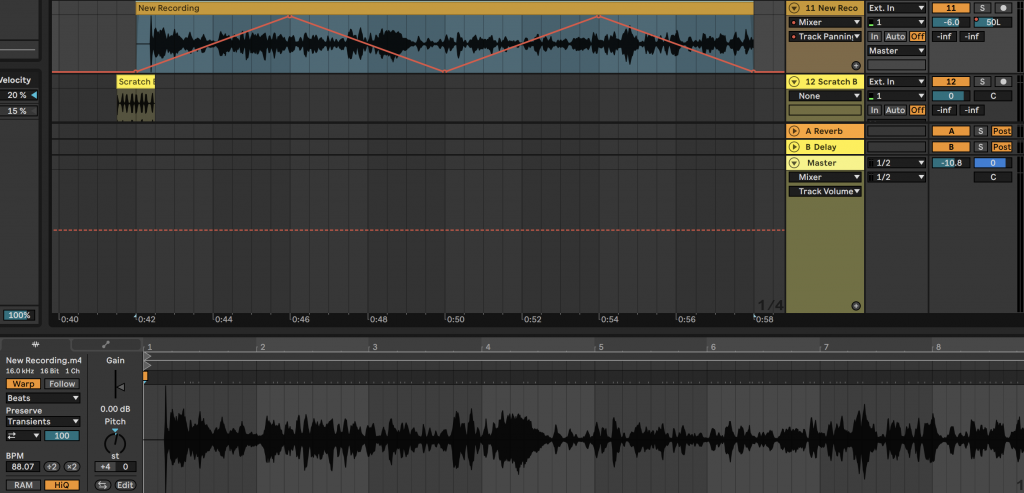
As a huge fan of samples/artists who sample, I wanted to include my own sample at some point in my song. I sought to record my own audio to include; I was on a train and there was a rather rowdy bunch of people speaking loudly, creating a white noise effect, and this is what I decided to put into the track. I placed it during one of the first sections and last sections. After deciding on the right pitch (five semitones higher than source), I needed a way to introduce the sample in a neater fashion which lead to a record scratch, I was very satisfied with how this part came out. Personally, I believe the sample is the highlight as it offers something truly unique to my work, as this is my own field recording it’s unheard before, and I think I got lucky with how well the sounds actually fit with the rest of my composition.

Lastly, before the drop in the latter half I added a riser. The drop felt a little blank and didn’t quite have the punch that I felt was necessary, so a riser was the solution to this little problem.
In summary, I am very pleased with how my very first electronically realised composition came out. There was a point where I hit a wall and didn’t like where I was at, but I pushed through and turned it around into something I am proud of. I would listen to this in my own time, which is all I can ask for in anything I make.
As for the project itself, it was an interesting challenge to use Ableton to create my own track. Ableton is a very functional piece of kit and I think I worked well with it, at the start I found it rather difficult to put things together as I’m new to this and it doesn’t seem the most beginner-friendly software. However, I pushed on and once I became accustomed to it, it was enjoyable and I was able to really experiment, using effects, modifiers, and much more. It could be familiarity bias but I prefer Ableton to Logic, as I understand it more and the style seems to cooperate with me – one thing I do wish Ableton had was the feature in Logic that recognises every chord played, it’s very useful for me as I am not a pianist in any sense.
The project was really quite open ended and I’m still not sure how I feel about that. On one hand, the lack of direction initially left me aimless as I struggled to find a sound/genre which I wanted to dive into, being tasked with creating something with a specific sound could’ve prevented me from meandering for a couple weeks. On the other, the freedom led me to where I ended up. I wouldn’t have thought to create electronic music and it was only after experimenting did I come across what would later become the sounds that I would use to build my piece.
If I was to attempt to create another composition, I think I would aim for a specific genre so I’m not struggling at the start. As grateful as I am for what the freedom offered me, it stunted my progress and I think it would be worthwhile to give myself more guidance.
Learning to use Ableton and getting to grips with using a DAW for the first time was a fascinating process. Whilst, at times frustrating, this is something that I really enjoyed when it went my way, and I can absolutely picture myself doing more of this in the future, potentially even for my final project.
