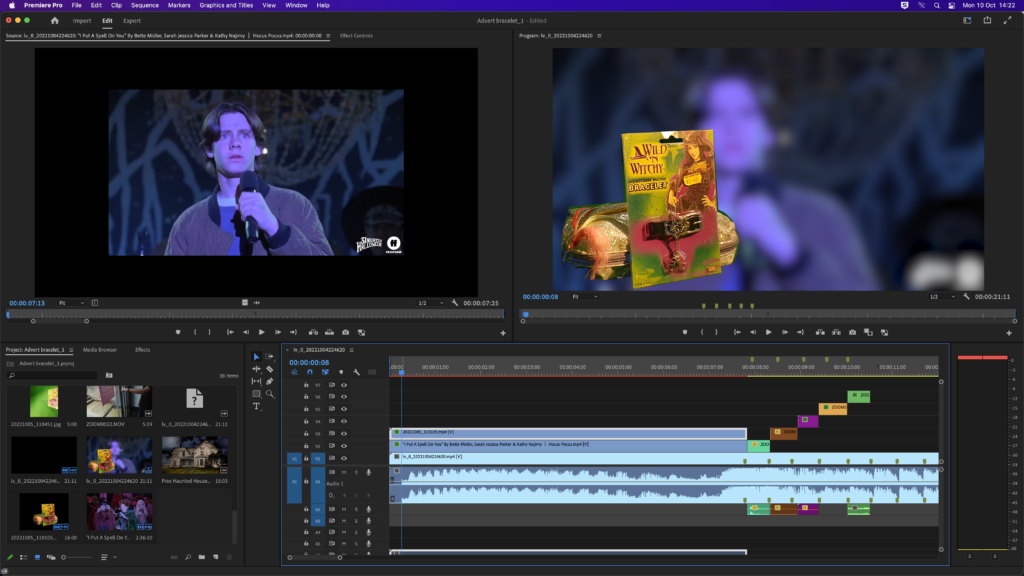
This was the first base plan of my edit but due to the outlining of the item the intro seemed out of place and disordered, To why it was necessary for me to replace my intro clips and the shot of my item. In this screenshot, looking back. My motive was to present the item. But just like I’ve said, Due to the picture looking out of place and the green screen not placing its full effects and my retries multiple of times, I retreated to my backup plan. I am glad I chose my second plan as the first did not look welcoming or seem professional or creative. At this moment looking at the start my layers were not all added and neither I organized my video footage at the start. Which I do soon as I get my clips together.
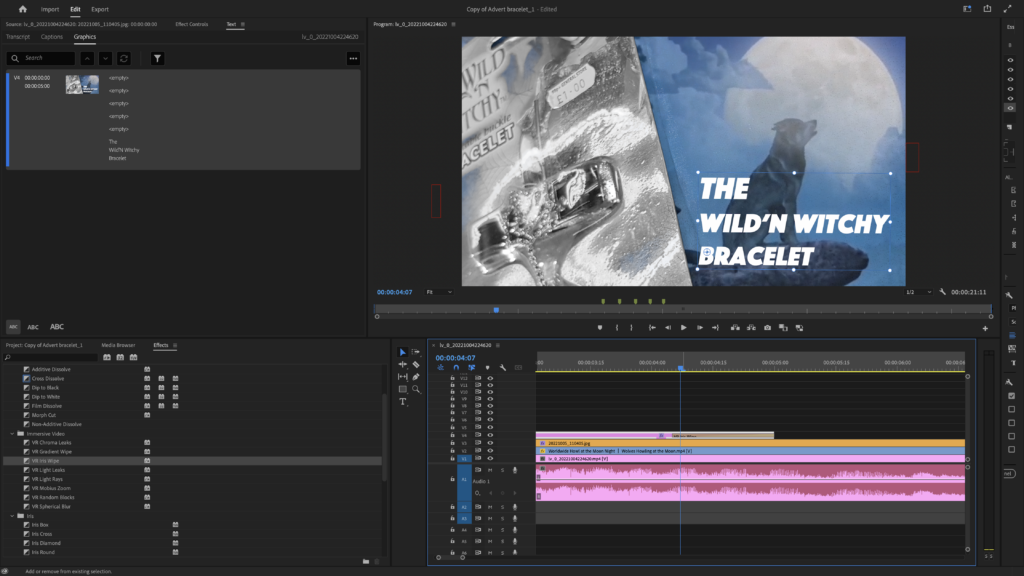
In the screenshot above shown was my new idea for my intro I formed at the last moment. Personally I took inspiration from Michael Jackson’s music video Thriller, which helped me with forming my intro and finding the right stock footage of a Wolf Howling in the background. Throughout the edit my main initiative was to mix different aspects together and present my AD as one to the best standard for the viewer. So if this was a real AD for a company, And was edited more abundantly. Viewers would remember the item and brand and want to check for anything else the brand/company offers because the quality of the good and pacey edit. Within the text in this image, I chose the font via premier pro because I believed this font added taste and made my intro stick out more than my previous intro shown above. For the title I decided not to go over board and choose an overly fancy title to surprise the viewer further on in the edit. Evidently lowering the contrast on my picture shot of the item smoothened the edit further. Reflecting back onto the present moment I wanted my edit to look welcoming and cool at the same present time to why I lowered the contrast. The main point for me was making this stick out and attract viewers to why I added the split screen effect so when viewed the viewers attention would be diverted to the howling wolves and background music sounds, Giving time to the audio to play its beat.
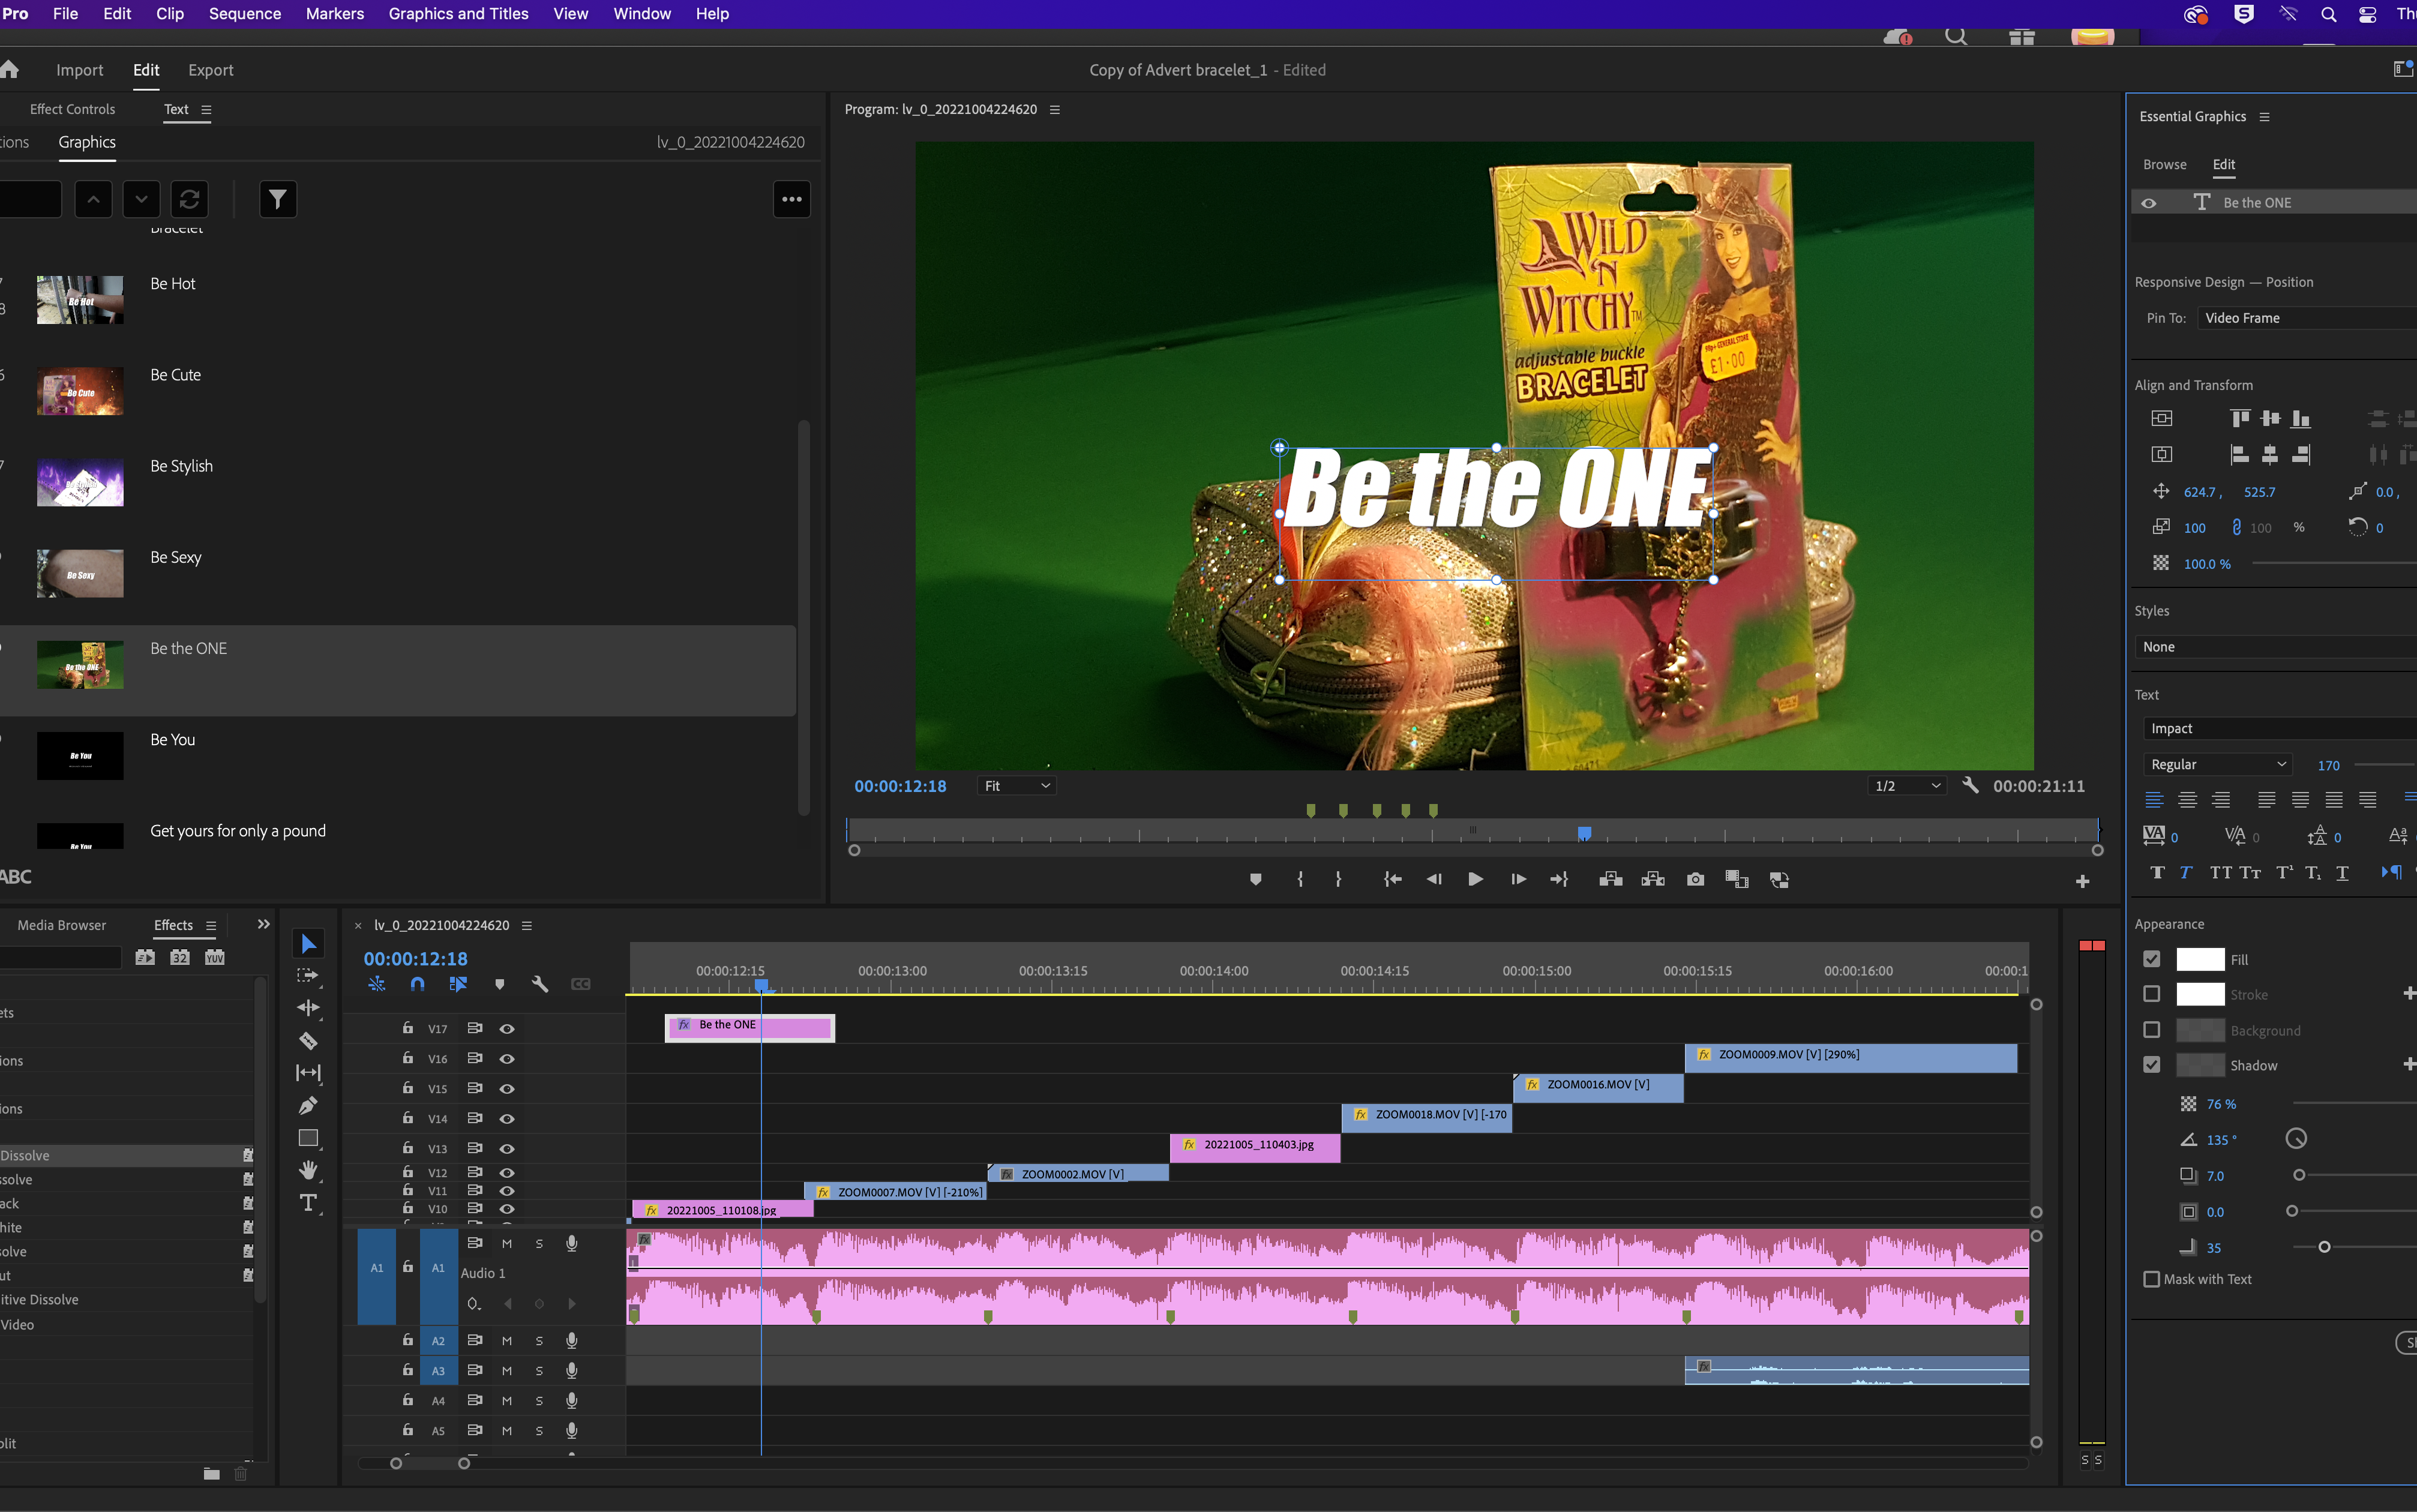
Shown above is the way I chose to layer and color coordinate my editing layers. With this the editing process seemed more smoother and swifter. Having experienced editing through Alight motion, Most of my ideas and my plan base to do with editing and filming shots channeled from the experience I gained there. I believe the best choice I made was finding my audio first and tweaking the audio via CapCut editor which helped me match the audio beats with my scene cuts. On the other hand as noticed the caption “Be The ONE” this caption idea was taken from ads like JD sports which was not part of my research but an idea that seemed appropriate further on in the editing process. Also another important aspect the green screen background, In some scenes I chose to add background video effects like fire flare and decided to keep some left with the greenscreen in the background. The reason to this was because of my weakness at analyzing the setting of the green screen and taking the clip angled the right way. But at the end I’m grateful and proud on how everything seemed to mold together.
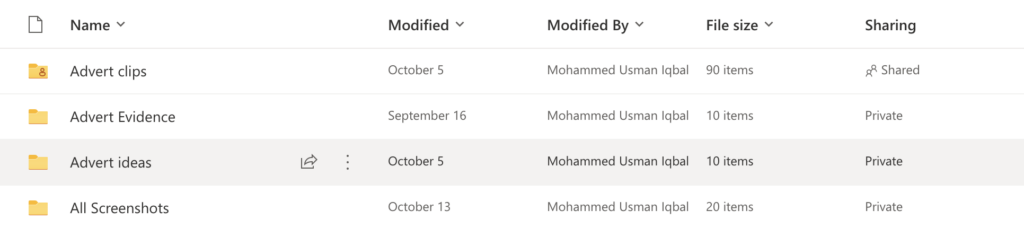
This is something I’m proud of. These folders came to use at the moment I had soo many mixed pictures and videos for my editing. So to speak it was like One Drive became my friend as I started understanding and becoming comfortable with the site. Referring back to my personal editing experience, I formed different folders dedicated to different actors and characters to my SD Card which helped me navigate across the variety of different movie scenes and clips I was in need of whilst editing. With that habit the first move I made was forming folders and picking my music first which assisted in any further changes and the overall edit process its self. The most use this folder has come is when I change through to other PC’S or Laptops, These folders are a login away by just downloading them. You maybe wondering why there’s many folders, These folders where titled for each matching evidence from my course work. By this, I was able to identify the correct locations to place certain evidences and coursework material.
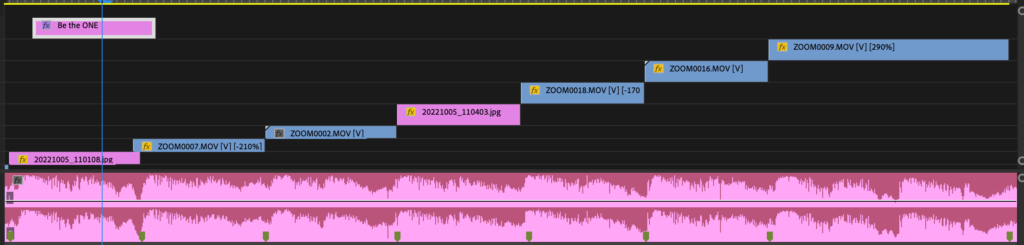
In the Screenshot shown above, As seen, I keyframed my audio. Something that I’ve learnt with my past experience with Alight Motion. Keyframes helped me split the clips on beat. And noticed my clips have an FX sign. This sign pops with most of my clips because of my decision of making my edit fast pace. Looking back, Every change I made. I wanted the change to contribute with the fast pace of the edit. As not every decision goes as plan but the best part is the experience. Via this I understood how Premier Pro’s speed settings worked like. Coming back to the format, This format made it easier not only to edit faster but to understand the placements 0f my clips and to avoid loosing there location within the timeline. As I’ve said this is one of the most important aspects of editing for me. Knowing your audio, Knowing your abilities and your surrounding within the timeline. Just this short experience made me understand how the smallest things can shape the upcoming view and outlook of your edit.