Drums
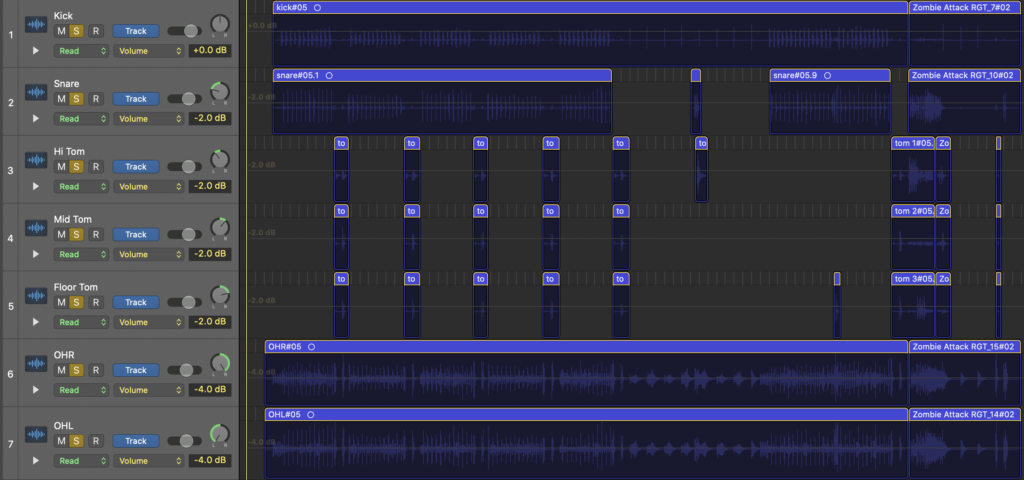
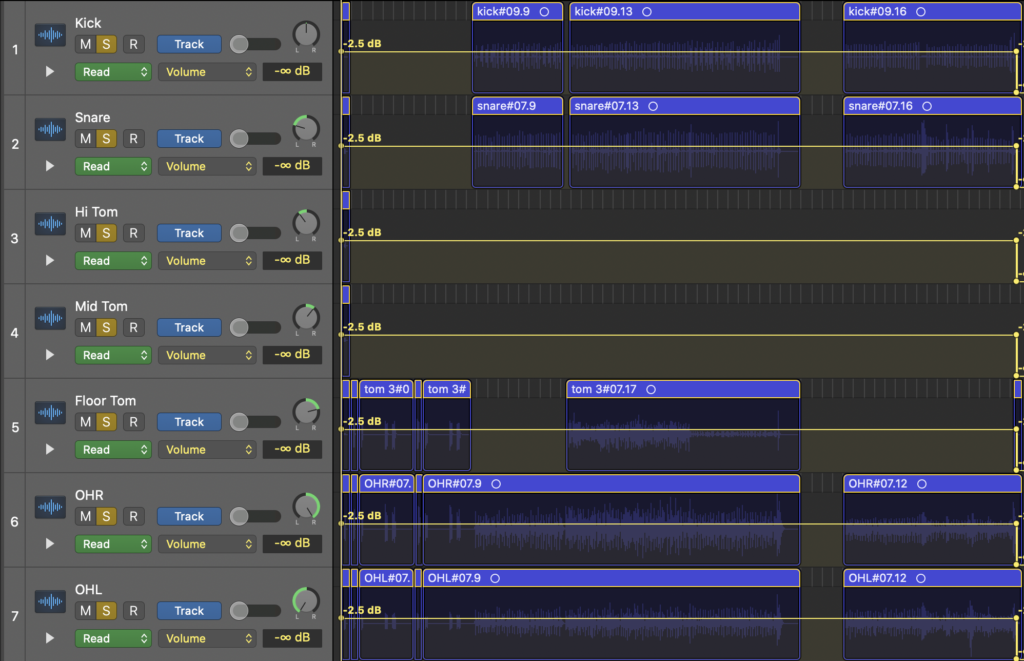
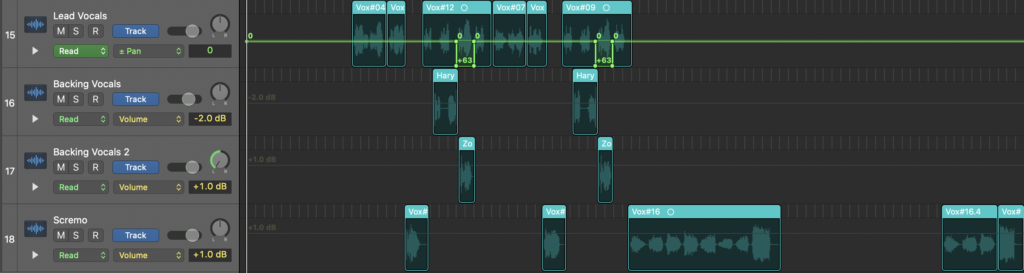
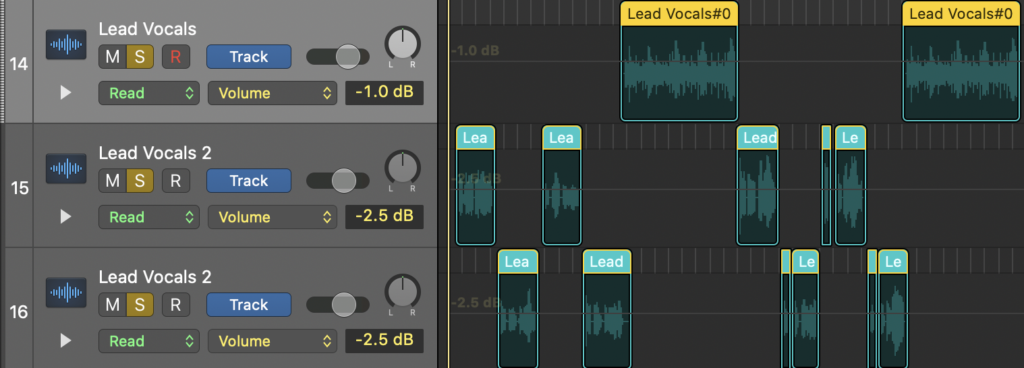
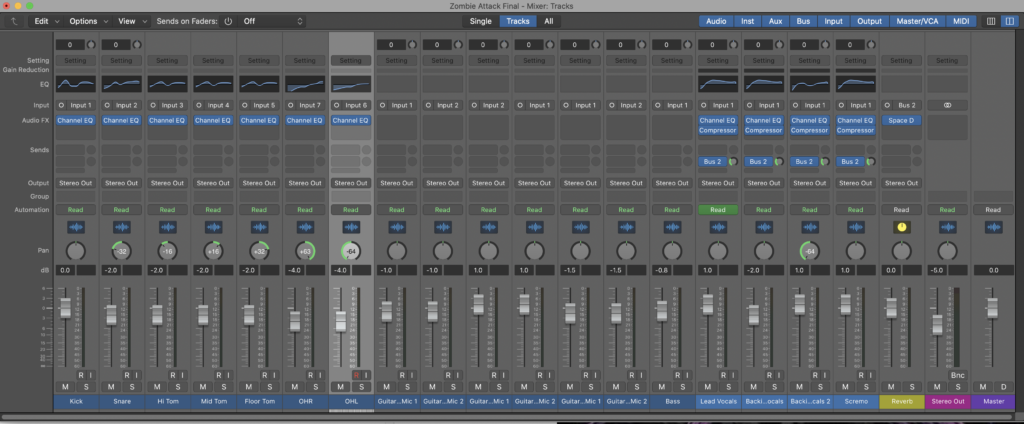
When I started mixing both songs I started of by organising my sessions by colouring tracks for different things and naming them so I knew where stuff was and made my life easier when mixing. Then I cut off any tracks where there was nothing playing to get rid of excess spill and unwanted noise. Once I did that I started off by panning the drum kit. I put the kick drum straight down the middle, I put the snare 32 to the left, I put the hi tom 16 to the left, I put the mid tom 16 to the right, I put the floor tom 32 to the right, I put the right overhead 64 to the right and I put the left overhead 64 to the left. The reason for this is because it gives the drums some space and its panned to how you would hear it if you was playing them which I thought was really cool and unique and I’ve never heard about anyone doing this before. Also I did some volume automation because I did some panning automation at the end and I needed to change some volumes after I did the panning automation.
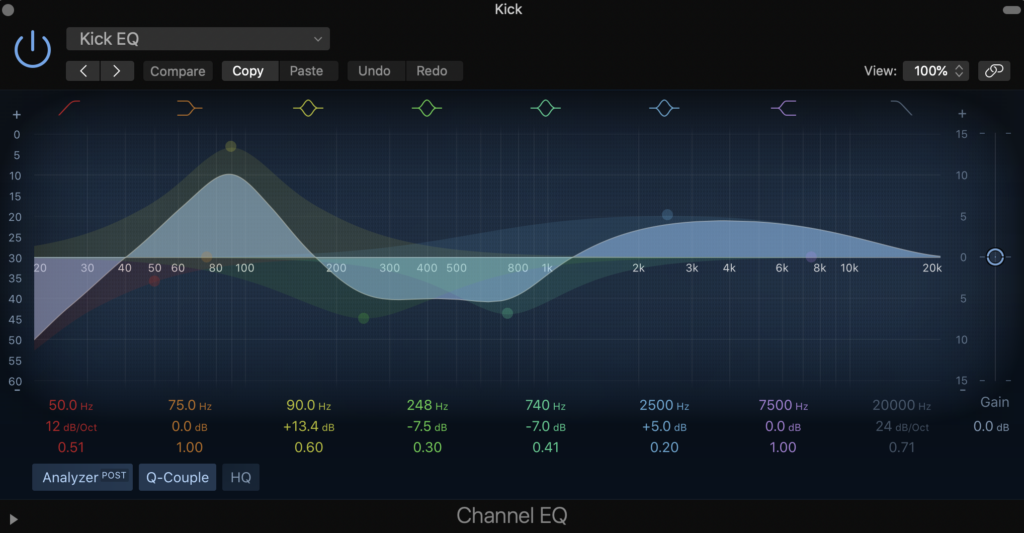
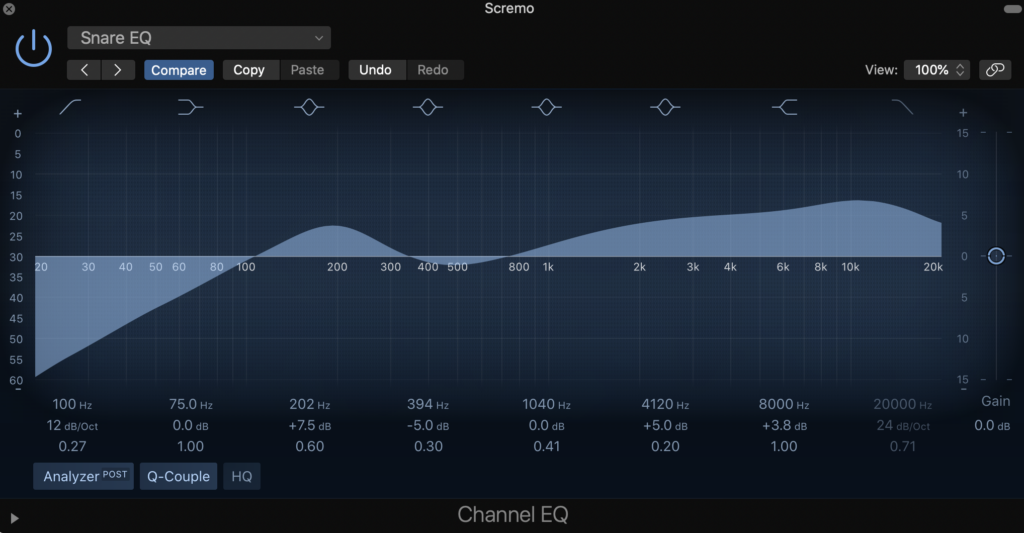
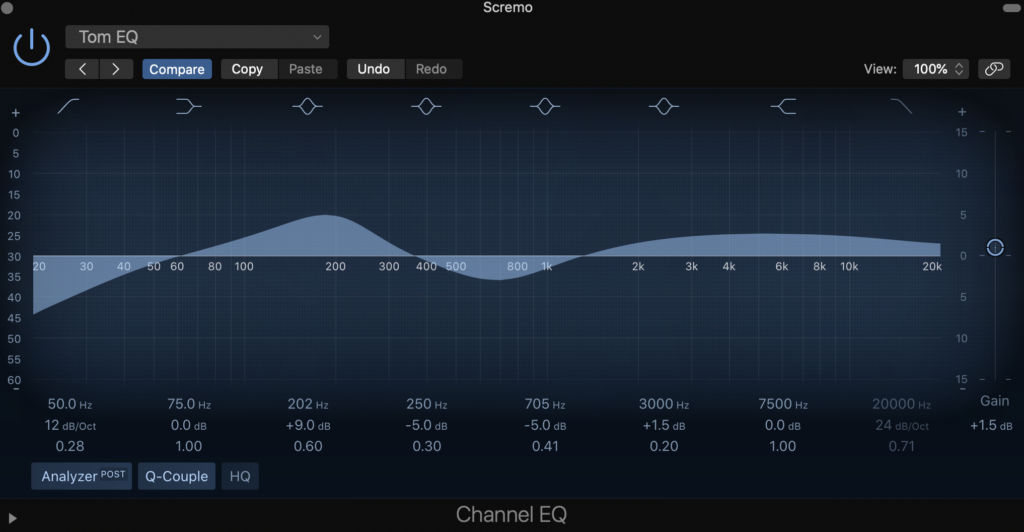
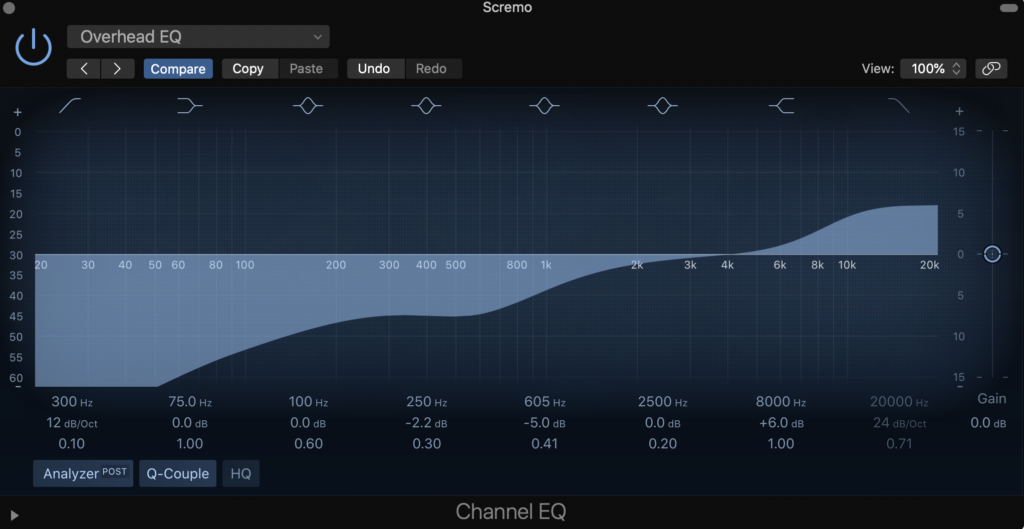
When I was ready to start properly mixing I started by adding EQ to the drums. For the kick drum I started of by cutting any low-end rumble using a high pass filter with +12 dB of 50 Hz. Then I boosted some low-end frequency with +13.5 dB of 90 Hz. Then I cut any mud in the low-mids with -7.5 dB of 250 Hz. Then I cut any boxiness in the mids with -7 dB of 750 Hz. Then I Boosted the high-end with +5 dB of 2500 Hz to add some attack to the kick. For the snare drum I started of by cutting any low-end rumble using a high pass filter with +12 dB of 100 Hz. Then I boosted some low-end frequency with +7.5 dB of 200 Hz. Then I cut any mud in the low-mids with -5 dB of 400 Hz. Then I boosted the high-end with +5 dB of 4120 Hz. Then I boosted a high shelf with +4 of 8000 Hz. For the toms I started of by cutting any low-end rumble using a high pass filter with +12 dB of 50 Hz. Then I boosted some low-end frequency with +9 dB of 200 Hz. Then I cut any mud in the low-mids with -5 dB of 250 Hz. Then I cut any boxiness in the mids with -5 dB of 700 Hz. Then I Boosted the high-end with +1.5 dB of 3000 Hz to add some attack to the toms. For the overheads I started of by cutting any low-end rumble using a high pass filter with +12 dB of 300 Hz. Then I cut any mud in the low-mids with -2 dB of 250 Hz. Then I cut any boxiness in the mids with -5 dB of 600 Hz. Then I boosted a high shelf with +6 dB of 8000 Hz. to add some sparkle and glimmer to the cymbals.
Vocals
Once I finished mixing the drums I left the guitars and bass and any other MIDI stuff alone because the mix in the amps was already good enough for me and I was happy with the effects and tone of it and didn’t need to change much of them apart from volumes and panning but that’s about it but once I was happy with everything else I moved on to the vocals.
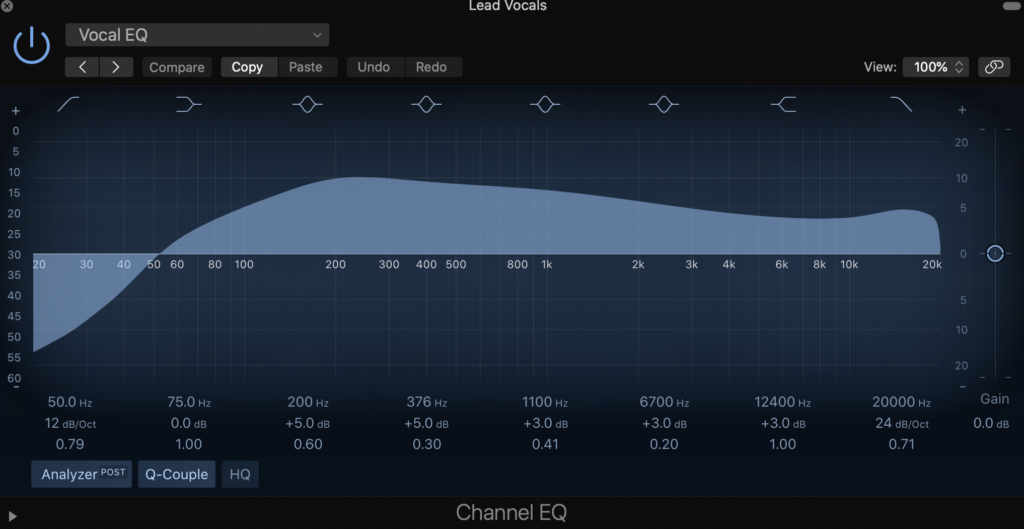
Once I was finished mixing the instrumentation I started by adding EQ to the vocals. I started of by cutting any low-end rumble using a high pass filter with +12 dB of 50 Hz. Then I boosted some low-end frequency with +5 dB of 200 Hz. Then I cut any mud in the low-mids with -5 dB of 375 Hz. Then I cut any boxiness in the mids with -3 dB of 1100 Hz. Then I boosted the high-end with +3 dB of 6700 Hz to add some presence. Then I boosted a high shelf with +3 of 12500 Hz to add some air into the vocals.

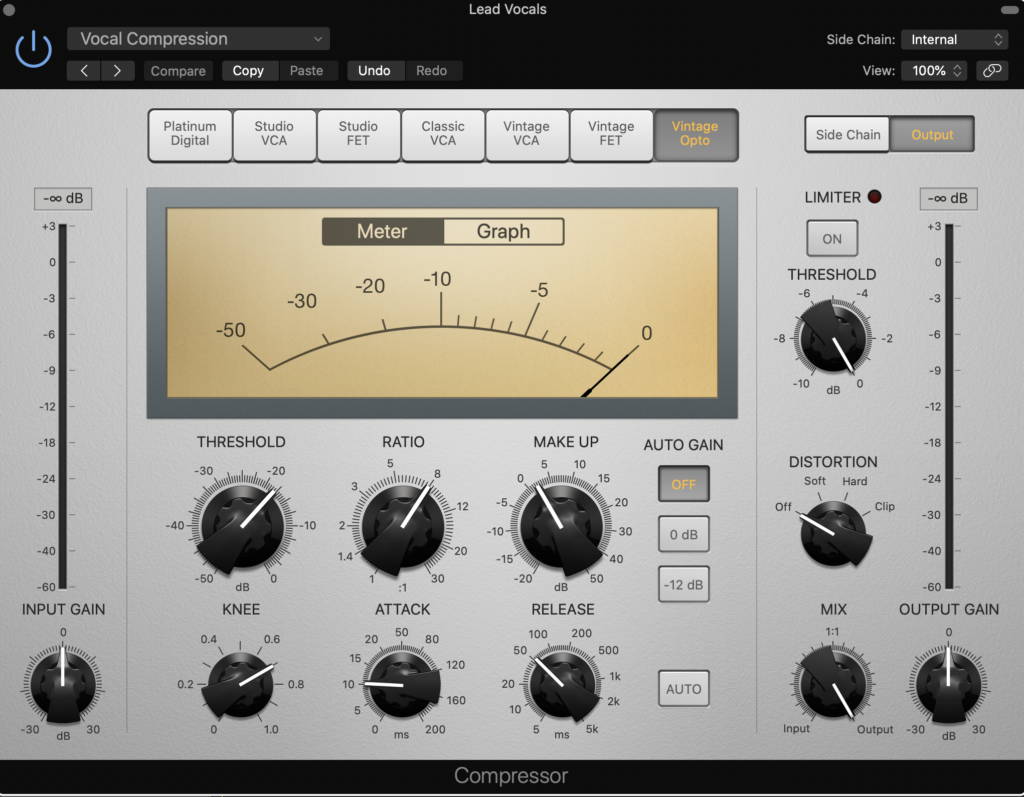
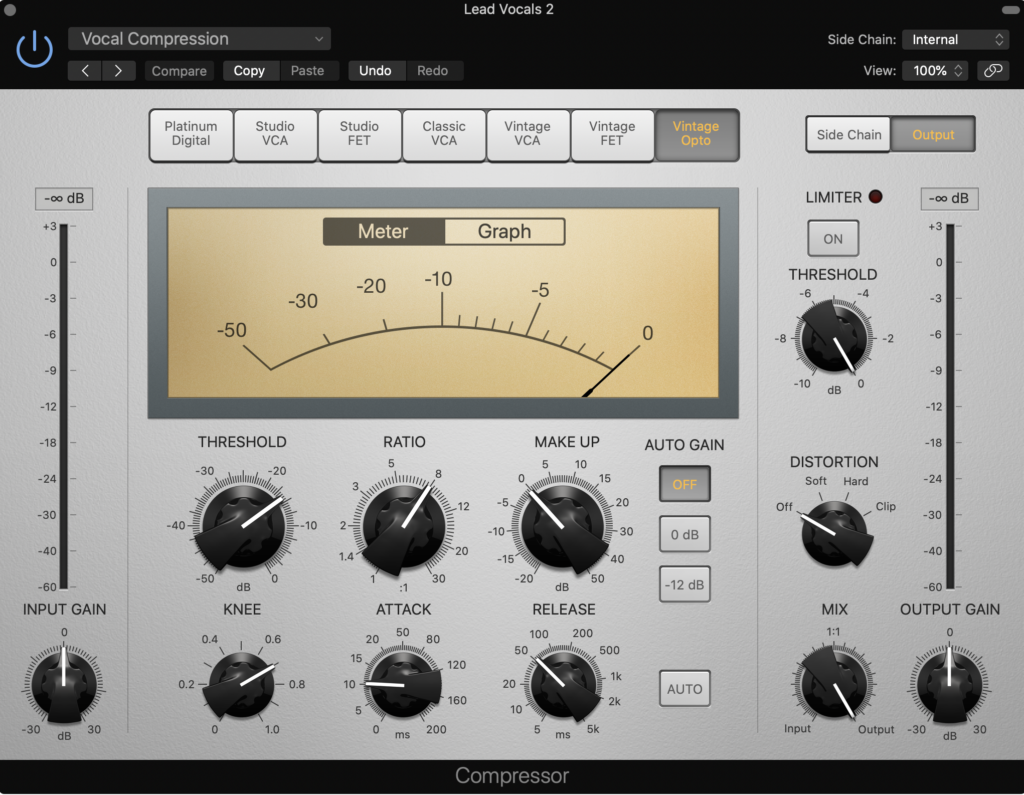
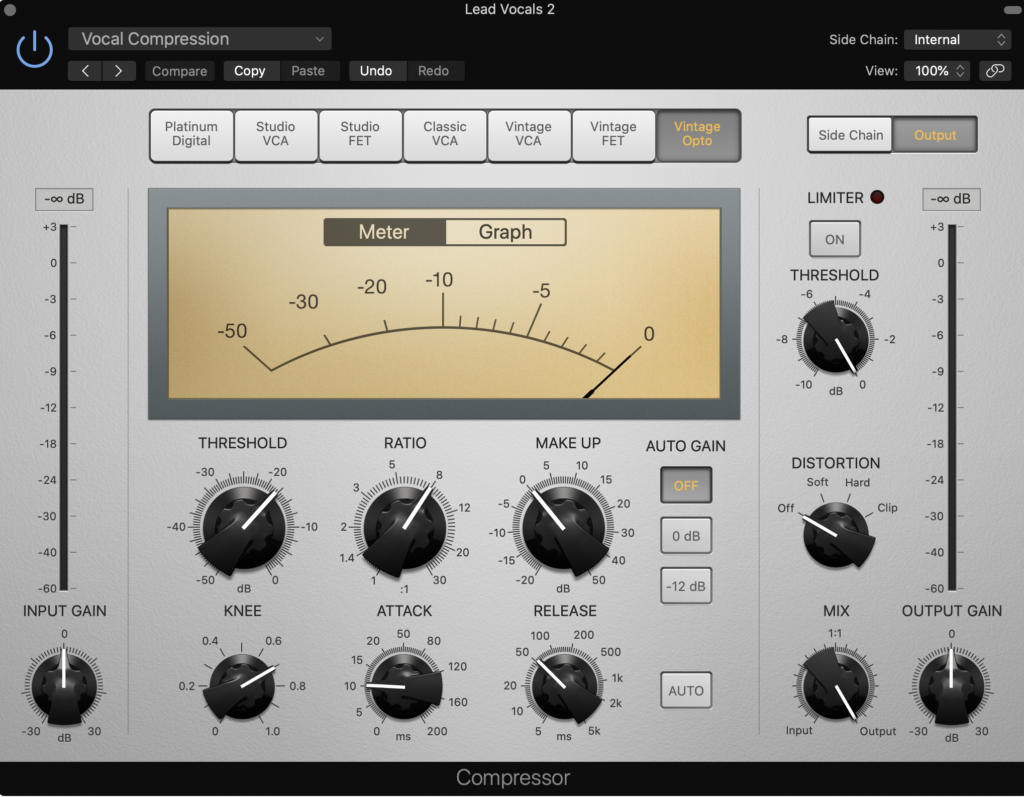
Once I added some EQ to the vocals I put some compression on the using a Vintage Opto which I find best for vocals. I started off by putting an attack time off 10.5 ms and a release time of 57 ms so I could get the best time from when the signal goes from non-compressed to compressed and when it goes from compressed to non-compressed. Then I put a knee of 0.7 so I could get the best Transition possible for vocals. Then I put a ratio of 8.0 :1 to get the best attenuation applied to the signal as possible for vocals Then when I did that I changed the threshold depending on the vocal performance and if different part were louder or quite than others and just added make up gain if needed.

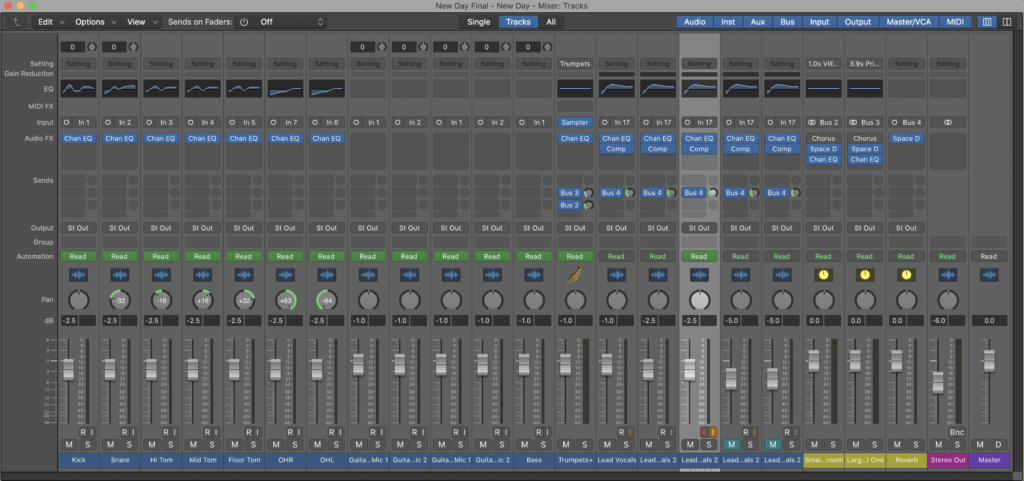
Once I added all of the compression to the vocals I used a reverb plug in called space designer using a guitar hall setting to use as a bus to send it to the lead vocals which gave them enough reverb and a really good sounding reverb with a great aftermath and once I did that I was done with all of the mixing for both songs and they were ready to be released. Once they were ready I checked it to make sure it didn’t clip or nothing was muted or anything and then bounced it to put on Soundcloud.