
Live sound is basically what happens behind the scenes of every live performance. It entails how to set up the speaks, each instrument, link up mics and the level control. We learnt about the different wires and how to wrap them back up again so we didn’t damage the inside.
Wires:
We first learnt about which wire to use for which pieces of equipment and then how to wrap them up properly so we’re not breaking the inside.
To wrap up a wire, you simply hold it in your dominant hand (writing hand), make sure the lead is untangled and the grab some of the lead. In one hand, you should have the end of the lead and in the other some of the wire. Now, cross them over so it makes a circle and simply repeat. This stops wires from getting tangled up, if they’re just not wrapped up at all, and stops you breaking the inside, if you wrap it wrong, so they’re ready for each play and don’t end up like those wires that have to be held on certain angles.
There’s so much different equipment that all have different inserts so you need to know which end goes where and how they fit in, in order to ensure you have any sound out at all.
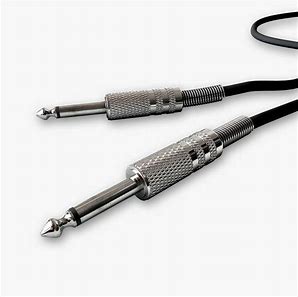
To set up keys, guitar and bass, you will need a jack cable. These simply connect the amp to the instrument so you can get volume on the instrument. This is useful because drums can play quite loud so if you need to, you can turn the other plays up to balance out the dynamics.
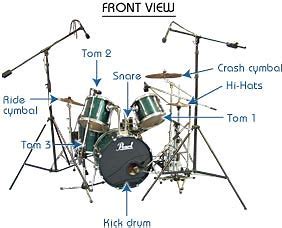
Amplifying drums is quite different to every other instrument because instead of using an amp, you use little microphones. You will need a microphone for the kick drum, snare, toms, the whole left side and the whole right side. Most of these just clip onto the side of what they’re needing to but for the whole sides, you put them on a stand and make sure the microphone is pointing to the centre of each crash cymbal. The kick drum mic can either be on a stand or simply go inside the drum.
Setting up a microphone is pretty simple, you take an XLR lead and connect the microphone to the DI box. The side with the pointed ends, goes into the DI box and the flat side goes into the microphone.

After everything is connected to the DI box, you need to connect the mixer and the speakers. To connect it to the speakers, you need a XLR cable and to connect it to the mixer, it’s a jack lead.

Finally, you just connect a kettle lead from the mixing desk to the wall and put the other end of the jacks lead into the mixer. The mixer simply allows you to ensure that all the instruments and mics levels are set properly so it stops feedback. You simply do this by adjusting the gain on the desk with the little dials, ask them to play so you can check that the level doesn’t go above green (0). Throughout the performance, you can adjust the levels if they increase too much by selecting the right channel and making your changes through the dials.

When doing sound checks, it’s important everything is checked properly so you should get each musician to play a piece of what they’ll be playing in the set to see their levels and make any changes.