MIXING
The first track I mixed was Take Me Away. My process was similar for both tracks.
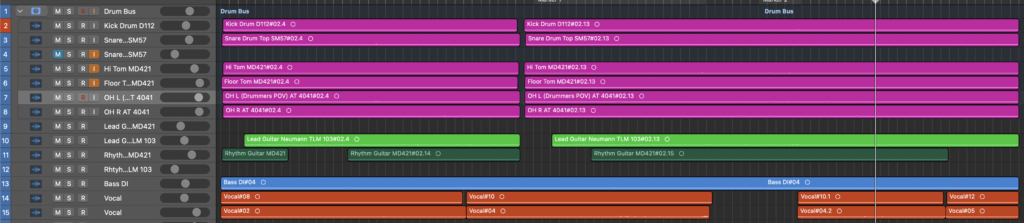
The first thing I did was cleaning up the mix. I decided which takes to use, it was the third take of the drums and guitars when we recorded together, the second take of the bass guitar, and the second take of the vocals, however, I used the first take, at a much lower dB, so I could double track the vocals to make them louder and give it more oomph. I had to pick which guitar microphone sounded better, and it was different for each guitar. The TLM 103 sounded better with the lead, but the MD421 sounded better for the rhythm guitar. This is due to them using different guitars and different amps, meaning different mics sound better for the different sound they are creating. I also decided to not use the recording of the microphone which was placed underneath the snare drum, as it didn’t sound good and was adding unnecessary noise to the mix. It didn’t sound good due to my placement being wrong. This meant cutting the start and the end so that it started on time and ended on time. I also cut out the bits in the guitar and vocals where they aren’t playing or singing, to reduce spill and any noise that the microphone picked up. In the second verse, there is a part where the instruments cut out for two bars, when we play this as a full band the vocals are the queue for everyone to come back in, however, the band recorded it seperate to the vocals. So to fix this issue I clicked my sticks so everyone, including myself, knew the timing. However, this couldn’t make it into the final mix, so I cut the part where it is out of all the tracks. Another issue was when we recorded it, to help the timing, the rhythm guitar played the bass notes in the parts where the bass was meant to be when he wasn’t playing, as bass was recorded at a later date. When bass was added, these parts weren’t needed and added extra noise that wasn’t needed, so I cut these out.
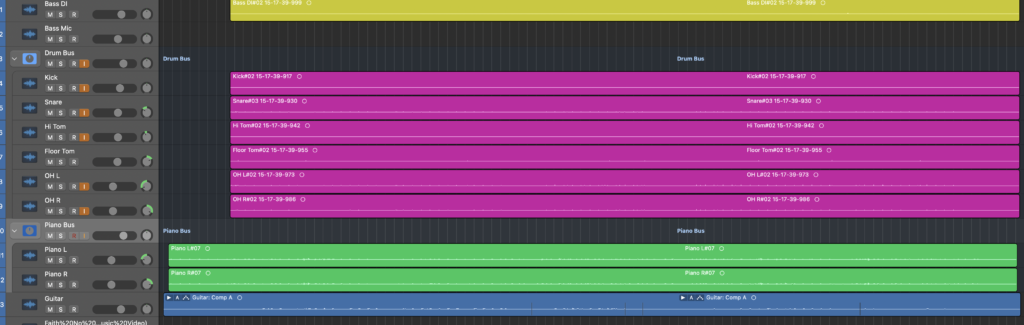
After this I colour coded all the tracks so it was easier to figure out what was what. I also created a drum bus to use at a later date. This is what it looks like after this.
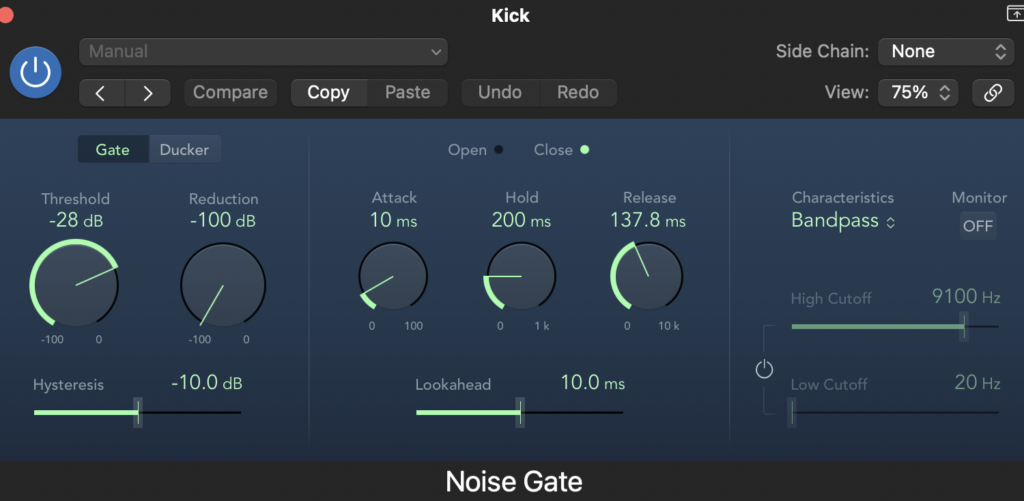
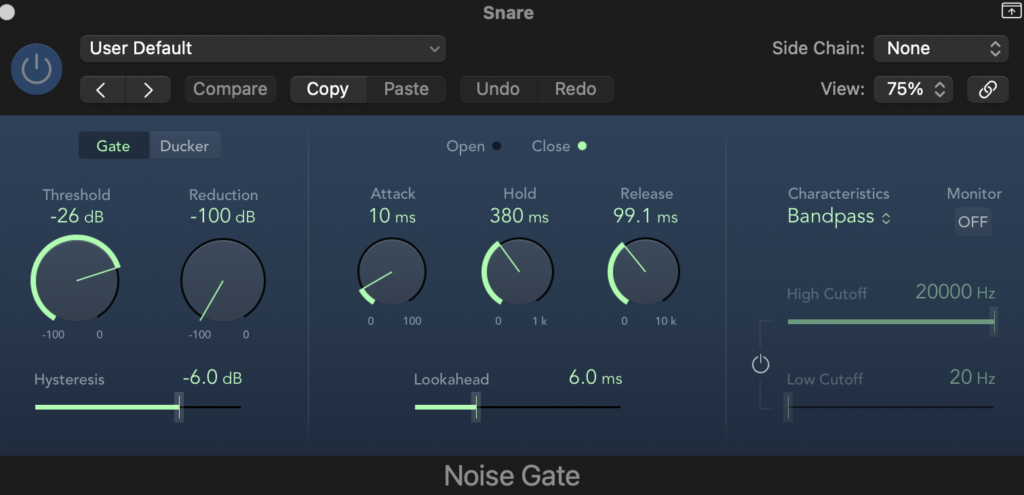
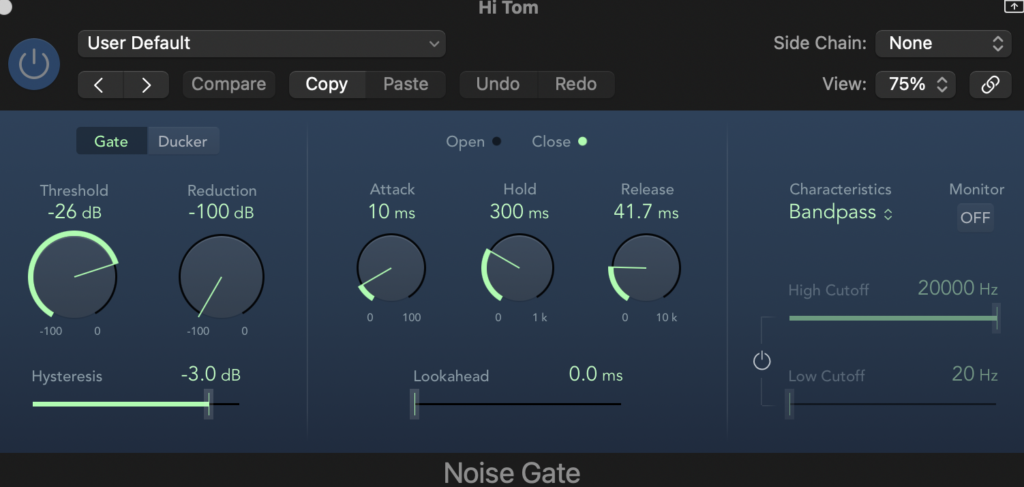
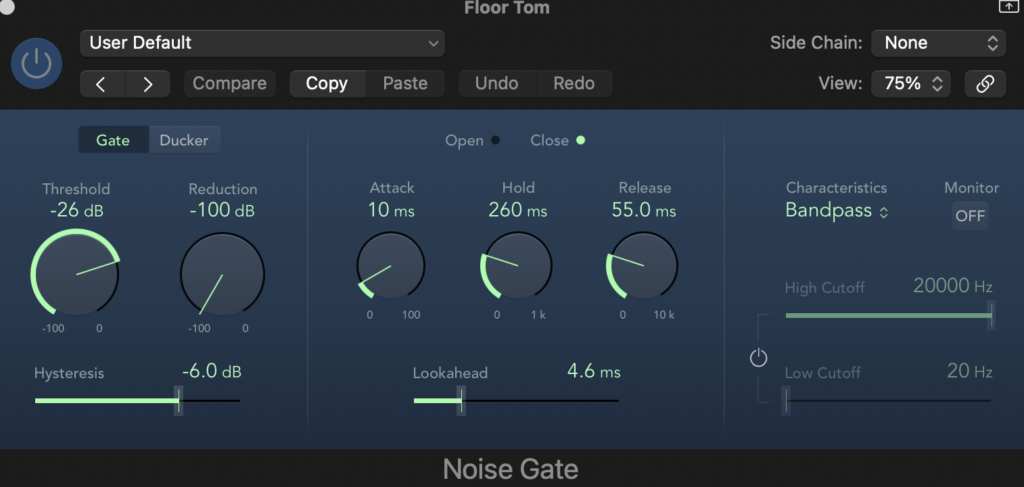
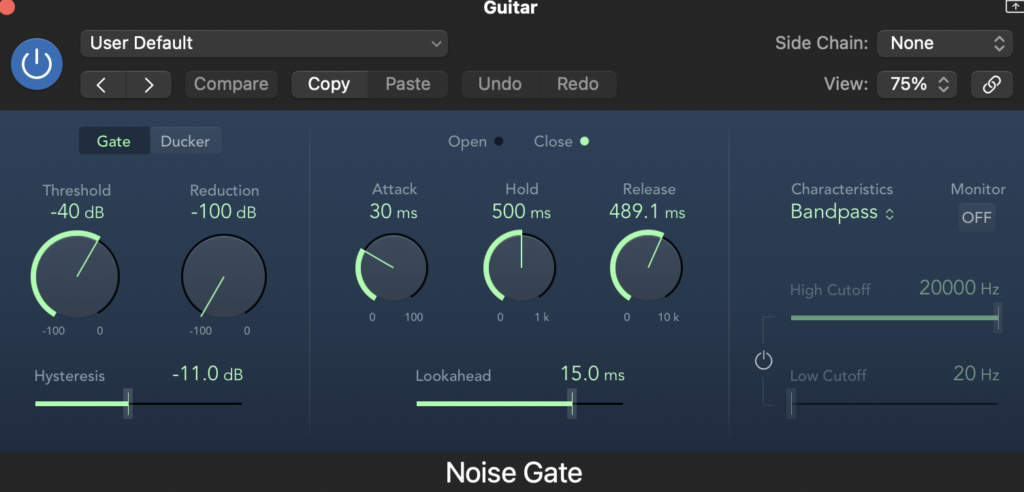
The next task was to use noise gates on all the tracks where there was instrument spill or where there were quieter parts that weren’t meant to be heard, such as guitar twiddling and mistakes or quiet sounds in the vocal track. The tracks that didn’t need it was the bass, as it was ran through a DI box there was no spill and there weren’t any sounds I didn’t want. The overheads also didn’t need it as there was no spill from the guitars, only sound from the drums. I did this by putting the reduction to max, -100db, the threshold as close to 0 dB as it could be while still being heard and not cutting out parts I didn’t want. The attack, hold, release, hysteresis and lookahead were all decided by ear and were different on every track.
Here are images of the noise gates.
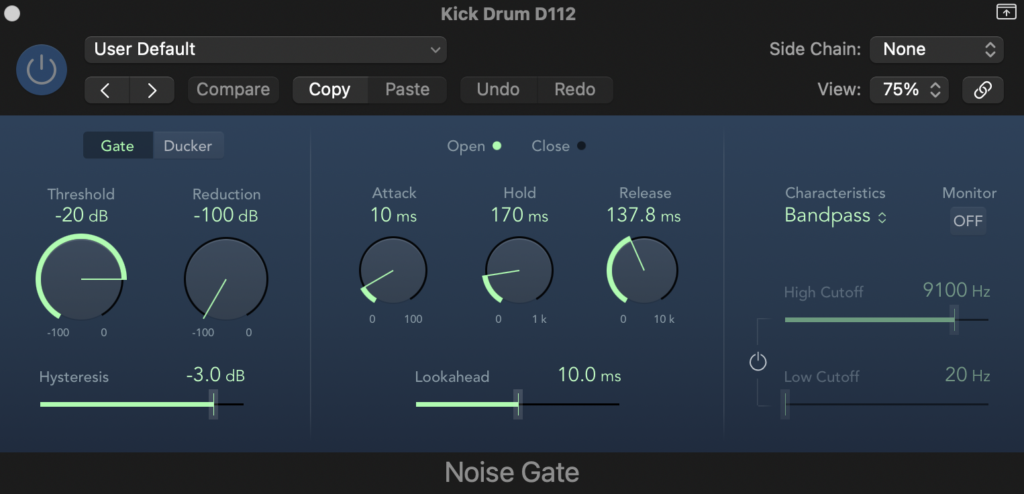
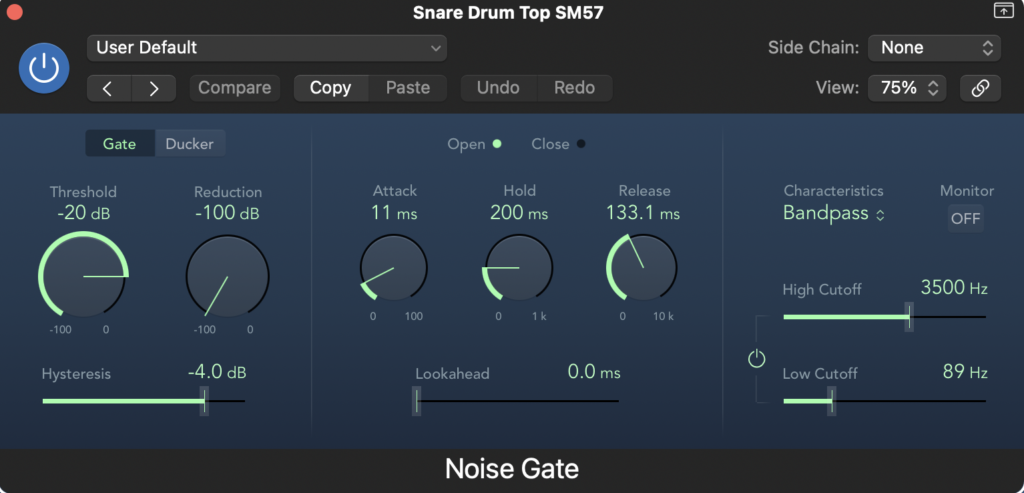
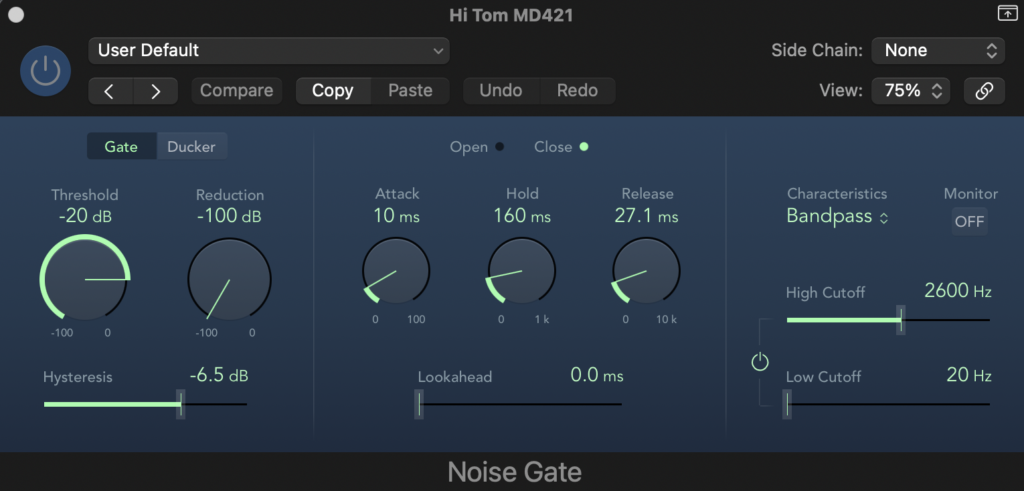
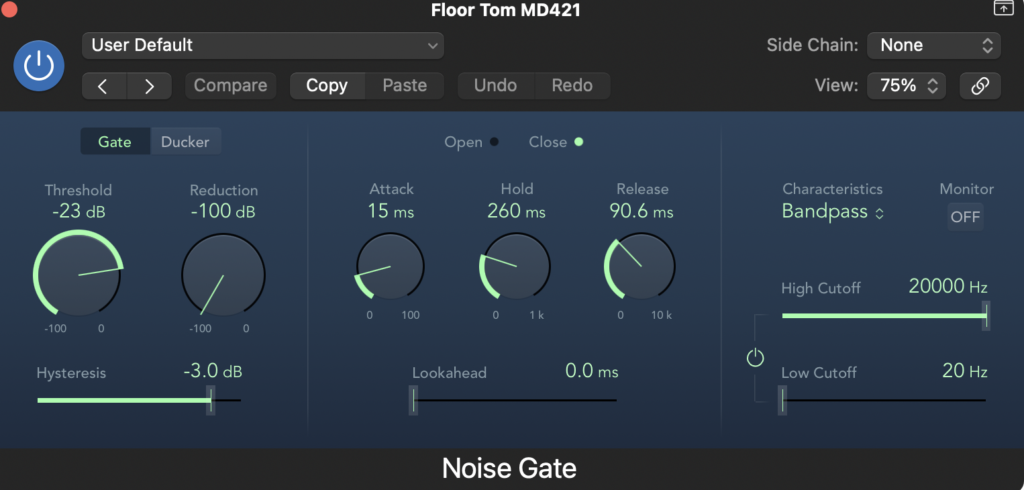

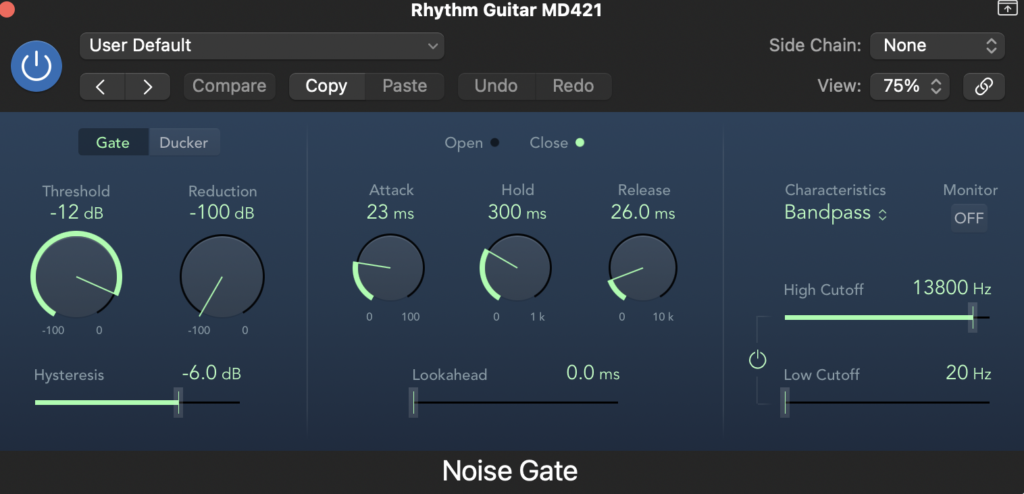

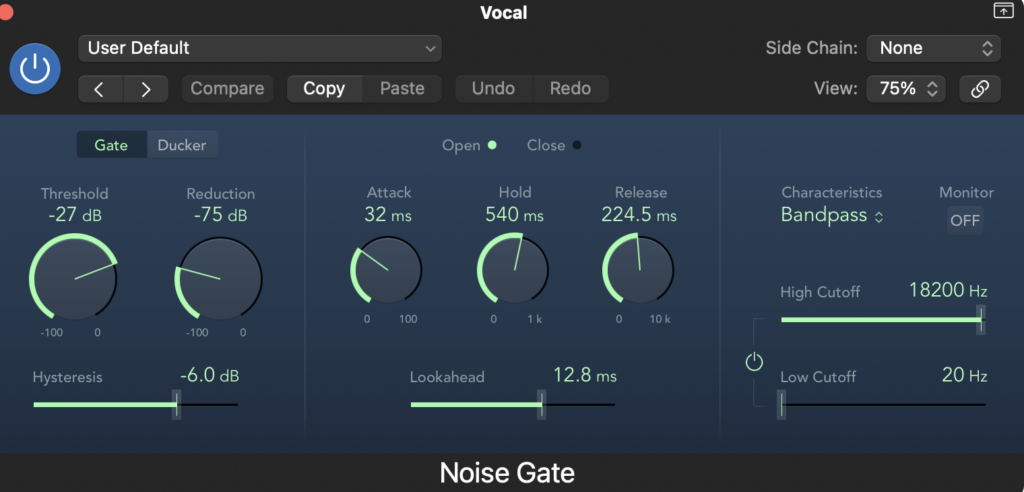
I used the same gate for both vocal takes.
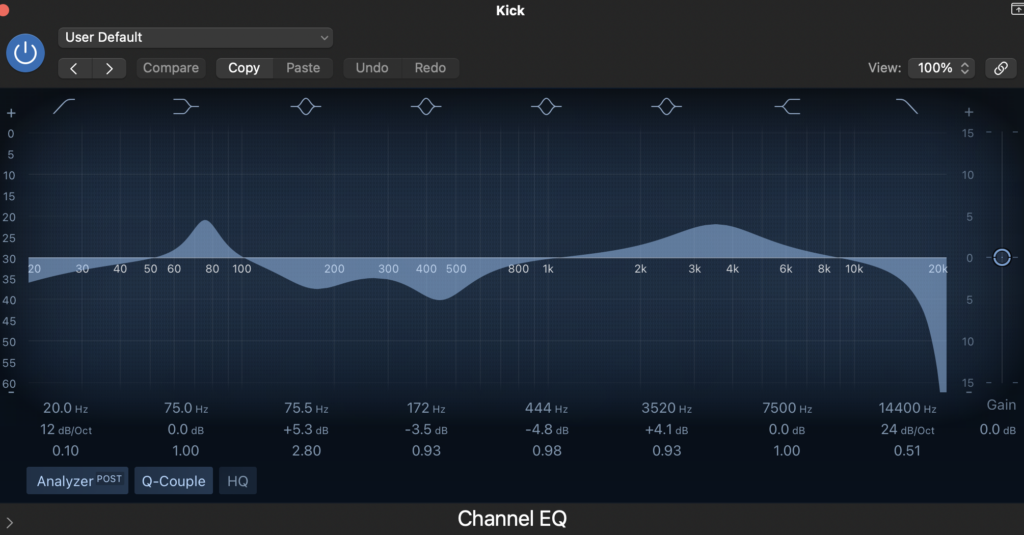
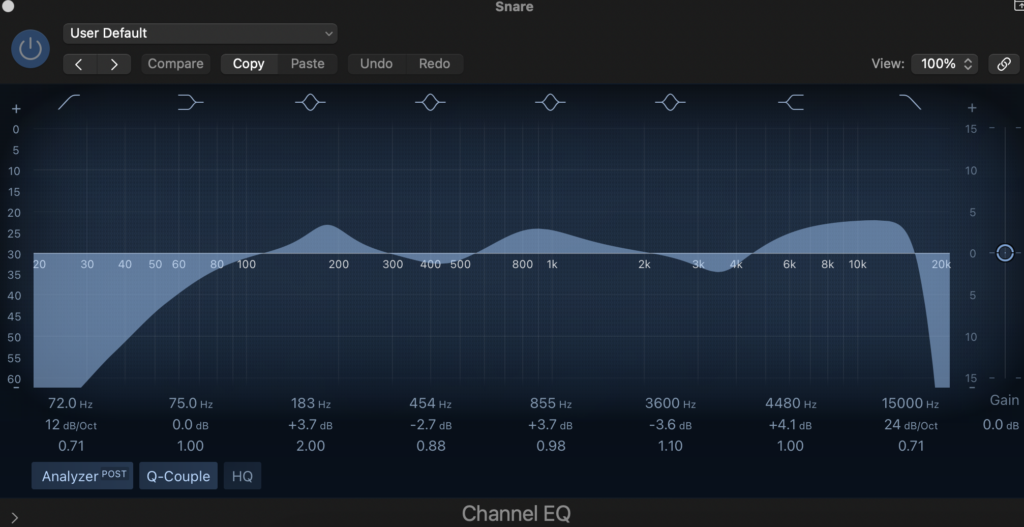
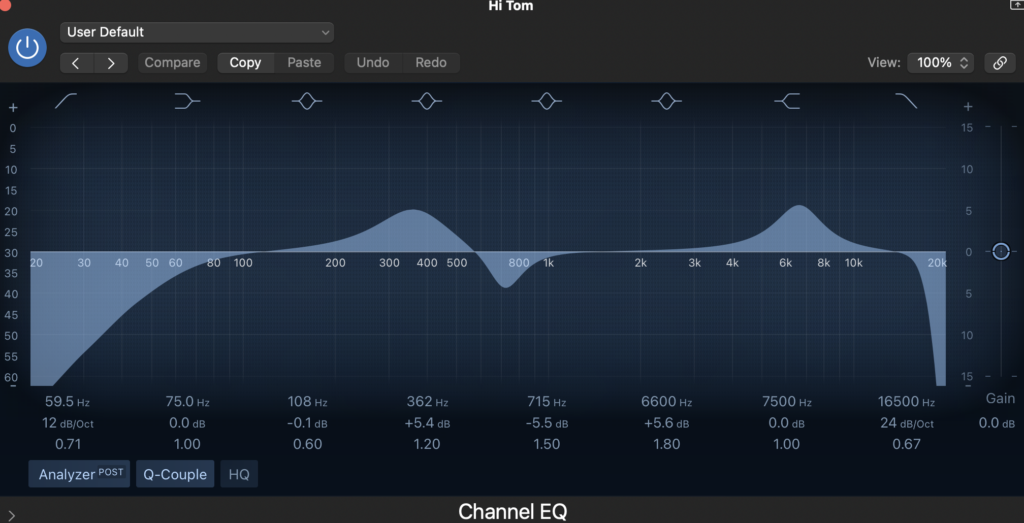
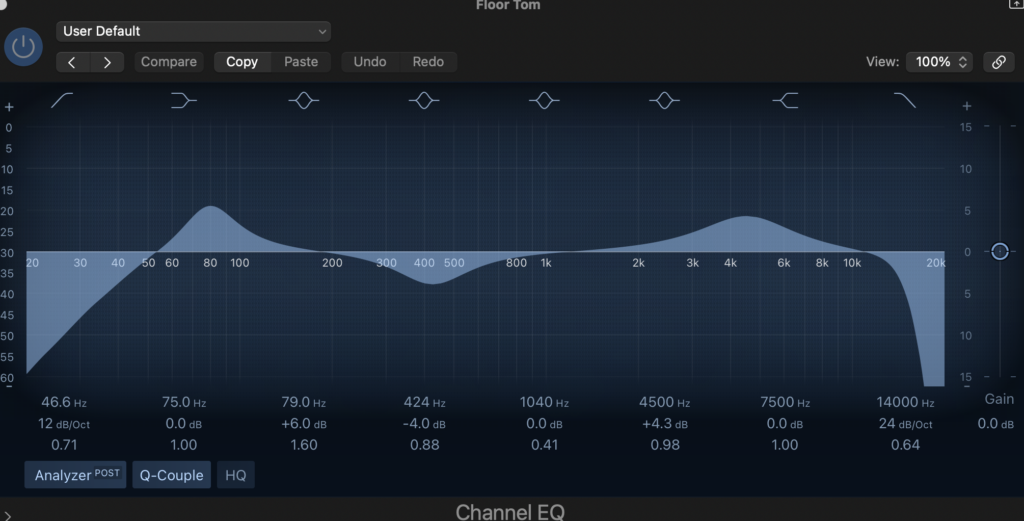
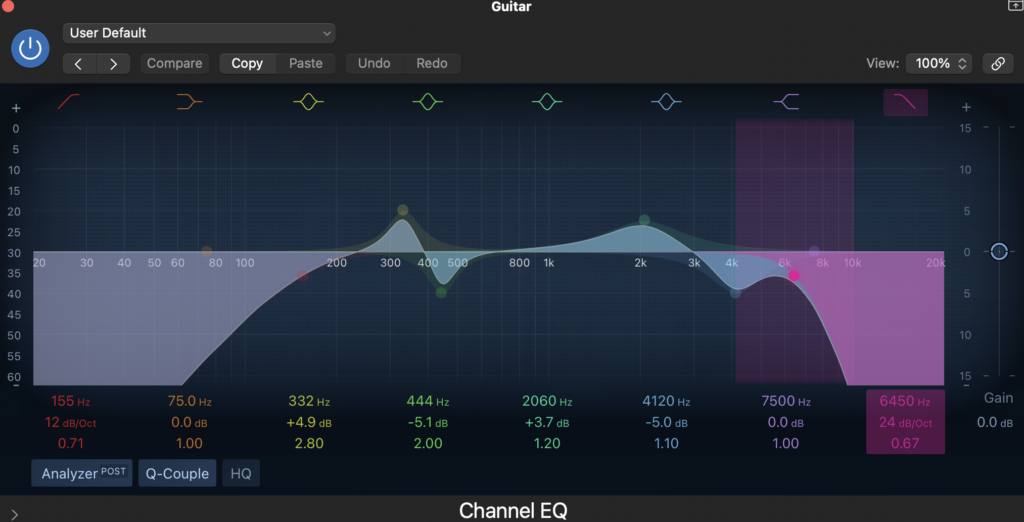
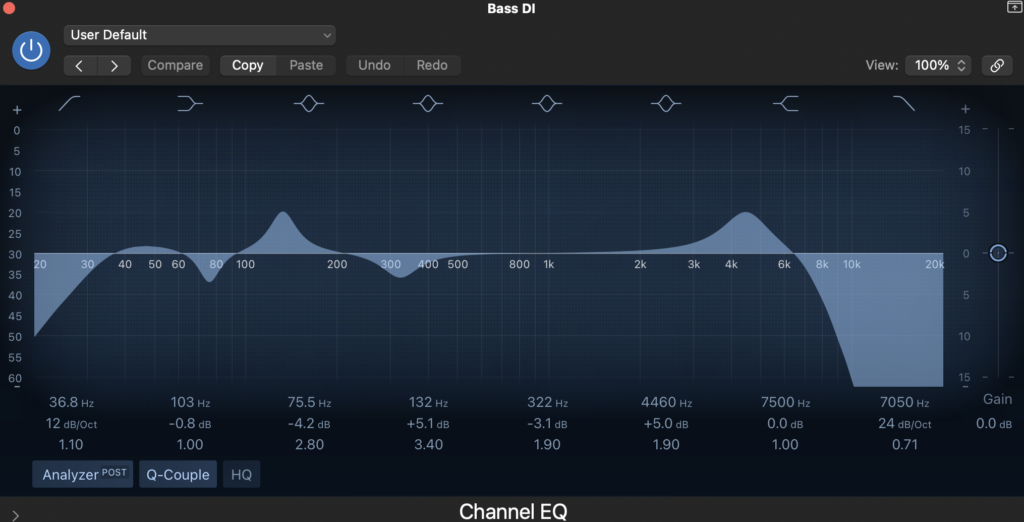
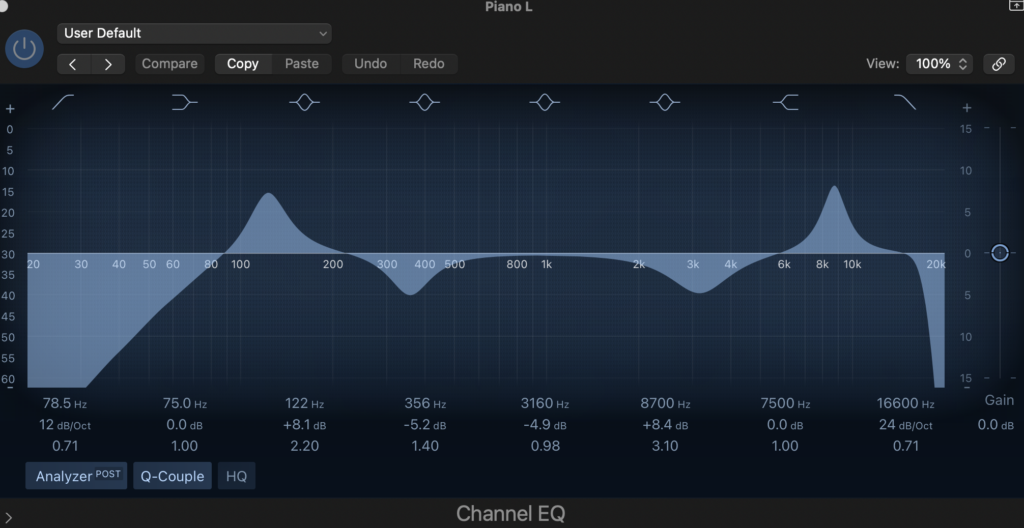
The next thing I did was EQ all the tracks. Equalisation is used to boost, reduce or cut out frequencies. It gives the instrument a better and clearer sound. I used a guide for each instrument which showed me a common EQ that producers use. I used this combined with my ear to EQ all the tracks.
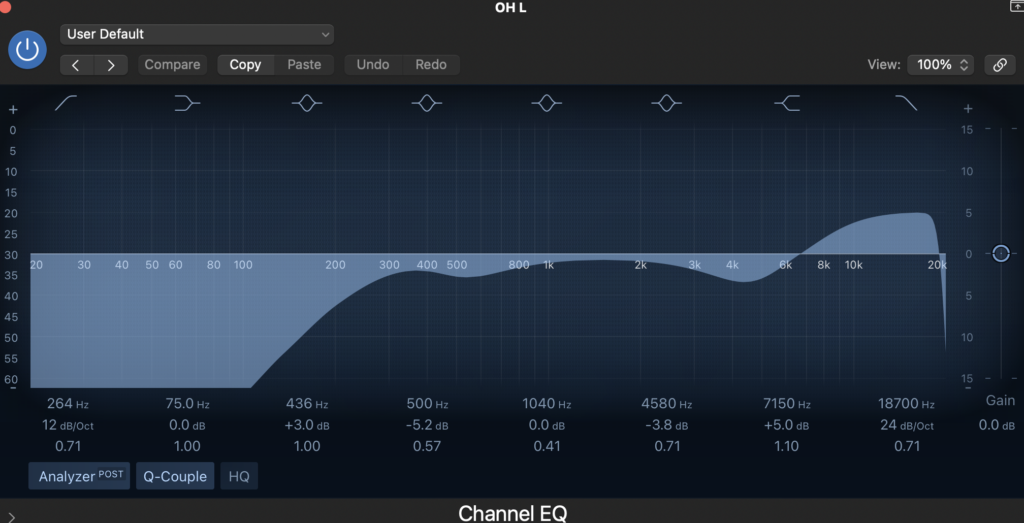
Here are images of the EQ for each track.
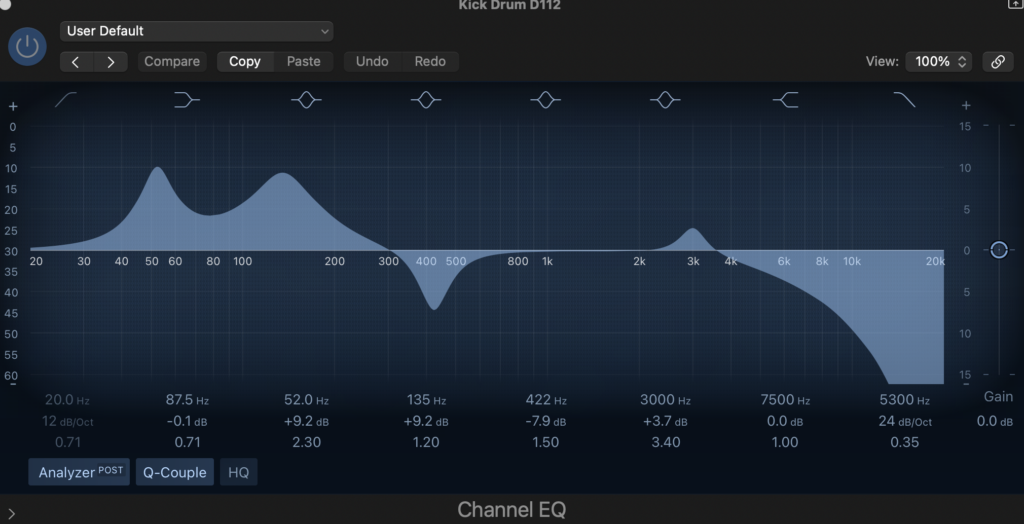

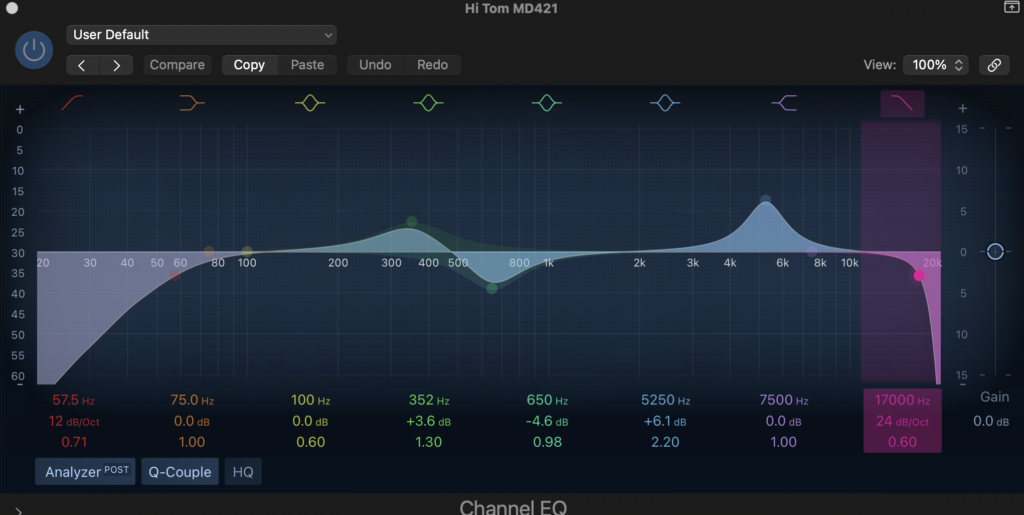
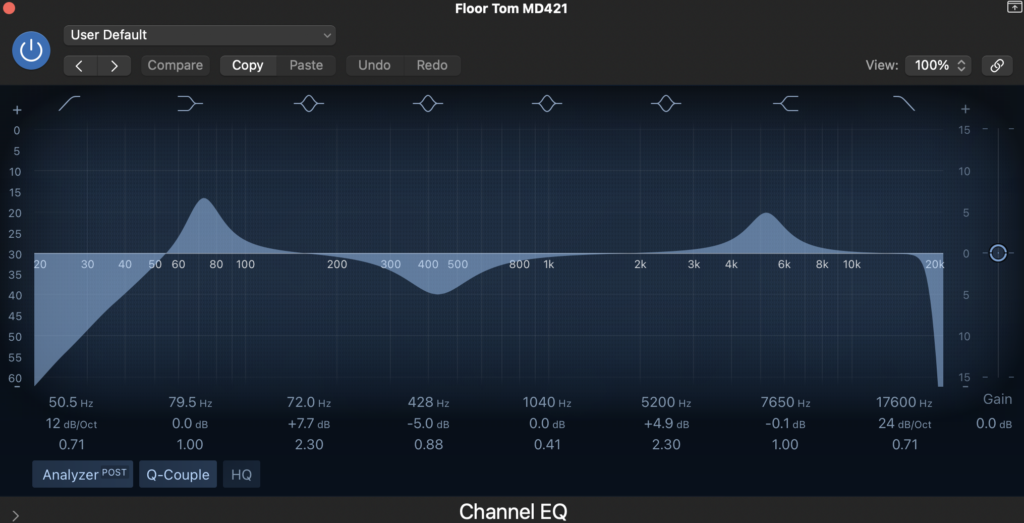
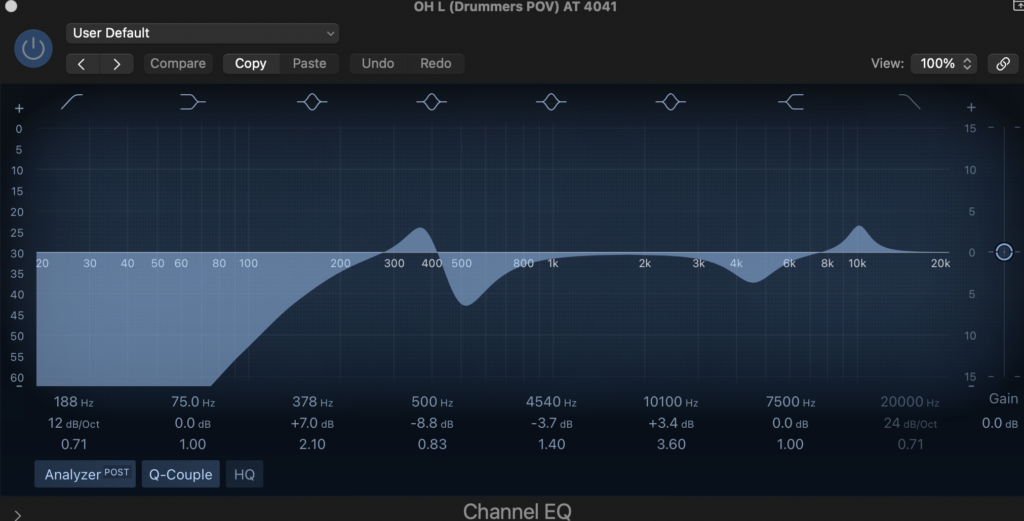
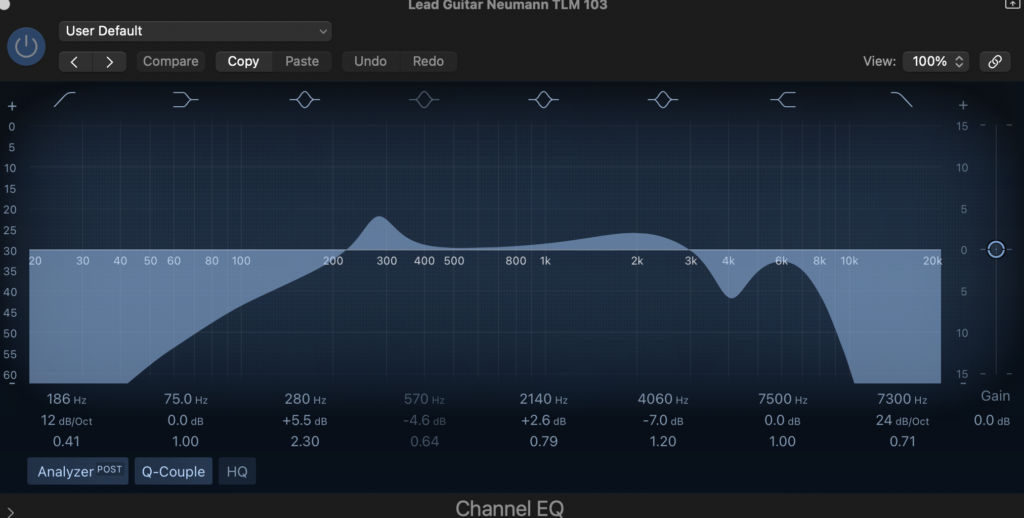
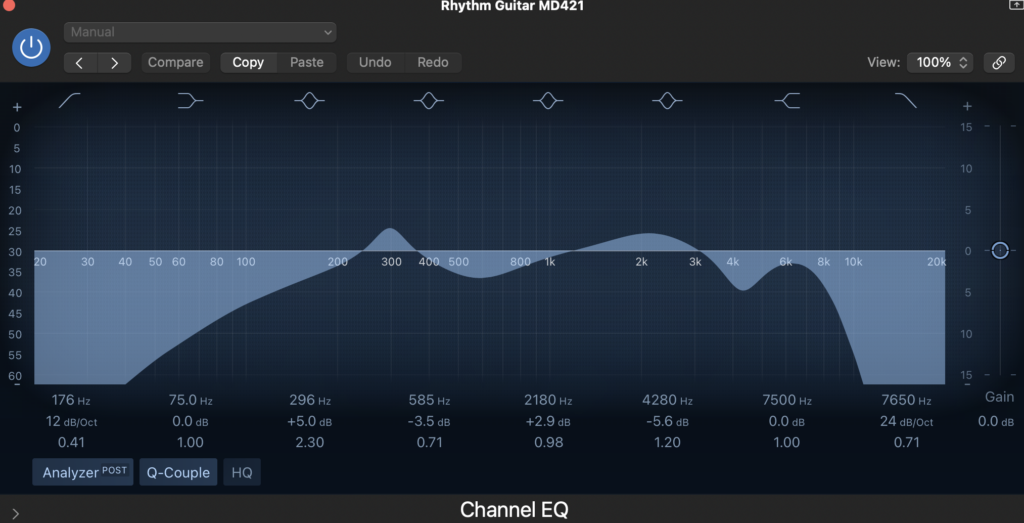
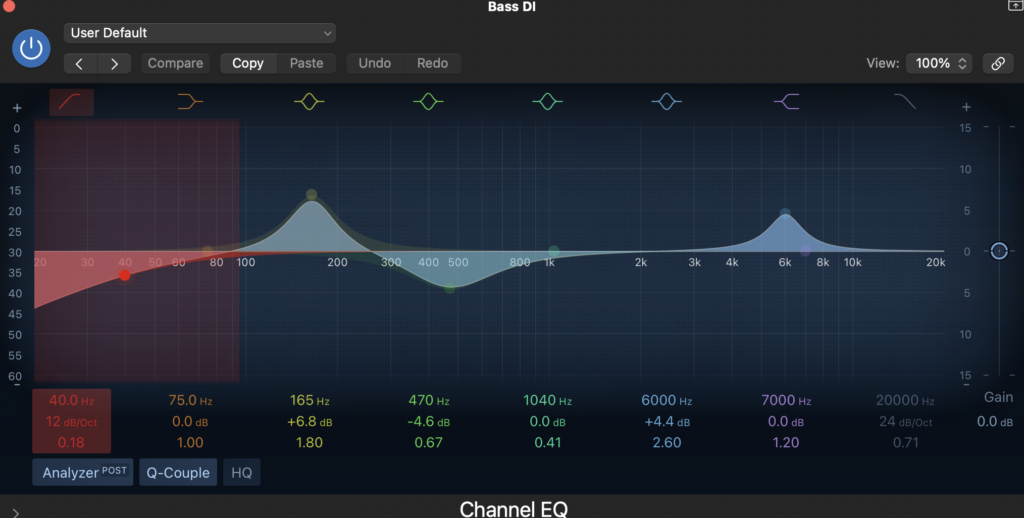
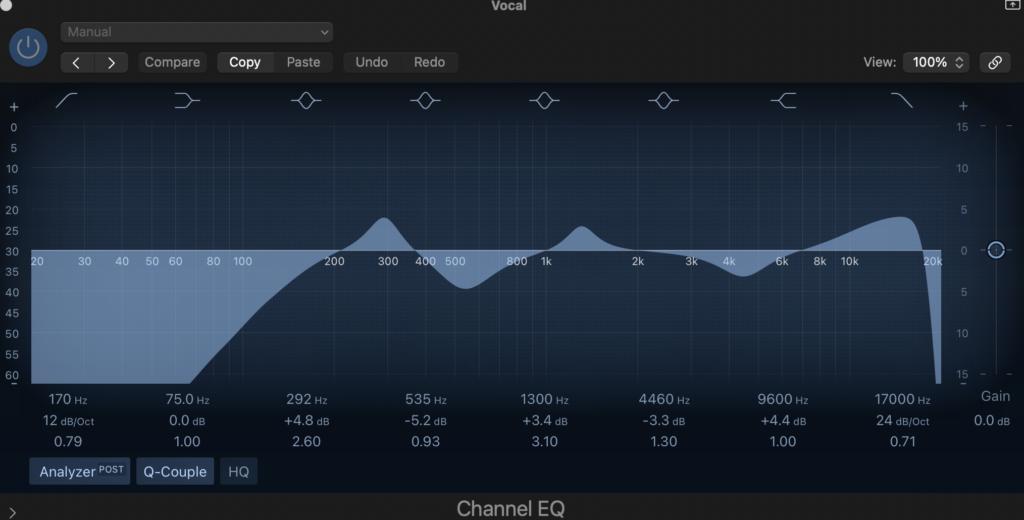
The EQ is the same for both overheads, and both vocals.
These are the two mixes before I mastered it.
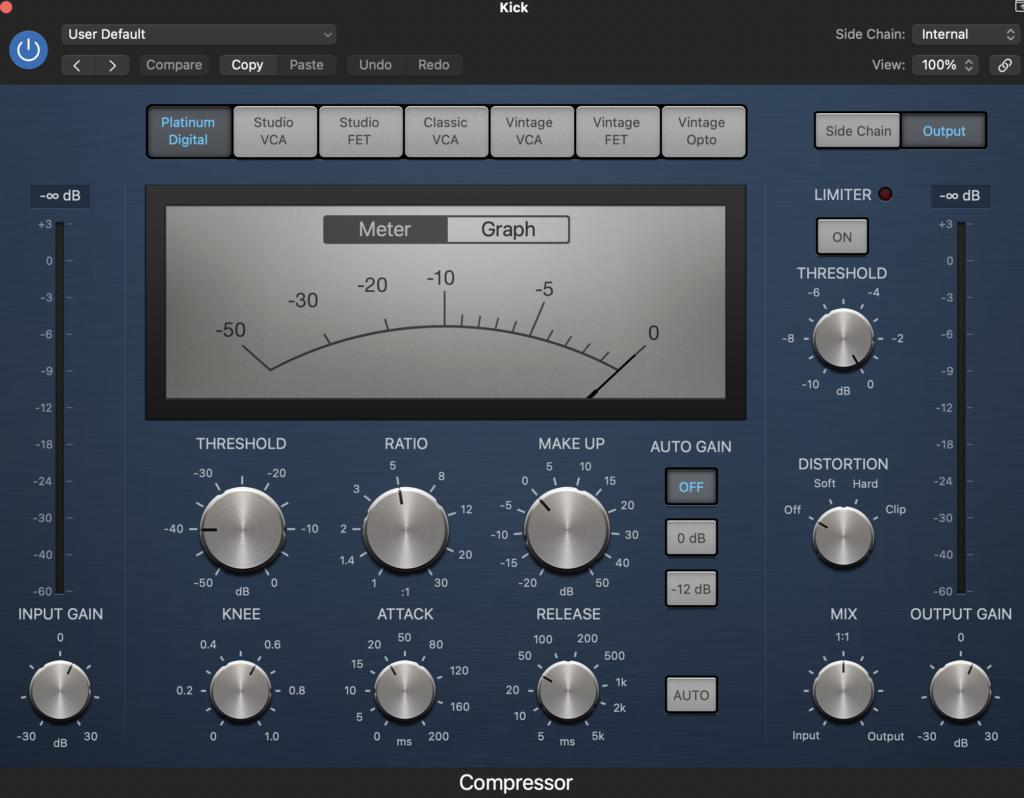
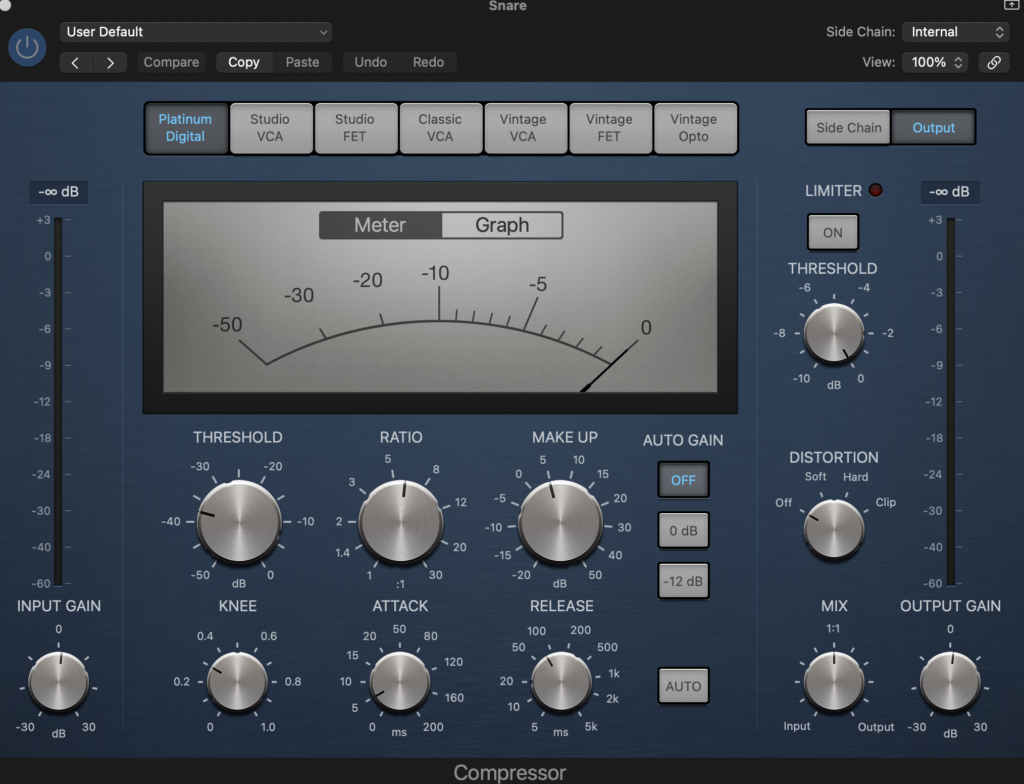
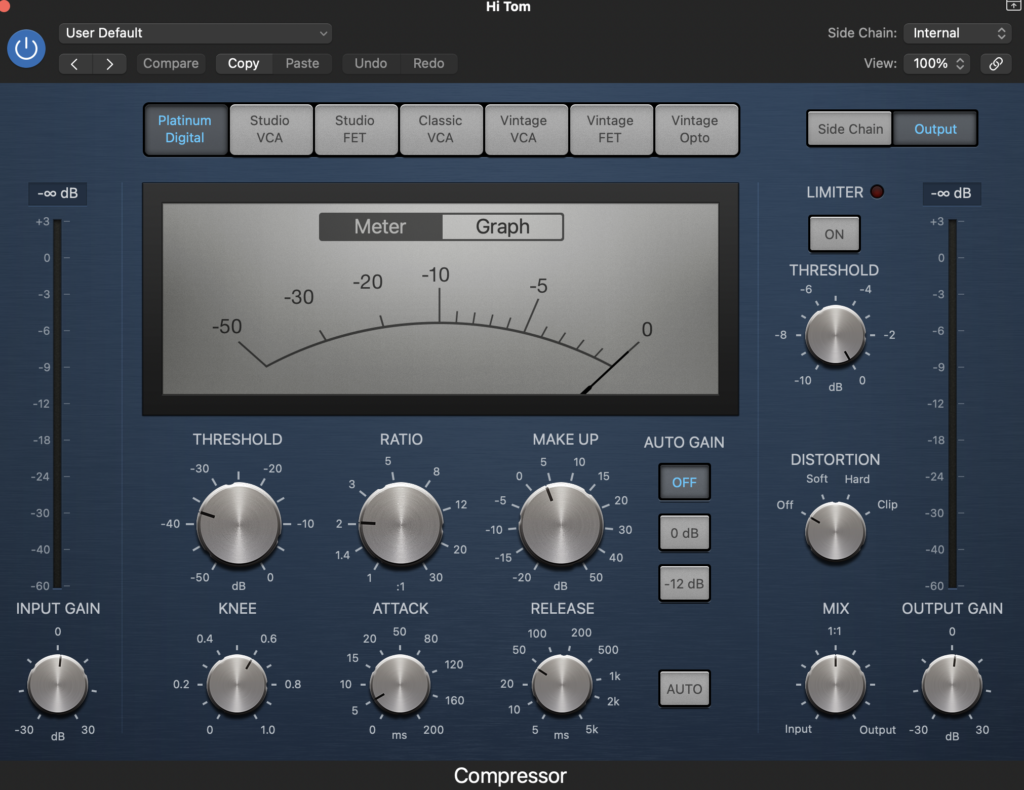
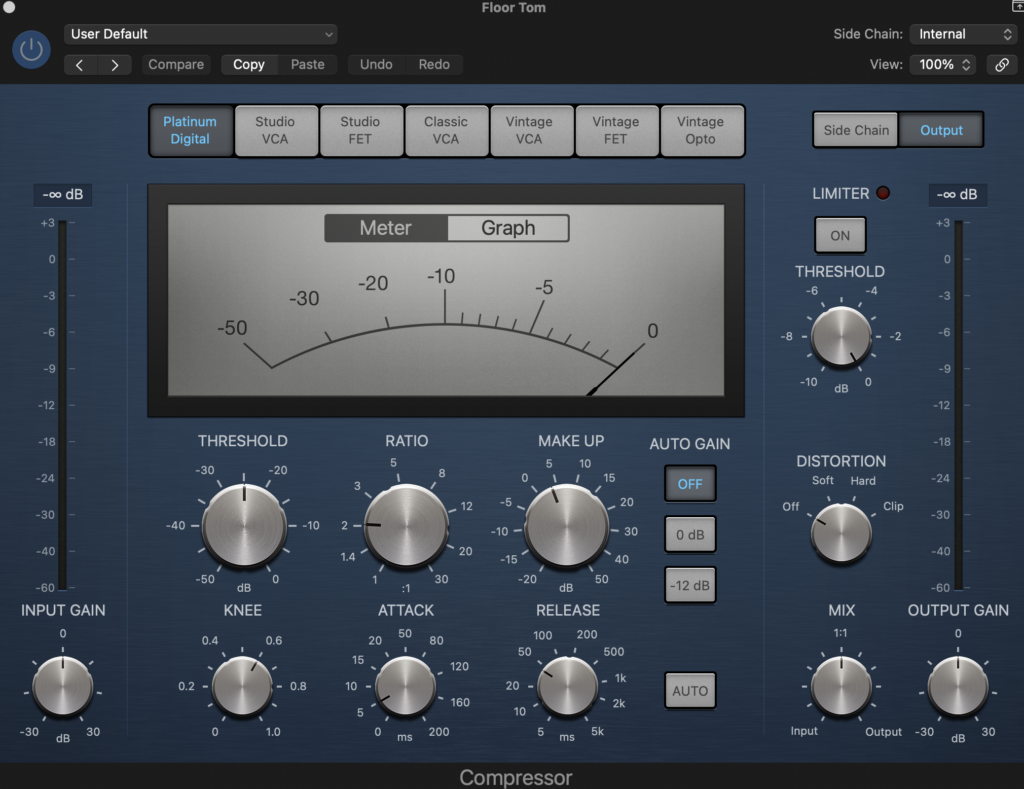
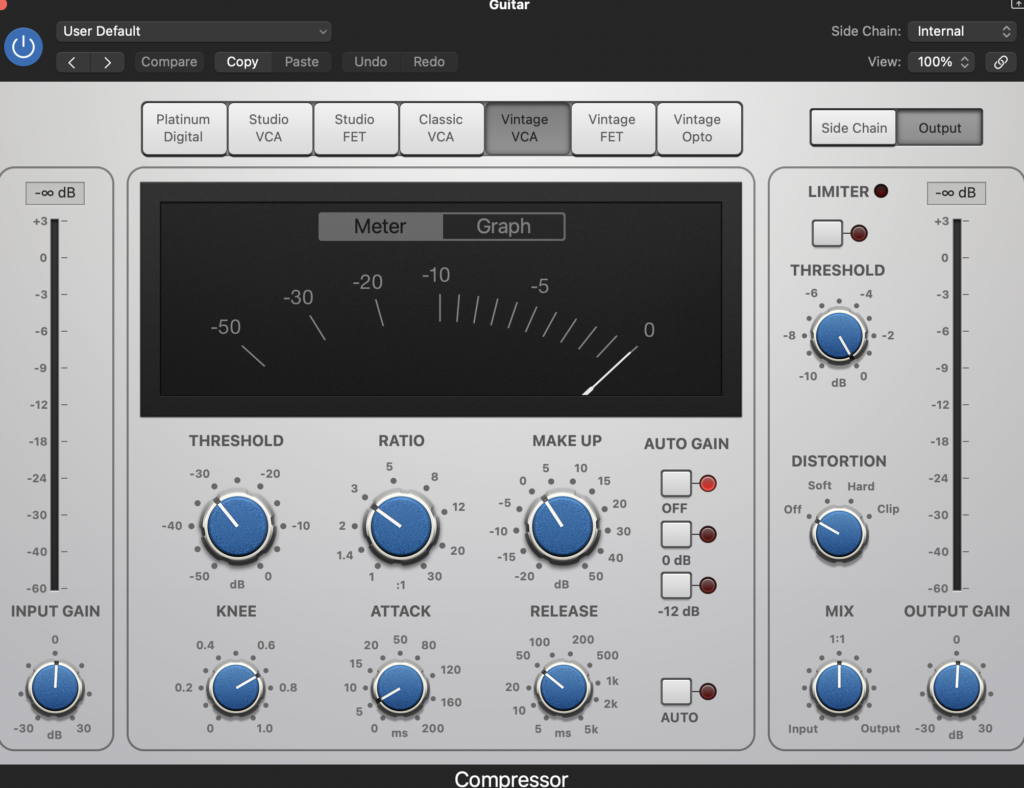
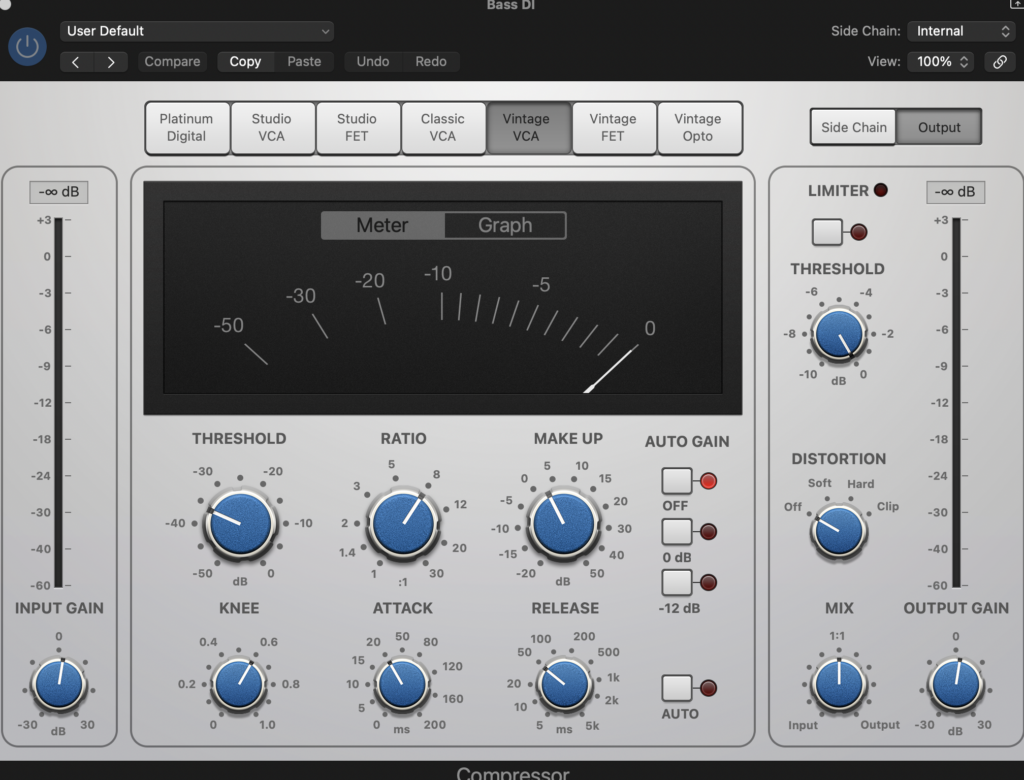
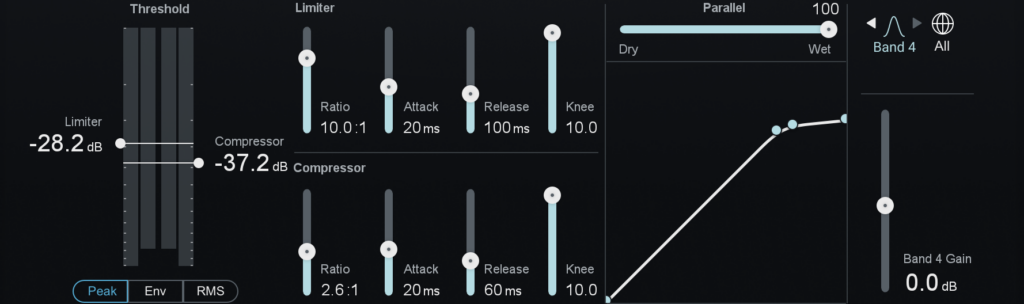
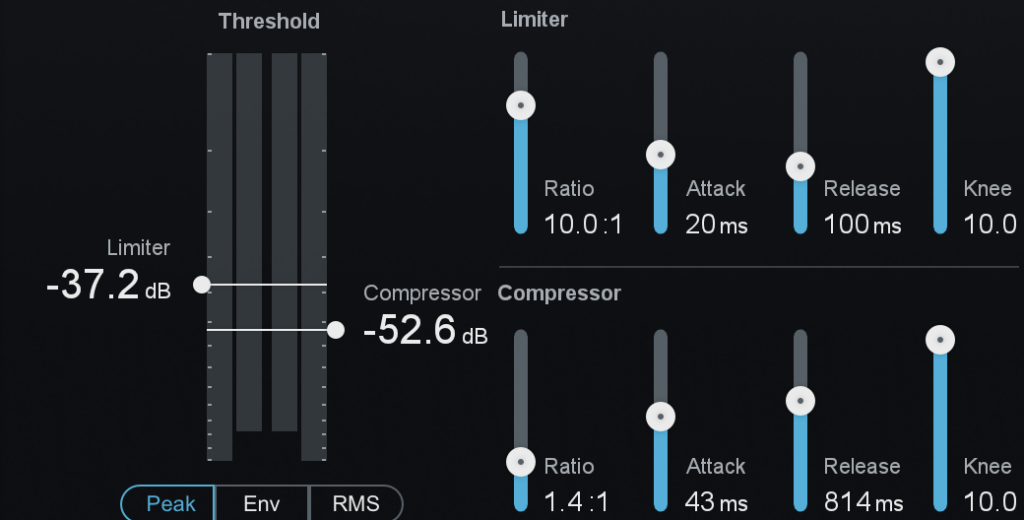
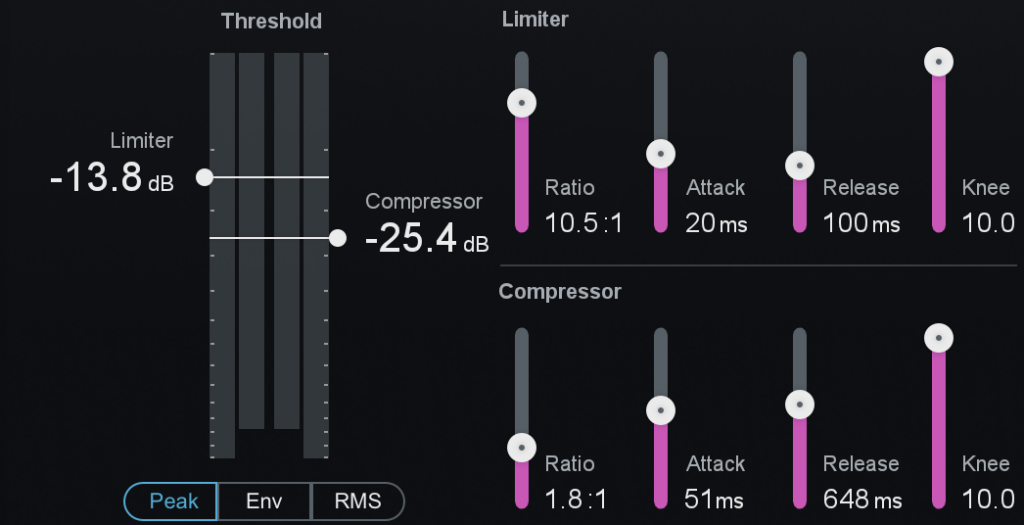
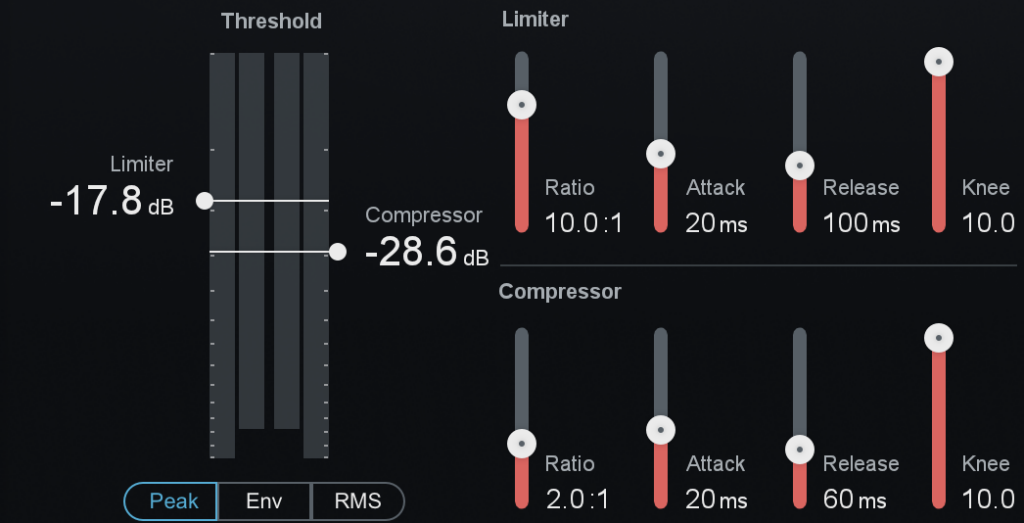
I then compressed all the tracks. Compression is used to control the dynamic range of a track. I used downward compression to reduce the highs of each track so the levels were consistent throughout. The threshold determines the volume level of when the compressor will kick in, ratio determines how much volume is being reduced, and make-up makes sure you don’t lose any of the volume that is reduced by the compressor. I didn’t understand compression before I mixed these tracks, so I used a guide to help me understand how it works and to see a common compression that producers use. The vocals needed it the most as vocals tend to go up and down in dynamics the most.
Here are images of the compression.
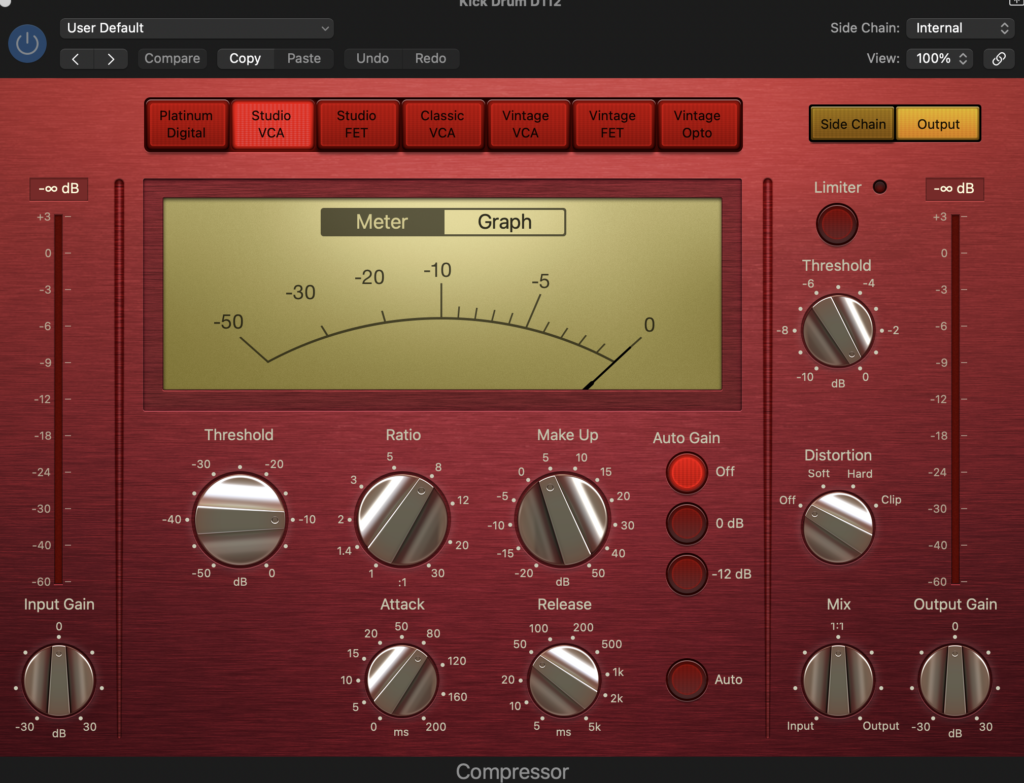
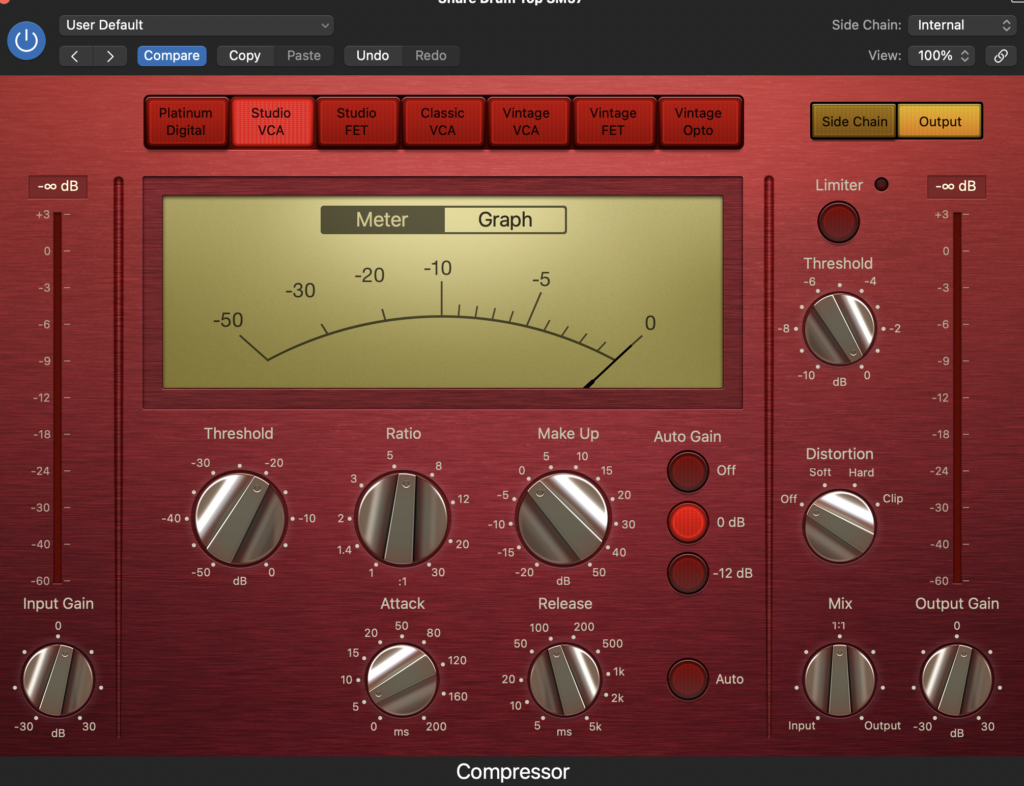
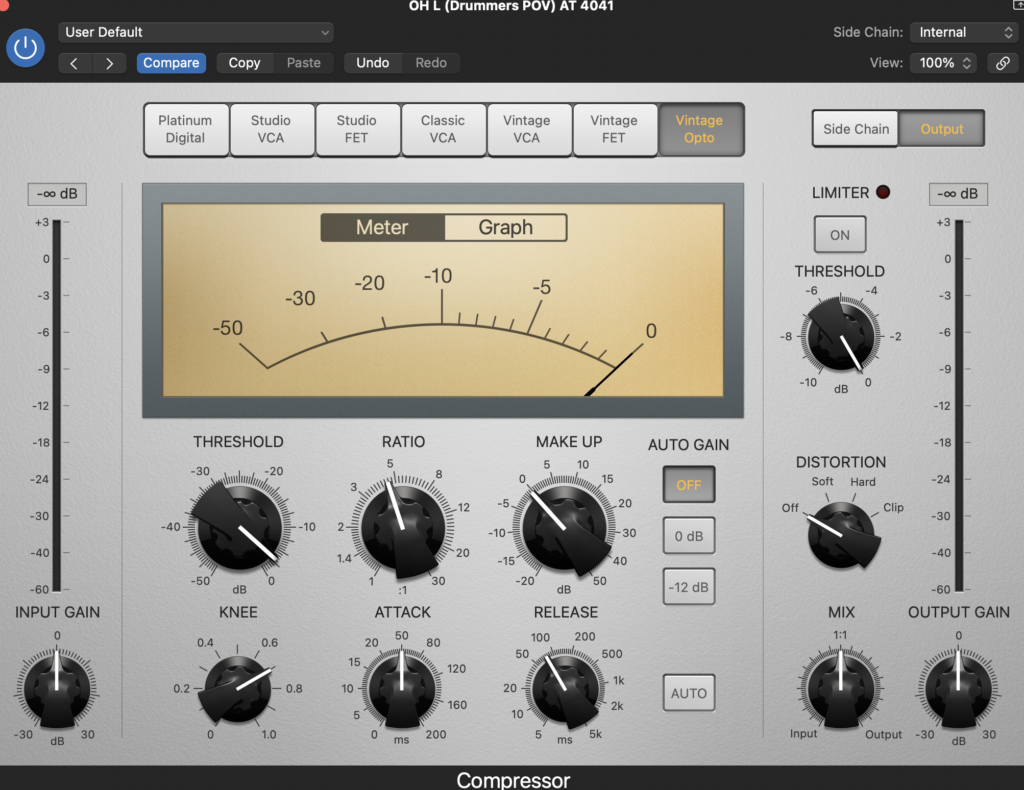
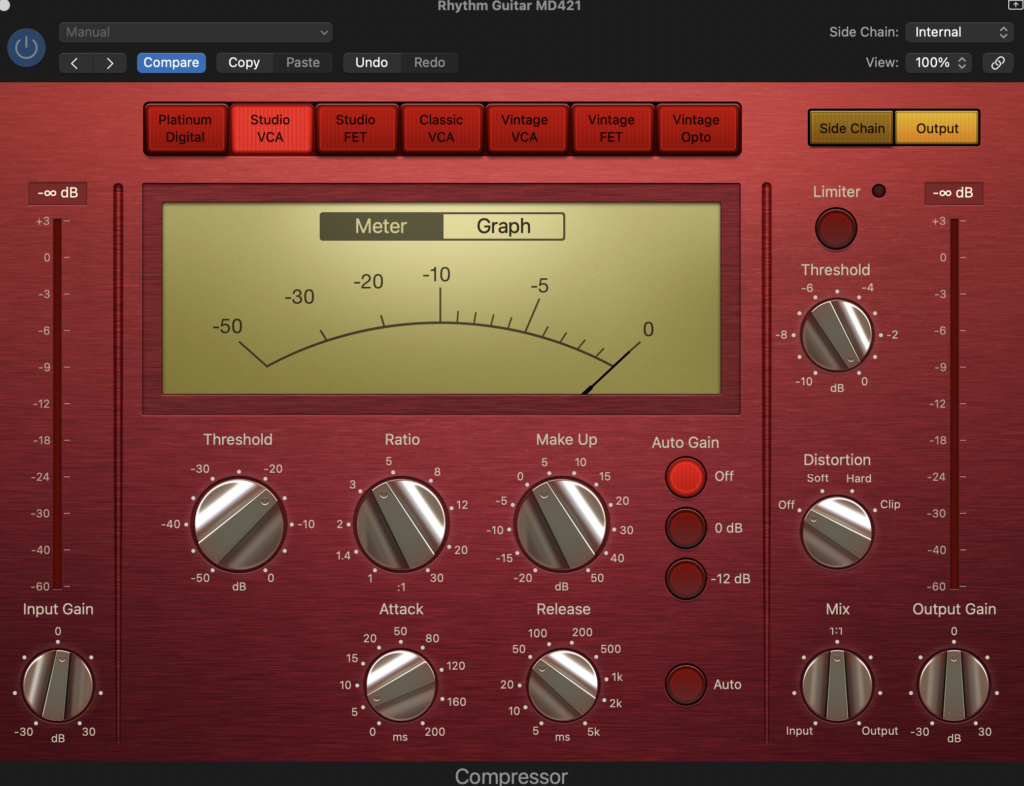
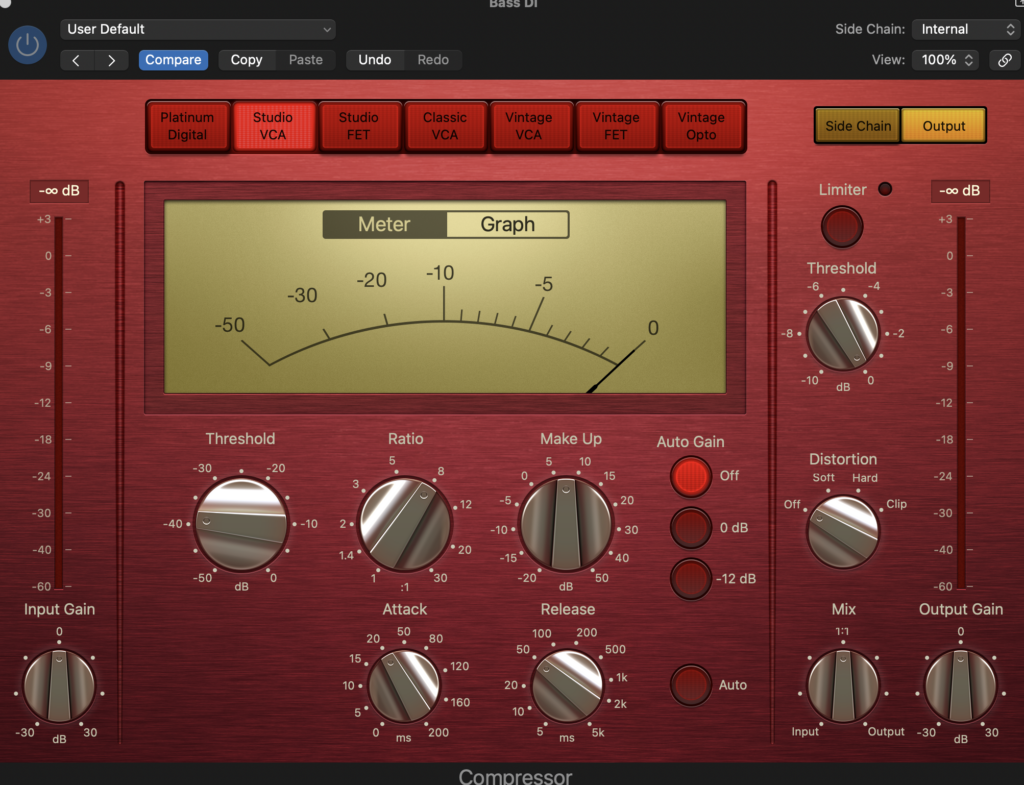
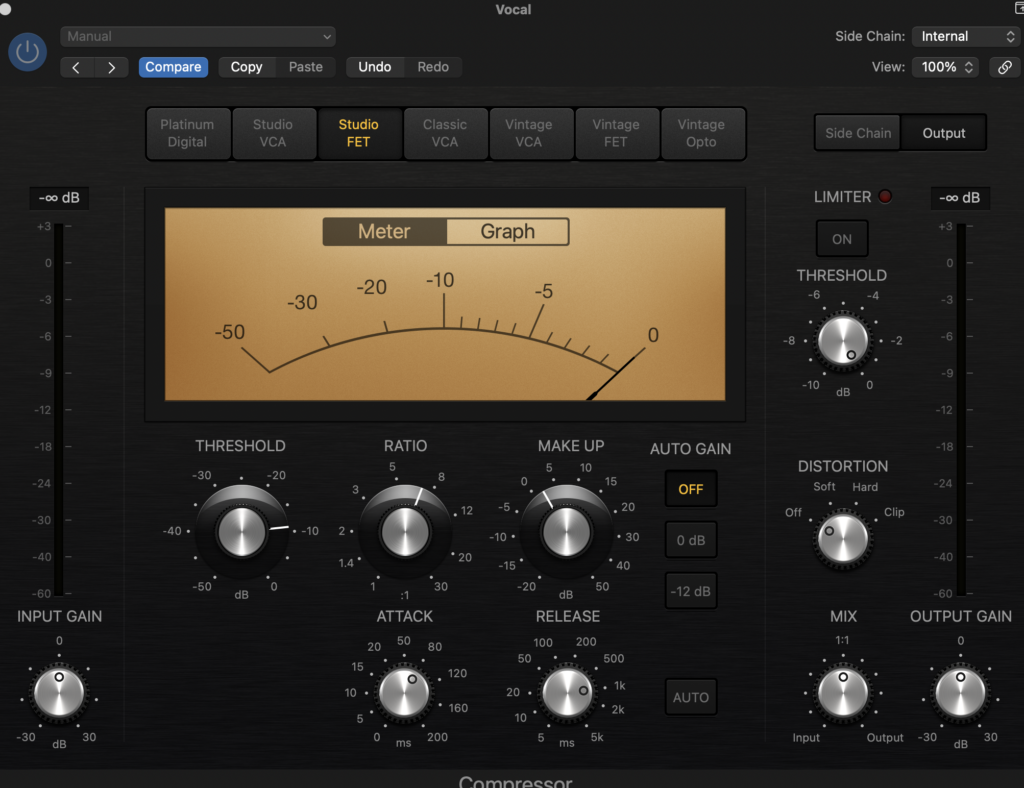
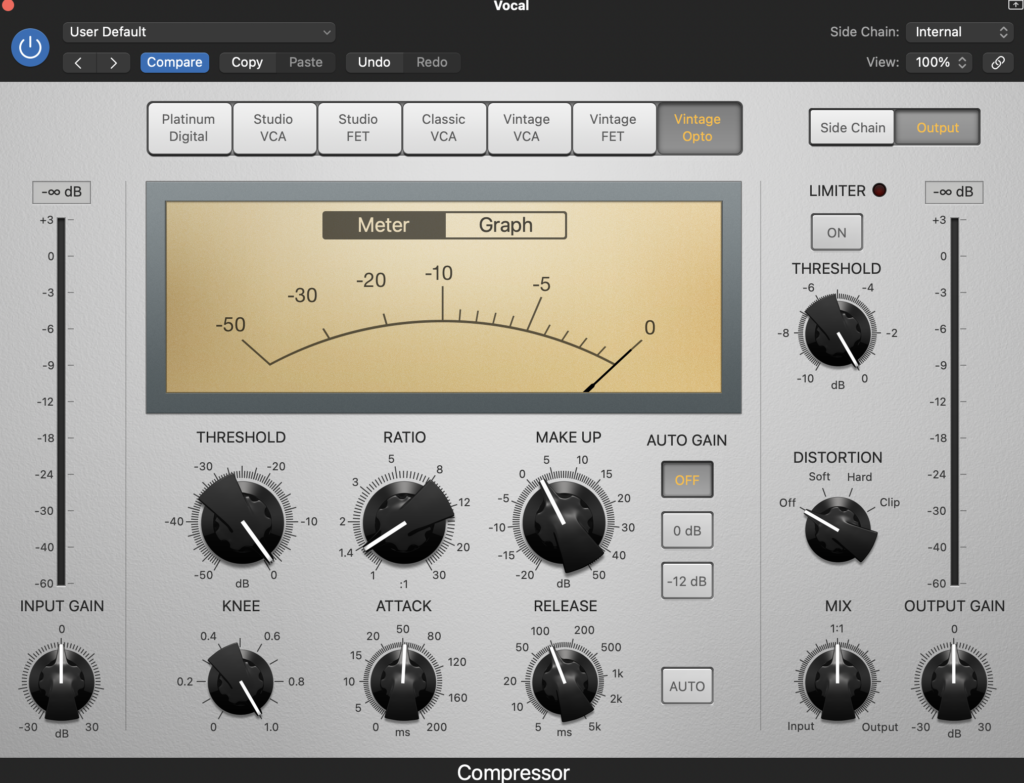
The compression is the same on the two overheads, two vocals and on both guitars. I used two compressors on the vocals to give it more volume and sound nicer.
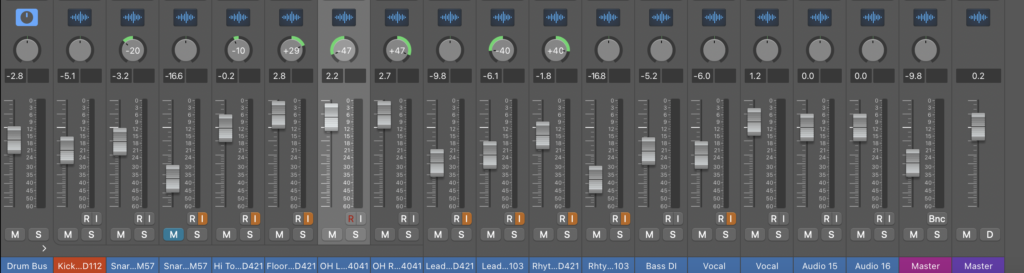
Next, I sorted the volume levels so you could hear everything as clearly as possible. I did have some issues with this as the lead guitar’s recording is much louder than the rhythm, and louder than anything else really. The lead guitar is the prominent part of the mix as the recording was so loud, whereas the vocals should be, this is due to his amp volume being too loud when recording. The vocals are also really quiet in the verses. To fix this I used automation. In the verses the lead vocal track goes up in volume and then goes back down for the choruses. I also used automation for the guitars in the solo. I used it to up the volume of the lead guitar in the solo so you can clearly hear it. I also used automation to change the panning of both guitars so they are in the middle of the panning mix. It would sound weird if the solo was on one side of the mix. They then go back to the original position when the solo is finished.
I panned it before I did the automation. I did realistic panning, so how it would be if you heard it live. The vocals, bass and kick drum are in the centre of the mix, the snare and hi tom slightly to the left, the floor tom to the right a bit more than the hi tom, the overheads are panned quite far to the left and right equally, and the guitar are panned a similar way to the overheads. I used a guide and my own ear to help me get the best panning.
Here are images of the volume levels, panning and automation.
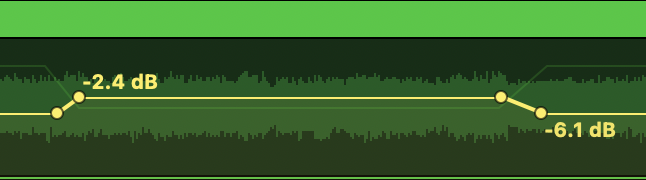
Lead guitar volume automation
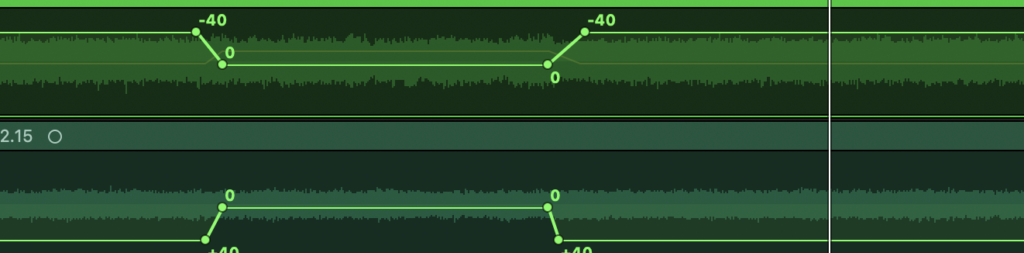
Both guitars panning automation

Lead vocal volume automation, I made it louder in the outro as the vocal is even quieter than the verses.
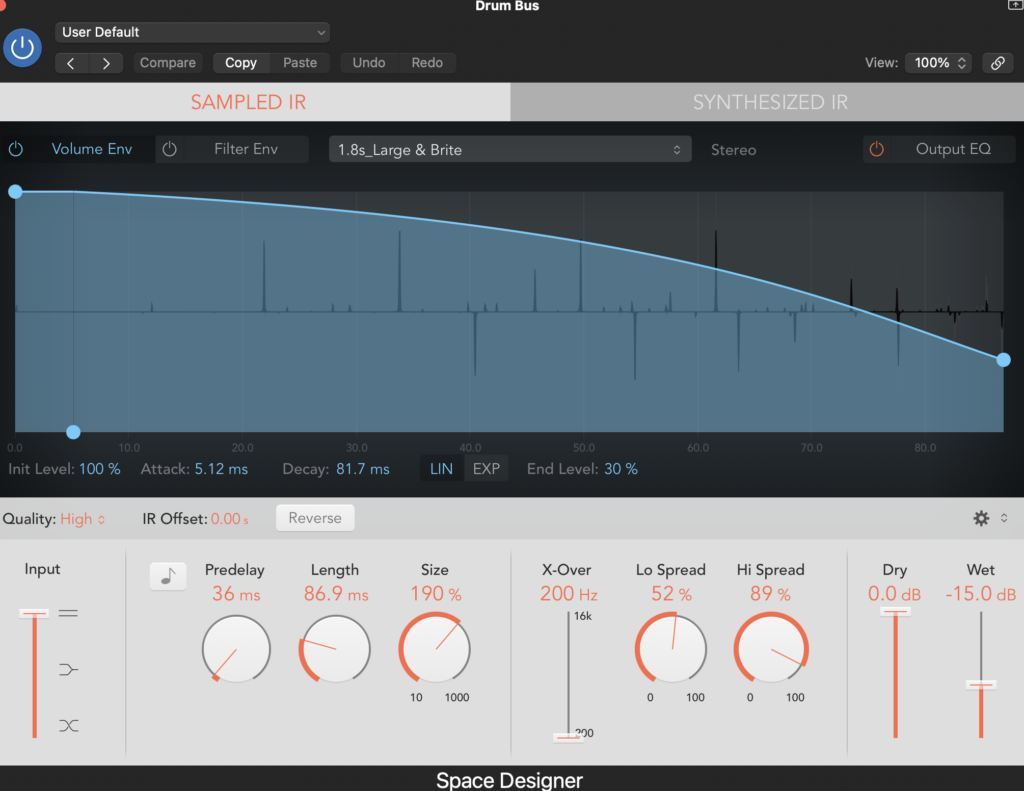
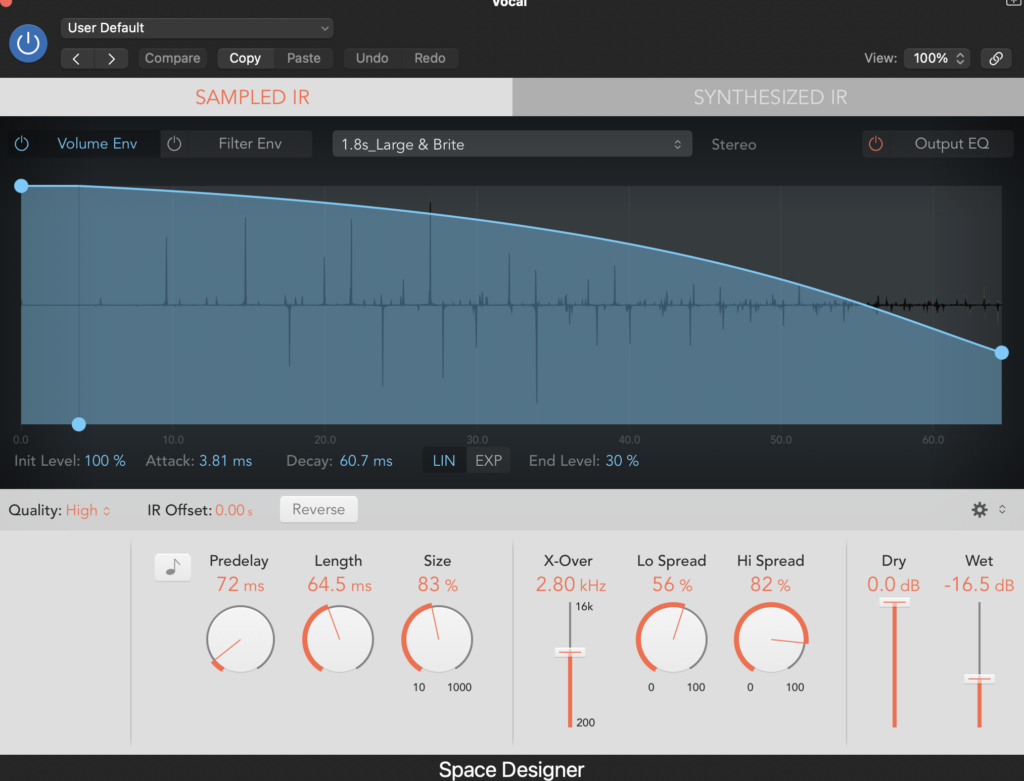
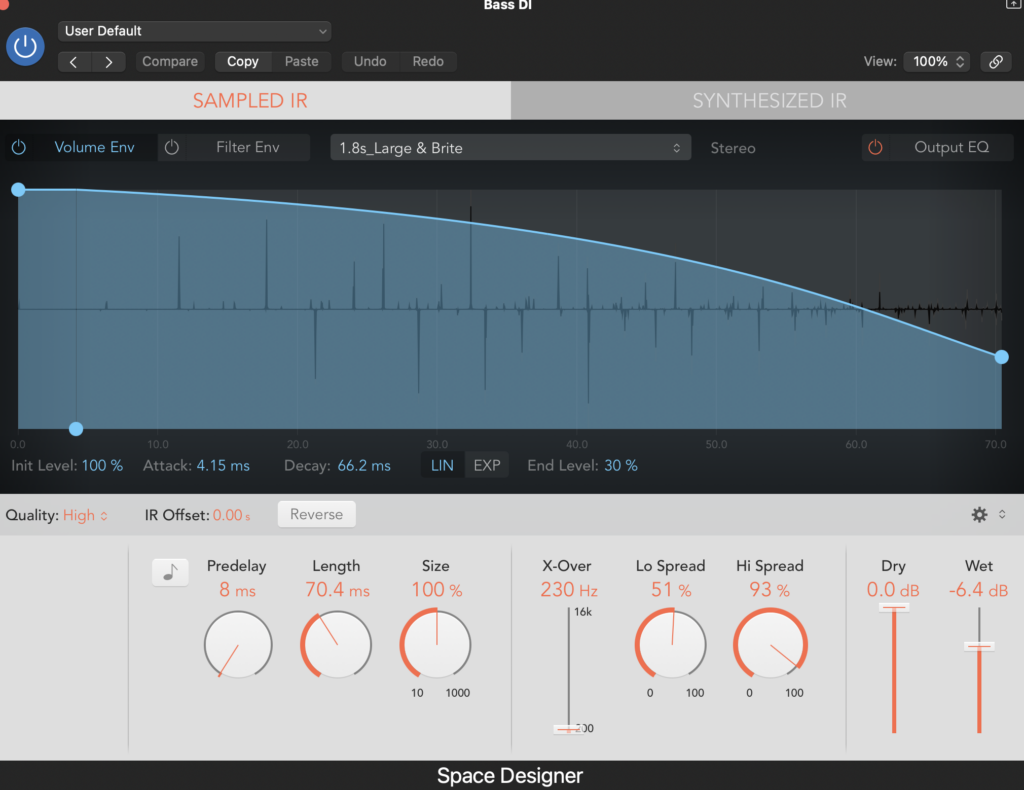
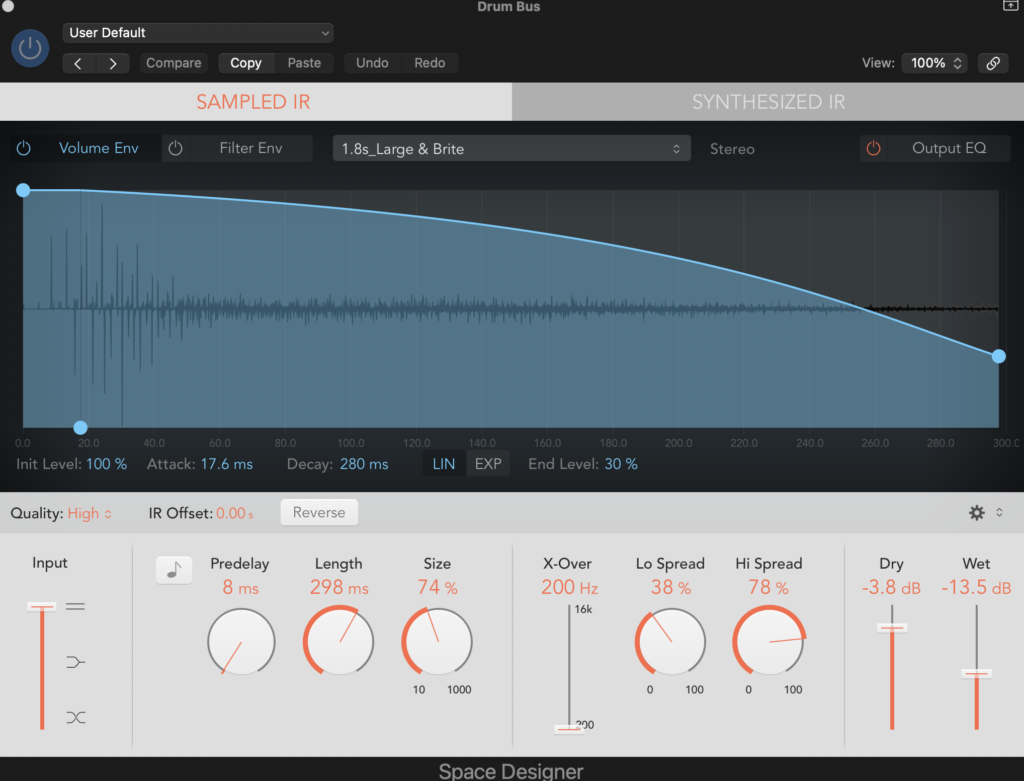
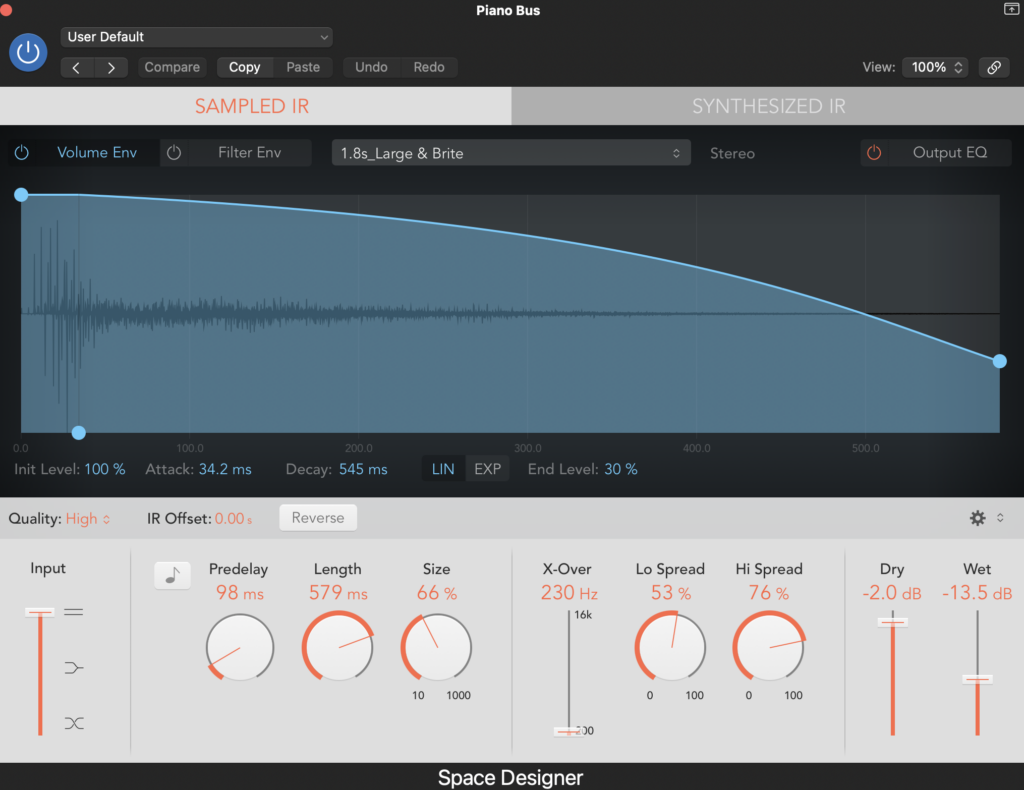
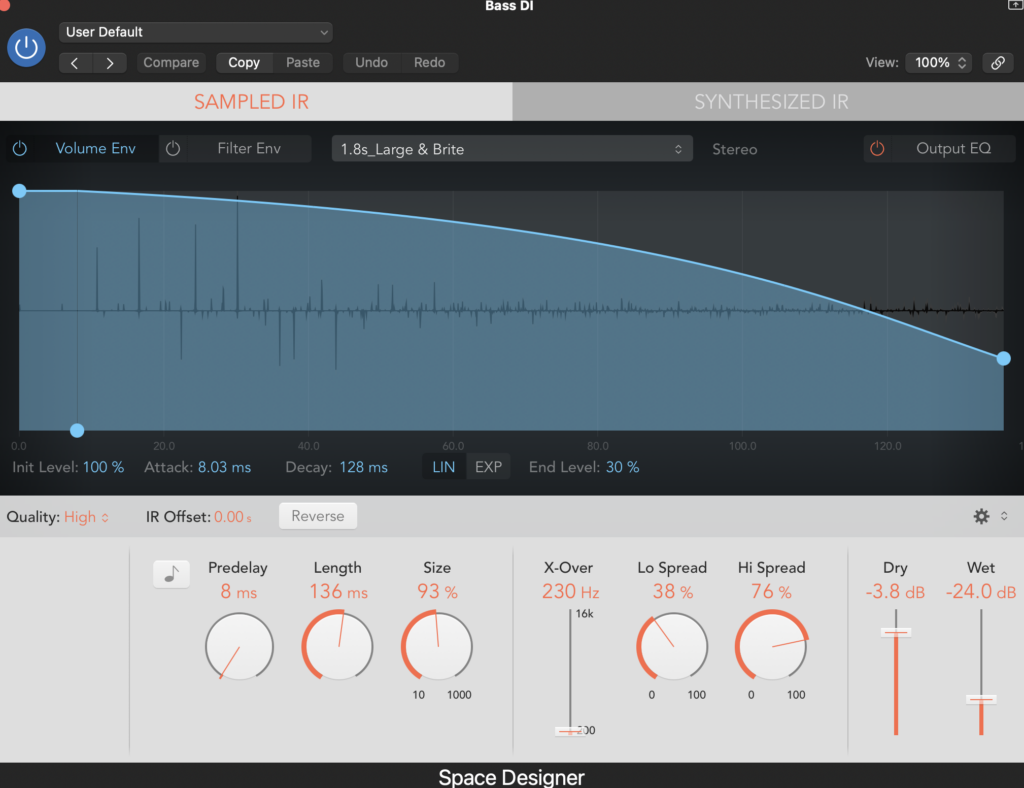
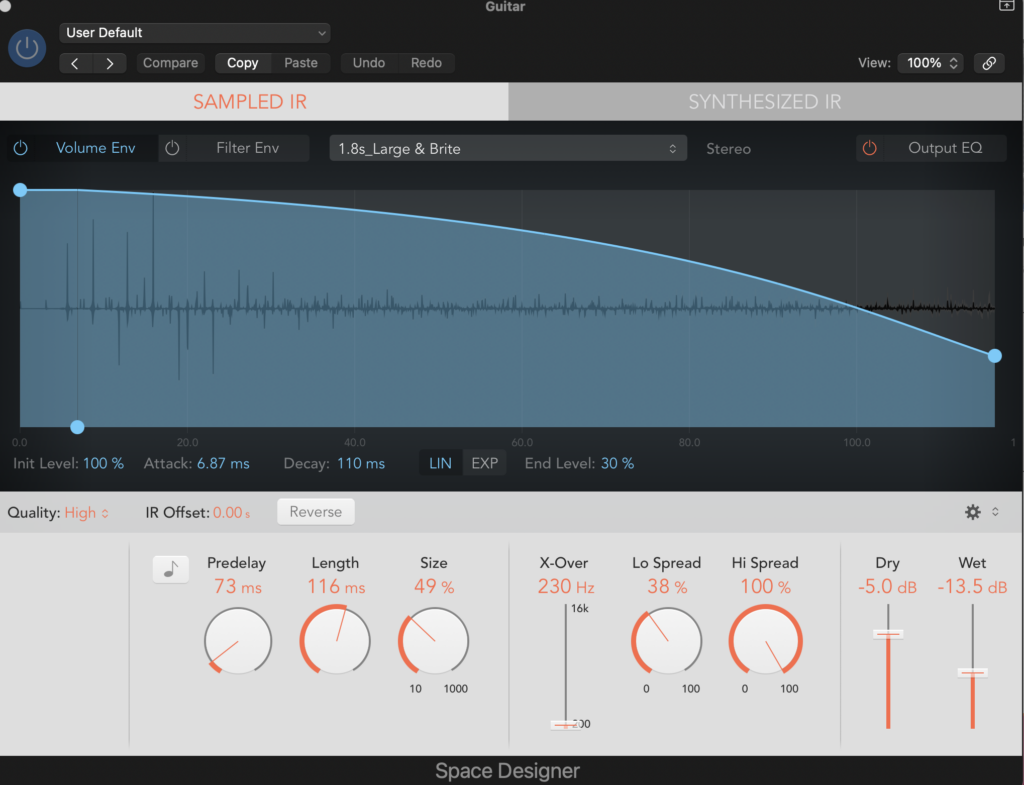
The next task was putting reverb on the tracks. Reverb simulates the sound of the frequencies reflecting off surfaces. There are different reverbs to simulate different types of surfaces. I chose to use the logic reverb “Space Designer” on all the tracks I used reverb on. I used reverb on the drum bus, not each singular drum, as it doesn’t need it and it sounds good. I also didn’t put it on the two guitars, as the amps already simulated the reverb that they want. I only put reverb on the prominent vocal take, not the quieter one as I thought it didn’t need it. I used my ear to get the sound I liked the best.
Here are images of the reverb.
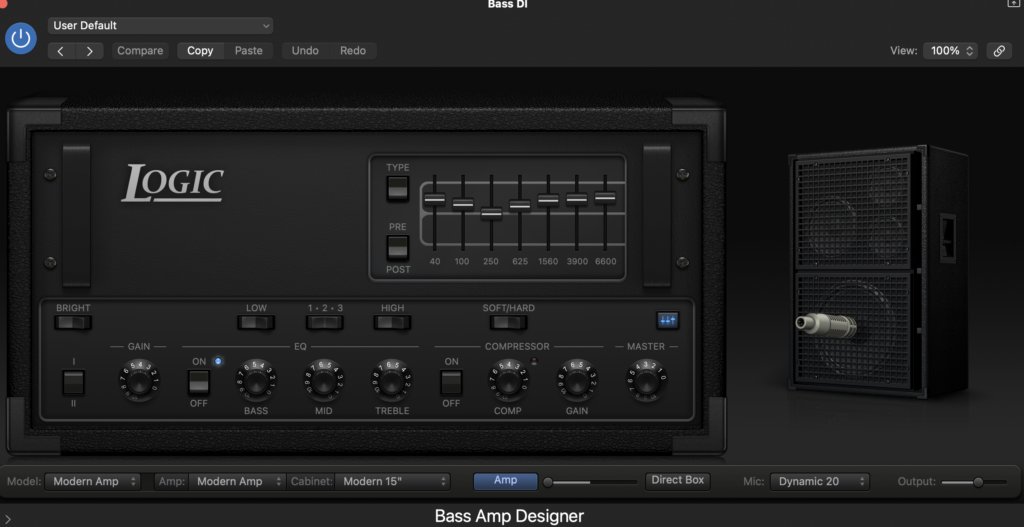
Lastly, I used an amp simulator on logic for the bass guitar. An amp simulator simulates a pedal or an effect on an amp. The reason I used this is because Oliver usually used a distortion pedal for his bass, so I used this to simulate that. He didn’t have it with him for the recording. Plus, as it was ran through a DI box, it wouldn’t have picked it up. I used the “Bass Amp Designer” effect on Logic. The reason I didn’t do it on the guitars is because they already have the tone and sound they want out of the amps and pedals they used, and they both sound good. I got the sound I want out of it by using my ear.
Here is an image of the amp.
Final mix without mastering
I then started mixing the track Easy. We chose the second take for all the instruments. The guitar is a compilation of many different takes.
I started off by cleaning up the track, the only thing to cut out was the start and the end, as instruments are constantly playing. It starts with a piano intro and the rest of the instruments come in after a drum fill. I then coloured the tracks for an easier viewing. I also created a drum bus and a piano bus, as there are two piano tracks, for later use.
Here is what it looked like after this.
Then I used a noise gate on most of the tracks, using the same process as Take Me Away. The piano and bass was ran through a DI and was playing constantly throughout so they didn’t need it, however the guitar did as there was some unnecessary quiet noises from the instrument.
Here are images of the noise gates
I then used EQ on every track, the same way as my first mix.
Both overheads have the same EQ, and both piano channels have the same EQ as each other.
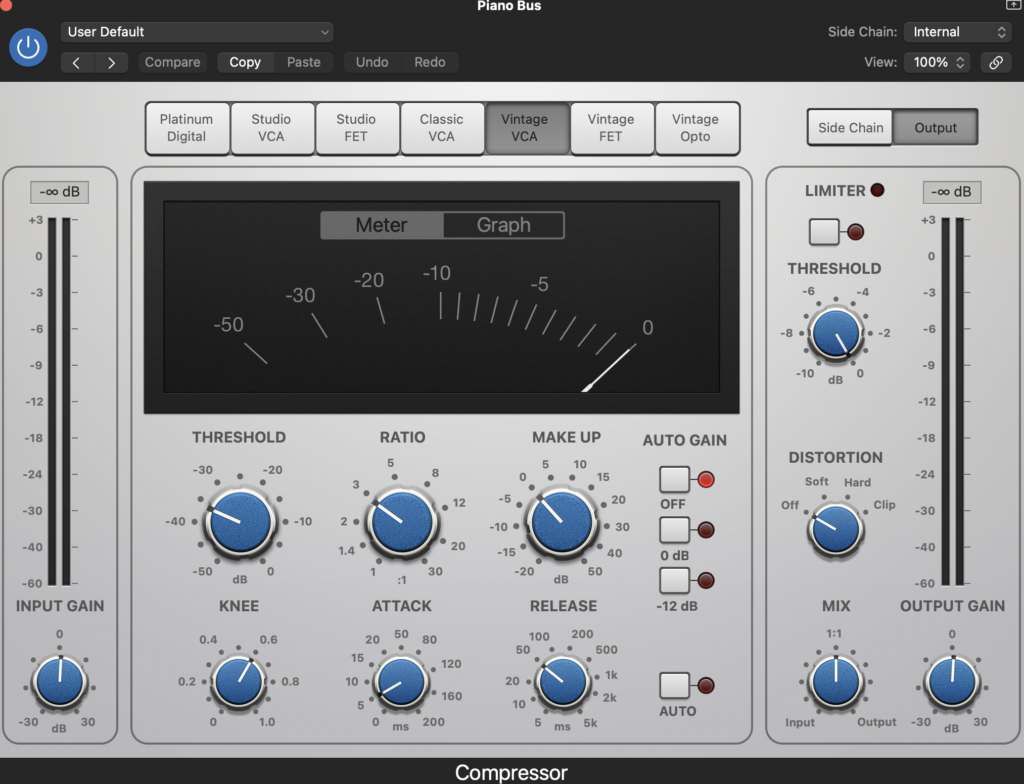
I then compressed it using the same process as the previous mix. I compressed both of the piano takes at once using the piano bus. I chose to not compress the overheads this time as it wasn’t making an audible difference.
Next, I changed the volume levels of the track so it all sounded good. Not much change was needed, as it is a much quieter recording than Take Me Away. No automation was needed here.
I once again chose realistic panning. The bass and kick drum in the middle, the guitar was also in the middle as there is only one guitar track, the snare to the left, the hi tom a bit less to the left, the floor tom to the right, and the overheads panned quite heavily to the left and right, and the piano panned at a medium range to the left and right.
Here is an image of the volume and panning.

I used the space designer reverb again. I used drum bus to apply the reverb to all the drums at once, and the piano bus to apply the reverb both tracks at once. I used my ear to decide the amount of reverb I wanted on the tracks.
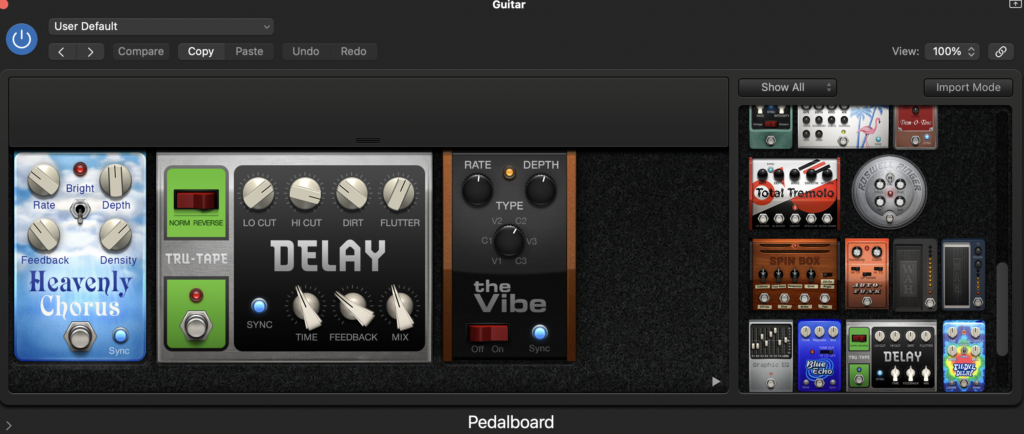
Unlike Take Me Away, the guitar wasn’t recorded with an amp with effects on it already. So I needed to add my own as the guitar sounds flat without any effects. I used the Logic Pedalboard, which is the same idea as the amp I used on Take Me Away, instead it simulates a pedal board. and added a chorus called “Heavenly Chorus”, and delay called “Tru-Tape”, and a pulsator called “the Vibe”.
Final Mix without mastering
MASTERING
To master these tracks I used Ozone Izotope 10, which is a mastering plug in. This plug in is the industry standard for mastering. As college only has the plug in on Ableton on one computer, I had to bounce it as a WAV, then put it onto Ableton. I did all of the mastering using my ear to make the changes.
Here is how it looks on Ableton

Here is the template and the effects that I used to master.

The EQ is the same as the EQ in mixing, however, as it is affecting the whole track not just one singular instrument, it should only be a small change.
Take Me Away EQ
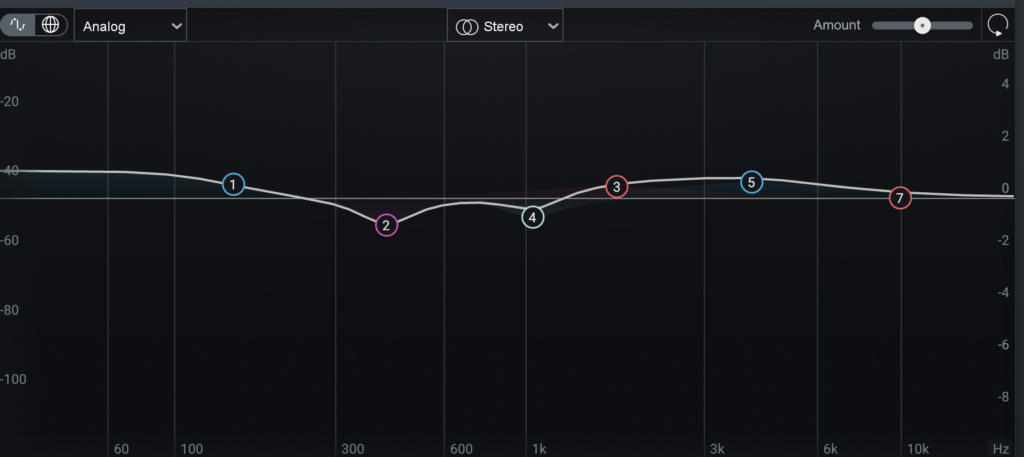
Easy EQ
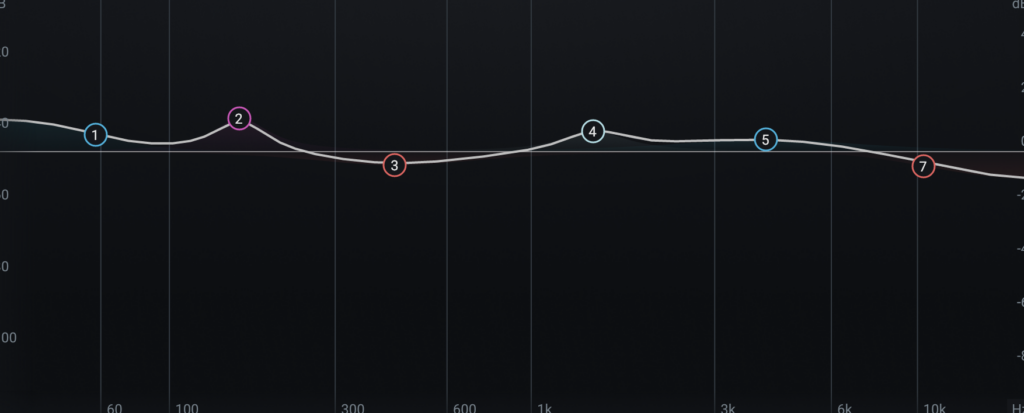
Dynamics is the next thing I did, and this is compression for the whole track. It is split up into different frequency splits, I split it into 4, sub bass, bass, mids, and highs. There are many different ways to split it up, such as low mids and high mids.
This is the frequency splits I used.

I then compressed each different frequency split.
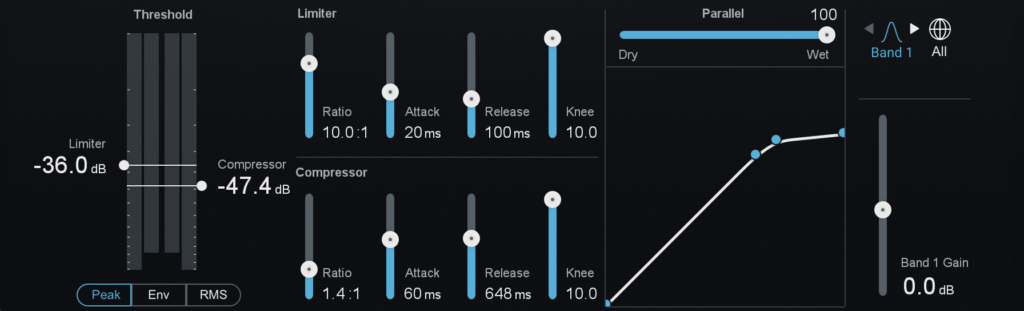
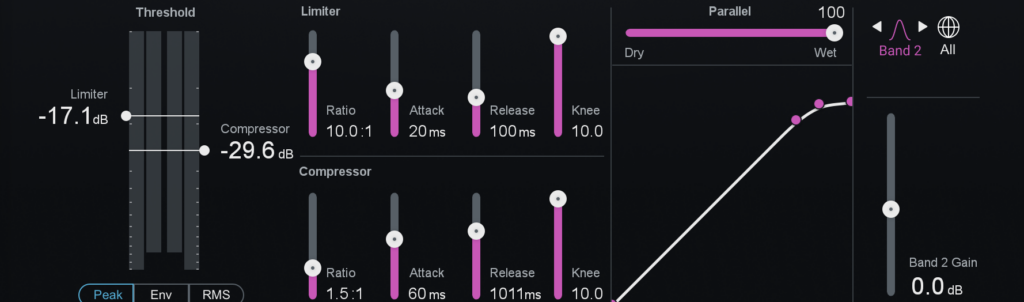
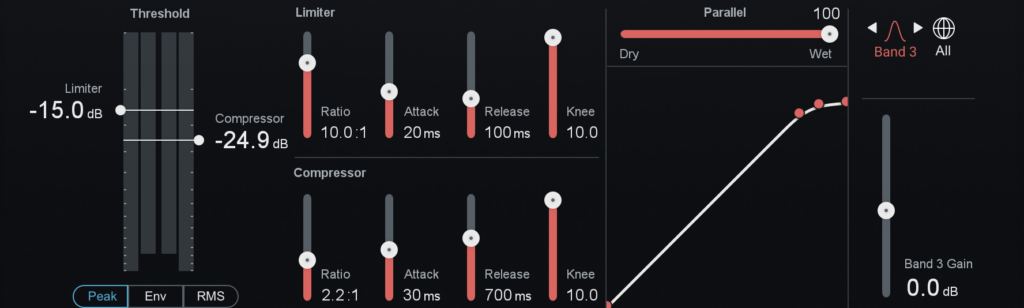
Take Me Away
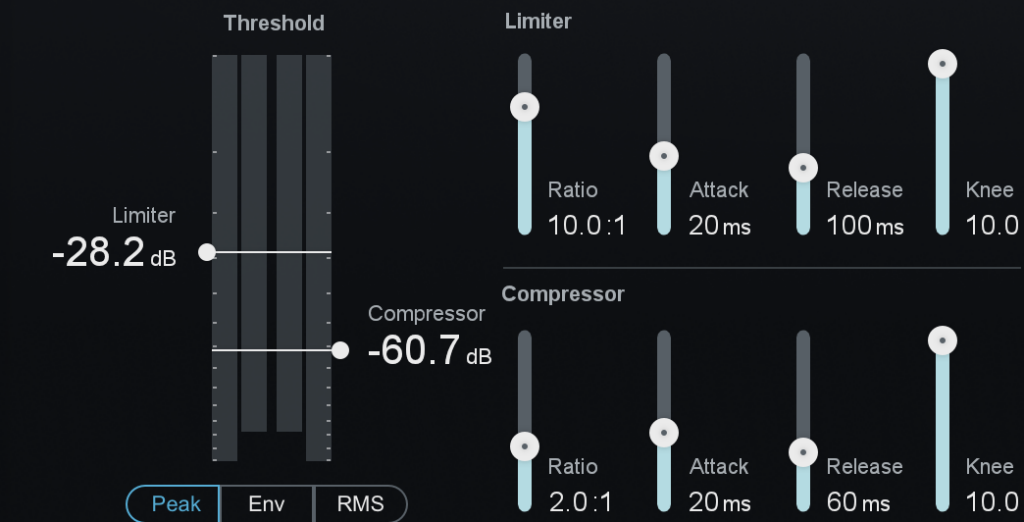
Easy
I then used an exciter. This simulates putting the track through a high pass filter and then adding slight distortion, which makes it sound more vibrant.
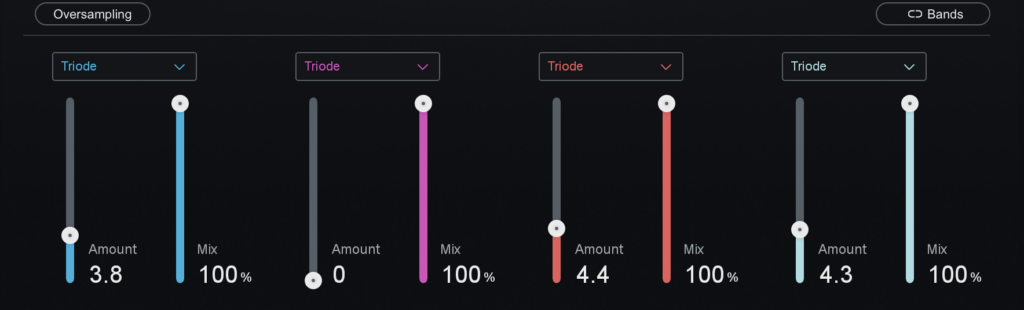
Take Me Away

Easy
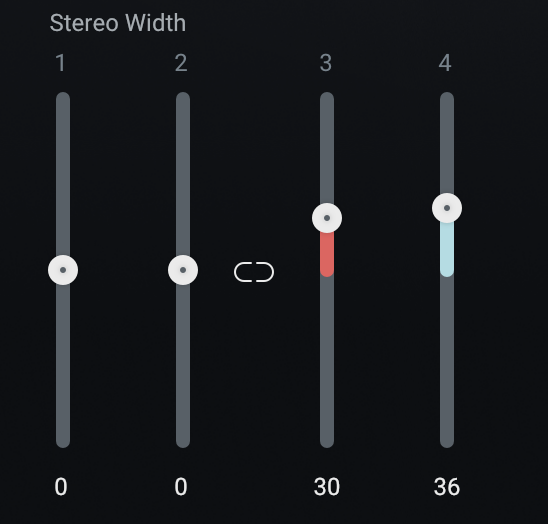
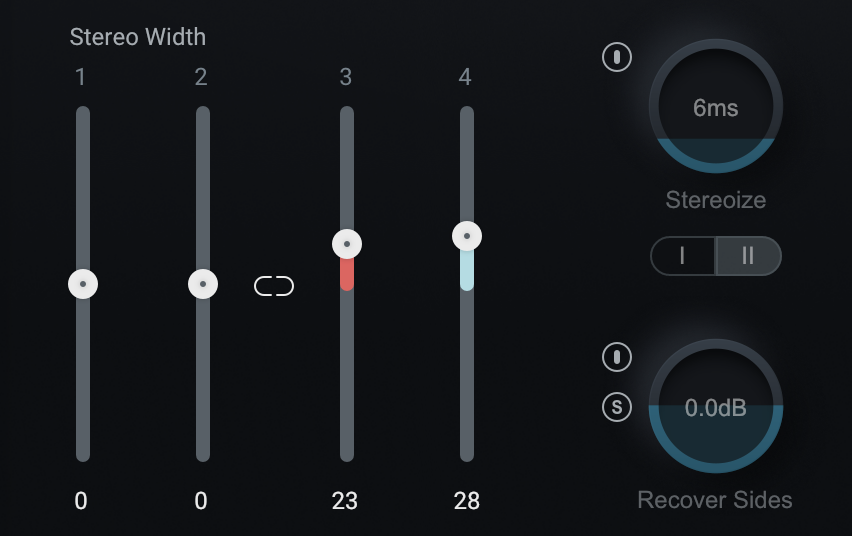
I used an imager next, this manipulates the stereo depth and width of a sound. I only did this on the mid and high frequencies as the lows are central in the mix.
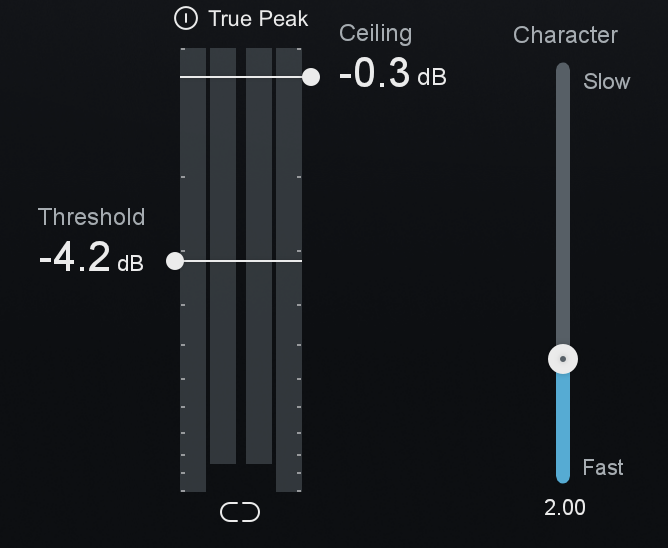
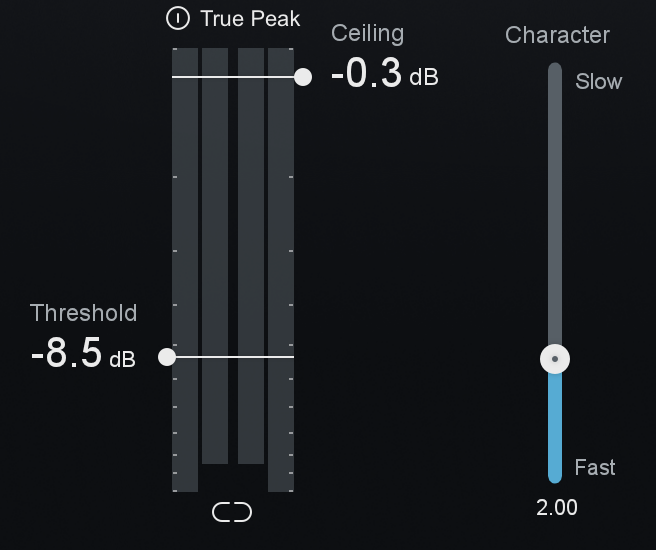
Lastly, I used a maximiser. This increases the loudness of a track while preventing it clipping. I boosted Easy a lot more than Take Me Away.
Final Product of Take Me Away
Final Product of Easy
Mayzes, Rob. “How to Use a Compressor: The Easy to Follow Guide (10 Top Tips) November 2023.” Mastering.com, 5 Oct. 2015, mastering.com/how-to-use-a-compressor-plus-10-top-tips/. Accessed 16 May 2025.
Music Guy Mixing. “Audio Panning Guide – Where to Pan Your Entire Mix – Music Guy Mixing.” Music Guy Mixing, 4 Oct. 2023, www.musicguymixing.com/audio-panning/. Accessed 16 May 2025.
MusicGuymixing. “Bass Guitar EQ Guide to Perfect It Every Time.” Music Guy Mixing, 13 Jan. 2023, www.musicguymixing.com/bass-guitar-eq/. Accessed 12 May 2025.
MusicGuymixing. “Drum Compression Chart – How to Compress Every Drum Guide – Music Guy Mixing.” Music Guy Mixing, 12 Apr. 2024, www.musicguymixing.com/drum-compression-chart/. Accessed 16 May 2025.
MusicGuymixing. “Electric Guitar Compression Guide – How to Compress Electric Guitar – Music Guy Mixing.” Music Guy Mixing, 13 Nov. 2023, www.musicguymixing.com/electric-guitar-compression/. Accessed 16 May 2025.
MusicGuymixing. “Electric Guitar EQ Guide – How to EQ Every Frequency – Music Guy Mixing.” Music Guy Mixing, 15 July 2023, www.musicguymixing.com/electric-guitar-eq/. Accessed 12 May 2025.
MusicGuymixing. “The Best Compressor for Vocals – Music Guy Mixing.” Music Guy Mixing, 11 July 2023, www.musicguymixing.com/best-compressor-for-vocals/. Accessed 16 May 2025.
MusicGuymixing. “Vocal EQ Guide – the Complete Guide to EQing Vocals – Music Guy Mixing.” Music Guy Mixing, 17 July 2023, www.musicguymixing.com/vocal-eq/. Accessed 12 May 2025.
MusicGuyMixing. “How to EQ Drums – EQing Every Piece in Your Kit.” Musicguymixing.com, 15 Sept. 2023, www.musicguymixing.com/how-to-eq-drums/. Accessed 12 May 2025.
MusicGuymixing. “How to EQ Piano – the Best Piano EQ Settings.” Music Guy Mixing, 22 Dec. 2022, www.musicguymixing.com/how-to-eq-piano-best-piano-eq-settings/. Accessed 20 May 2025.
MusicGuymixing. “Piano Compression Guide – How to Compress Piano.” Music Guy Mixing, 15 Aug. 2023, www.musicguymixing.com/piano-compression/. Accessed 20 May 2025.