
Microphone Positioning:
Overhead Mics:
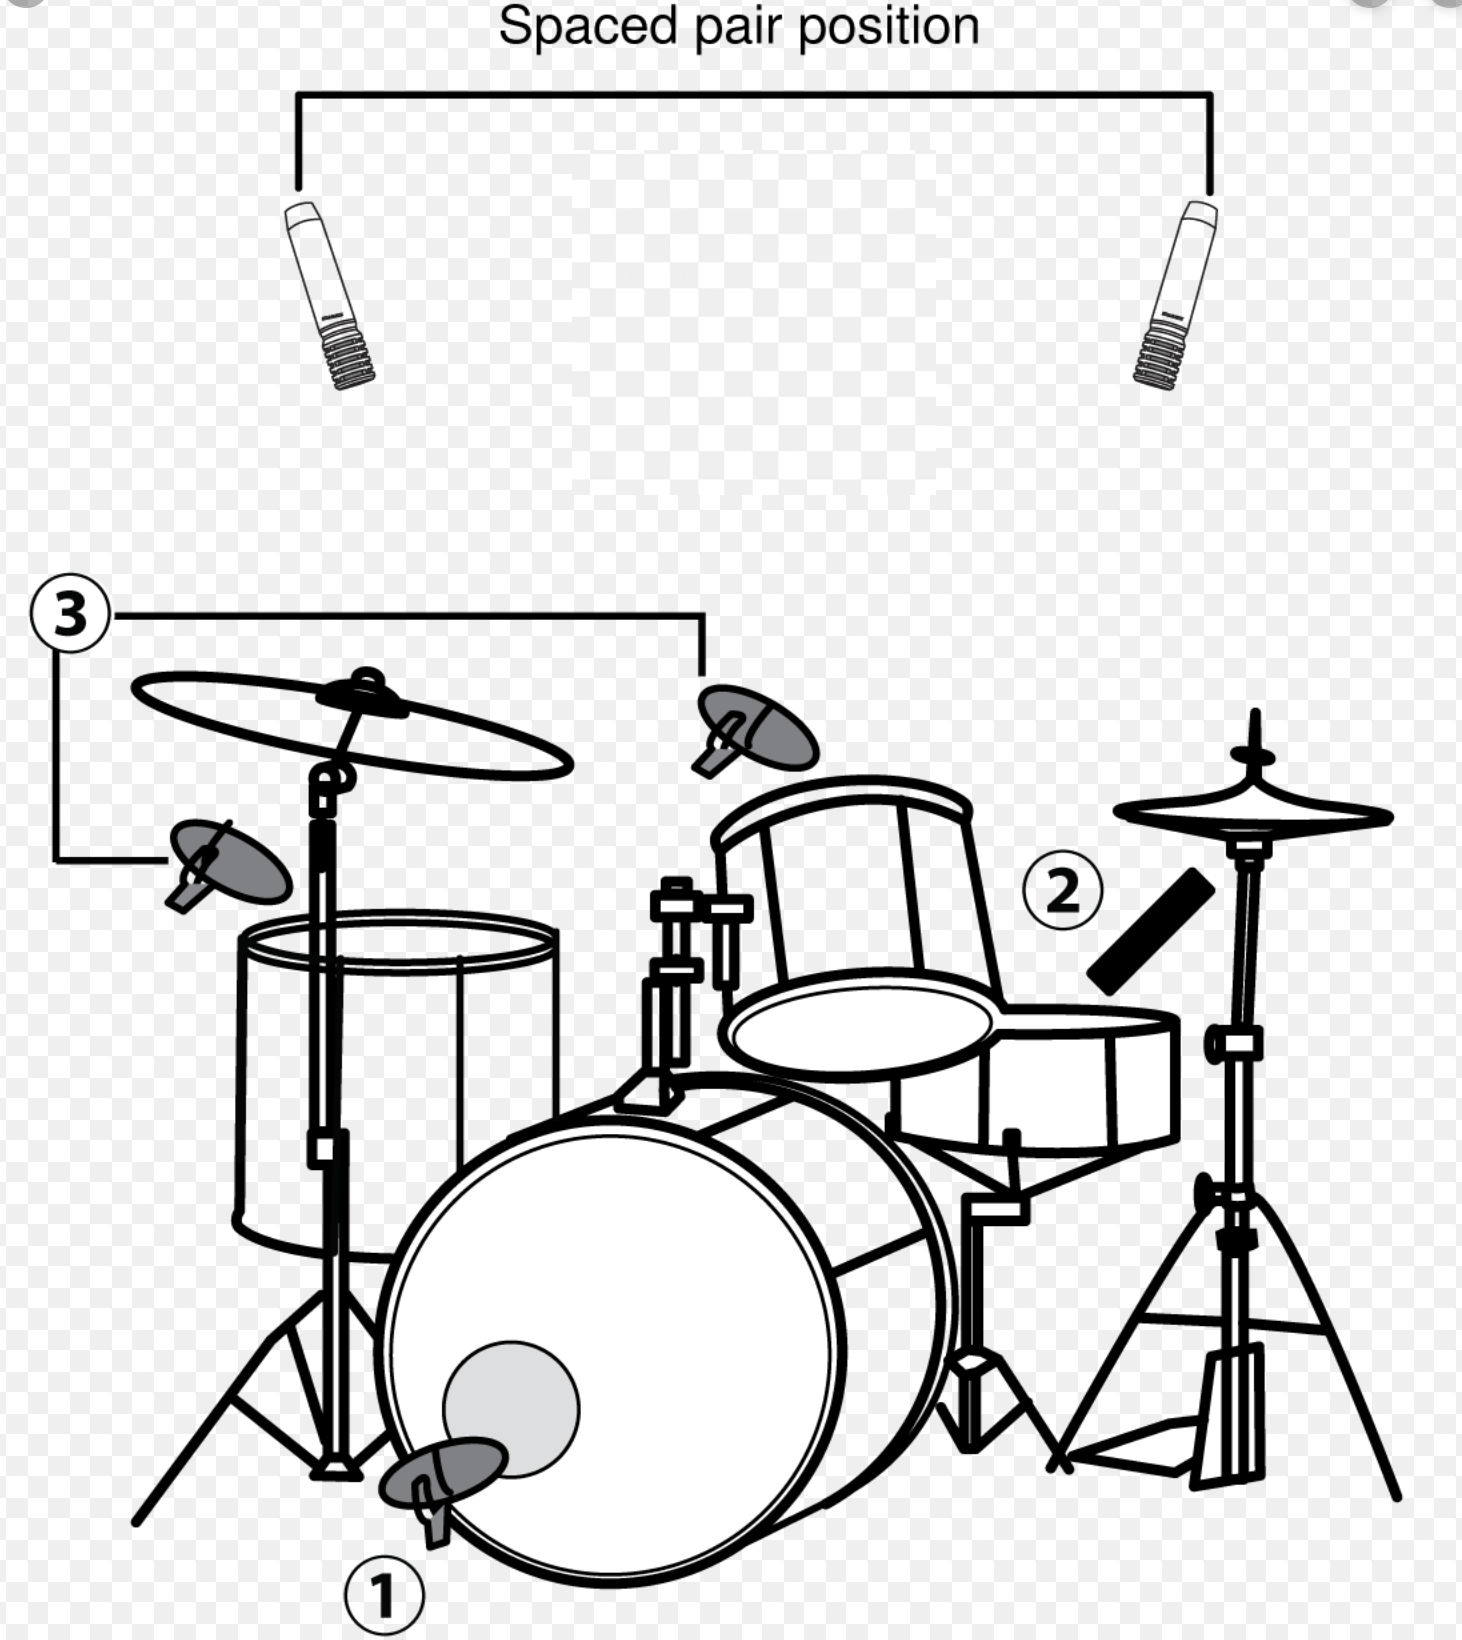
There are three basic techniques for micing up drum overheads, which are spaced condensers, XY and ORTF.
First of all, spaced condensers are two condenser microphones positioned above the drum kit at “cardioid position”. The placement of the mics give you different sounds. If they are quite low and above the cymbal they “remove emphasis” from the whole kit, whereas if they are higher you will get a more balanced sound. Furthermore, if the mics are far apart, they will produce a “balanced” sound and will create a “wide stereo image”. No matter which position you choose, you must always make sure that the mics are within equal distance away from the snare drum!
 (mics 1, 2 and 3 will be covered under the next subheading)
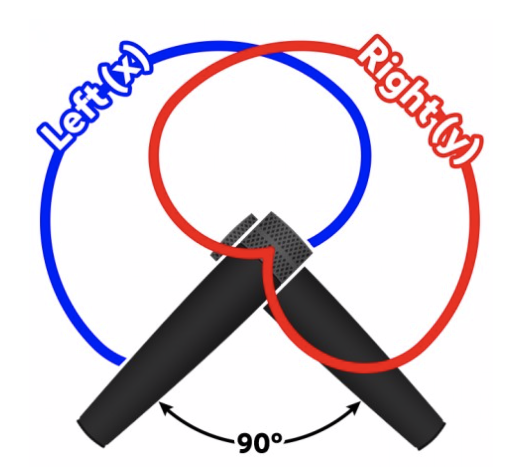
Secondly, XY configuration is when two cardioid condenser microphones are positioned above the kit at a 90 degree angle. They must be centred above the snare drum to keep it in the “stereo field”. This is because the stereo image is quite narrow when using this technique. The only way to widen it is to create space between the mics. However, this creates a less concentrated sound. It is very important to remember that no matter the position, the mics must be positioned at right angles!
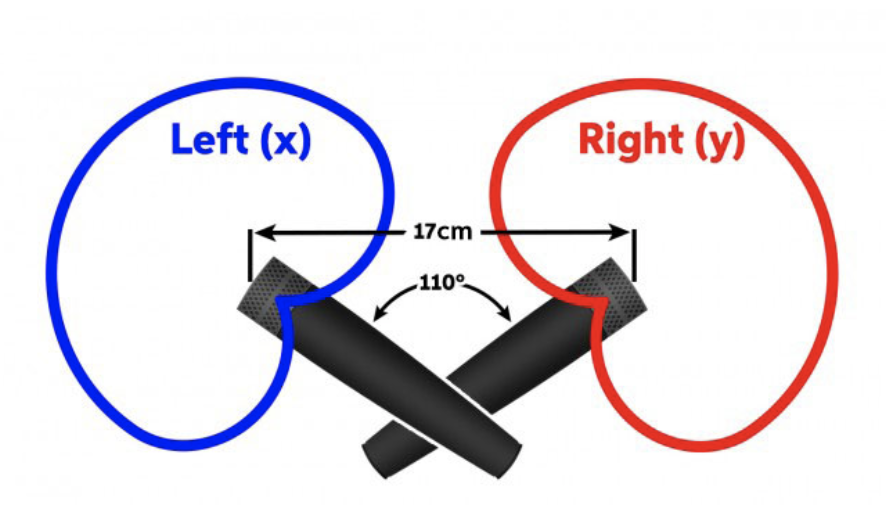
Finally, ORTF which was created in L’Office de Radiodiffusion Télévision Française (a French broadcasting company) hence the name. This technique is a slight improvement on the XY configuration, using cardioid mics at close distances, with their diaphragms positioned a 110 degree angle and 17cm apart. The reason for this is so that it mimics the human ear and how that hears in a simple way. It has a wider stereo image that XY too.
Drum Mics:
In the previous section, I uploaded a diagram with spaced condensers but it also had three other microphones labelled on it. I am going to cover those now.
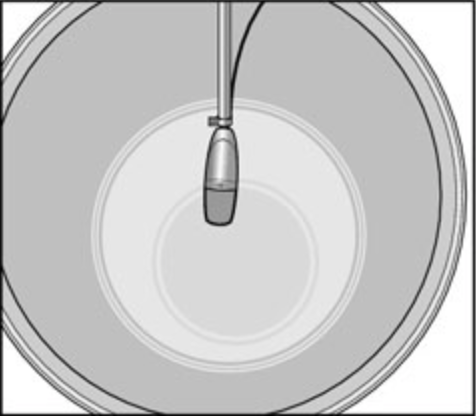
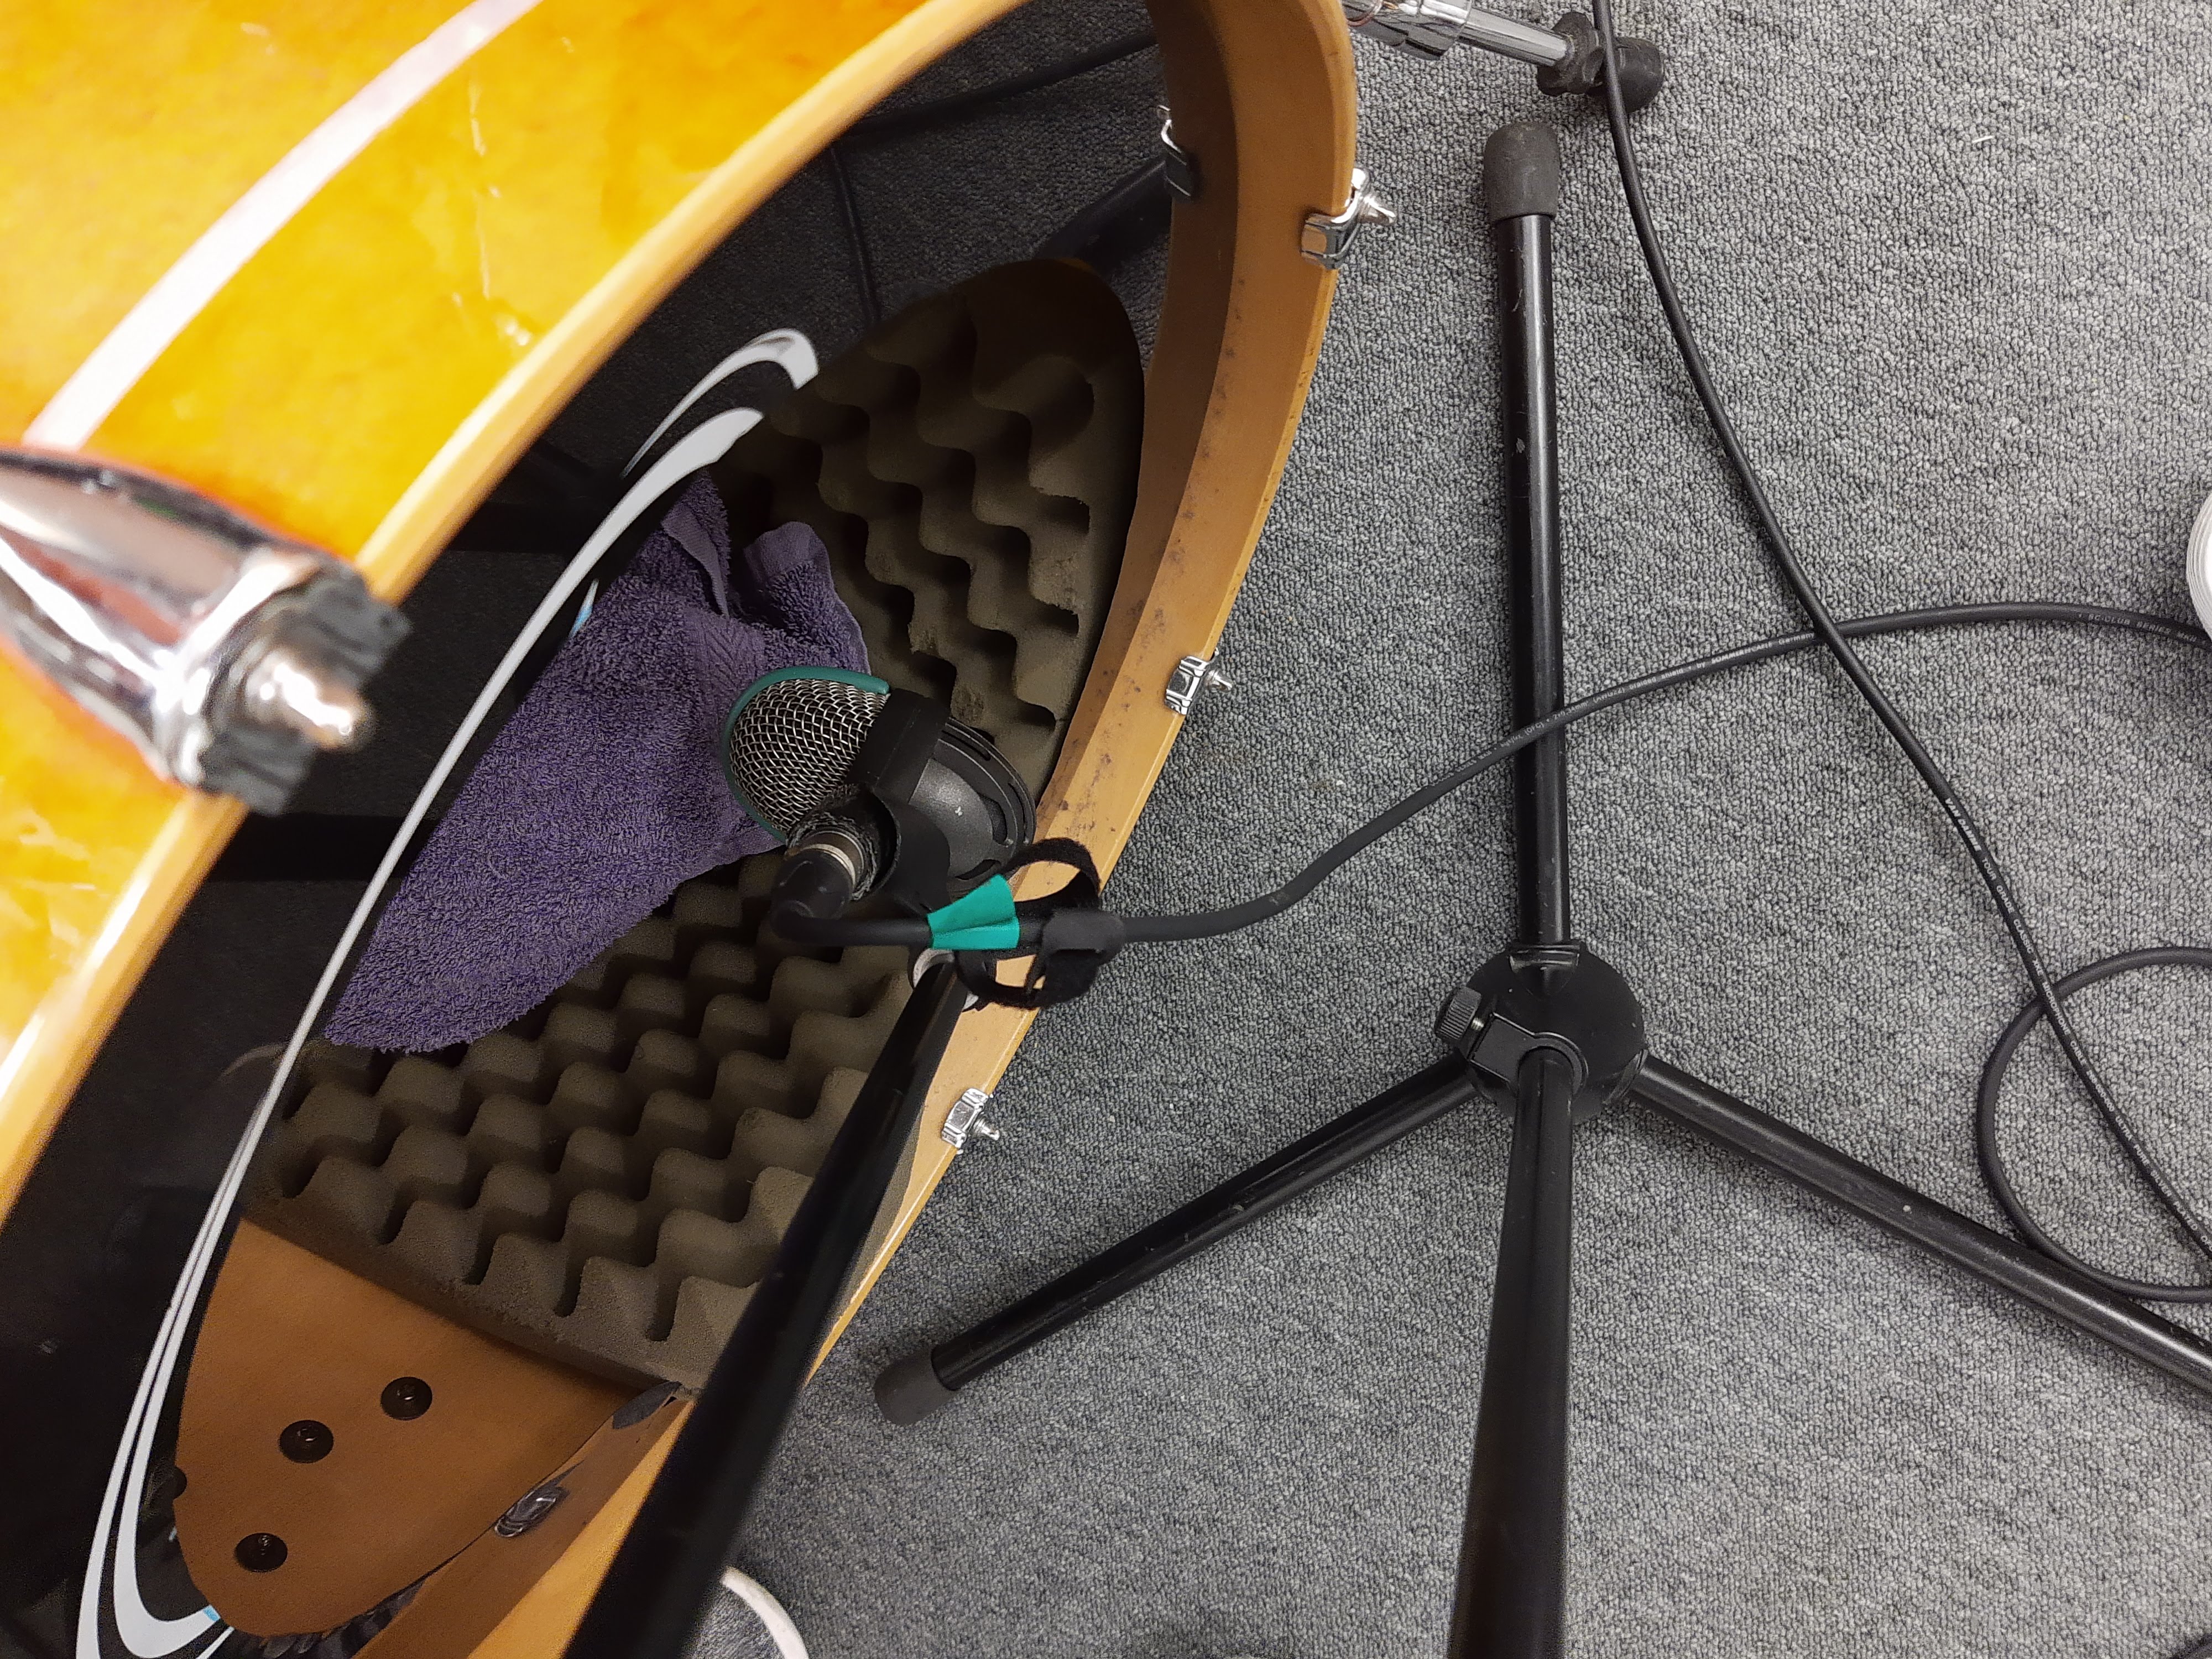
Firstly, the mic for the kick drum. This mic (a large dynamic mic) can be set up in various ways: near the inside head, halfway inside the drum and near the outside head.
1. Near the inside head:
If you remove the outside head or cut a hole into it, you can then carry out this mixing technique. It should be around 3 inches away from the inside head and slightly off-centre. This way of mixing up a bass drum is the most common as it picks up a lot of “attack”.
2. Halfway inside the drum:
For this technique, the mic should be placed directly in the centre of the drum at exactly halfway. This allows for less “attack” and more “body”.
3. Near the outside head:
For this method, the mic can be placed in different places to create different sounds. For example the closer the mic is to the centre of the outside head, the more open and bass heavy it will sound. Or if you are looking for a softer sound, place the mic offset from the centre.

TOP TIP! You can reduce the amount of bass frequencies from the drum by putting a pillow or blanket inside. It is mostly beneficial when this touches the inside head but it does not have to.
Second of all is the snare microphone. This is a dynamic microphone (Shure SM57) which is placed at the edge of the snare and pointed towards the centre. If it is close to the centre, although fuller sounding it will not be as “snare-like”so it is better to place it close to the rim. Commonly, only the top head of the snare is miced up but some people prefer micing the bottom head as well.

The third and final drum mics are the toms. It is not essential to mic up these drums because they are not the most used drums and will still be picked up by the overheads. This means that they aren’t always miced up to save precious studio time. They are also rather loud and can often sound just as good if not better acoustically. However if they are going to use a mic, it is highly likely that it will be a clip on dynamic mic – usually smaller but similar to that of the bass drum. These are clipped onto the rim and then aimed toward the centre of the drum just like the snare mic.
Guitar Mics:
Guitars often use dynamic mics, usually the Shure SM57, which are placed on either side of the cab of the amp because there is no sound coming from the wood in the centre. This is then positioned slightly offset from the centre of the speaker in the amp. The closer to the centre it is, the brighter sounding the recording will be and the further away, the more emphasis is added to the lower range frequencies.
Vocal Mics:
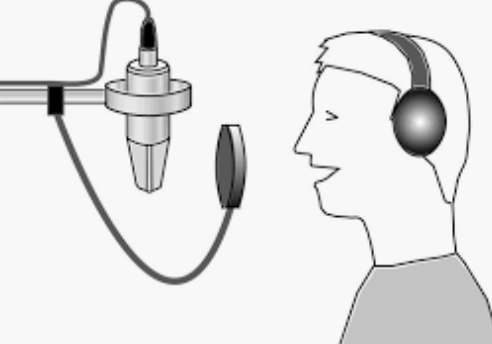
Vocal mics are commonly condensers such as the Titan SE. This mic is mostly used because of its cardioid polar pattern, which means it can be used to record vocals in a full band setting without picking up too much spill if any from behind. However dynamic mics can be used if the vocalist is “aggressive”. For example if they are screaming on a metal track. They are normally placed in front of the vocalist’s mouth and are generally quite close so that they pick up most of the sound.
Bass and Keyboard DI:
DI boxes (e.g. BSS AR-133) are very important for instruments such as bass guitars and keyboards because it removes line noise and makes the tone easier to control when using a mixing desk. They are very simple to use and take mere seconds to set up. It also means that mixing is very easy to do as it is more controlled at the time of recording than miced instruments and has no spill.
Bibliography:
Where It’s A-T. (2014). 3 Basic Techniques for Overhead Drum Mic Setup | Recording Drums. [online] Available at: https://blog.audio-technica.com/3-basic-techniques-overhead-drum-mic-setup/ [Accessed 13 Jan. 2020].
Strong, J. (n.d.). Microphone Placement for Kick (Bass) Drum – dummies. [online] dummies. Available at: https://www.dummies.com/art-center/music/recording-music/microphone-placement-for-kick-bass-drum/ [Accessed 13 Jan. 2020].
Room, M. (2011). Mic Positioning: Toms and Room – Signature Sound. [online] Signature Sound. Available at: https://www.signaturesound.com/mic-positioning-toms-and-room/ [Accessed 13 Jan. 2020].