
30/01/2020:
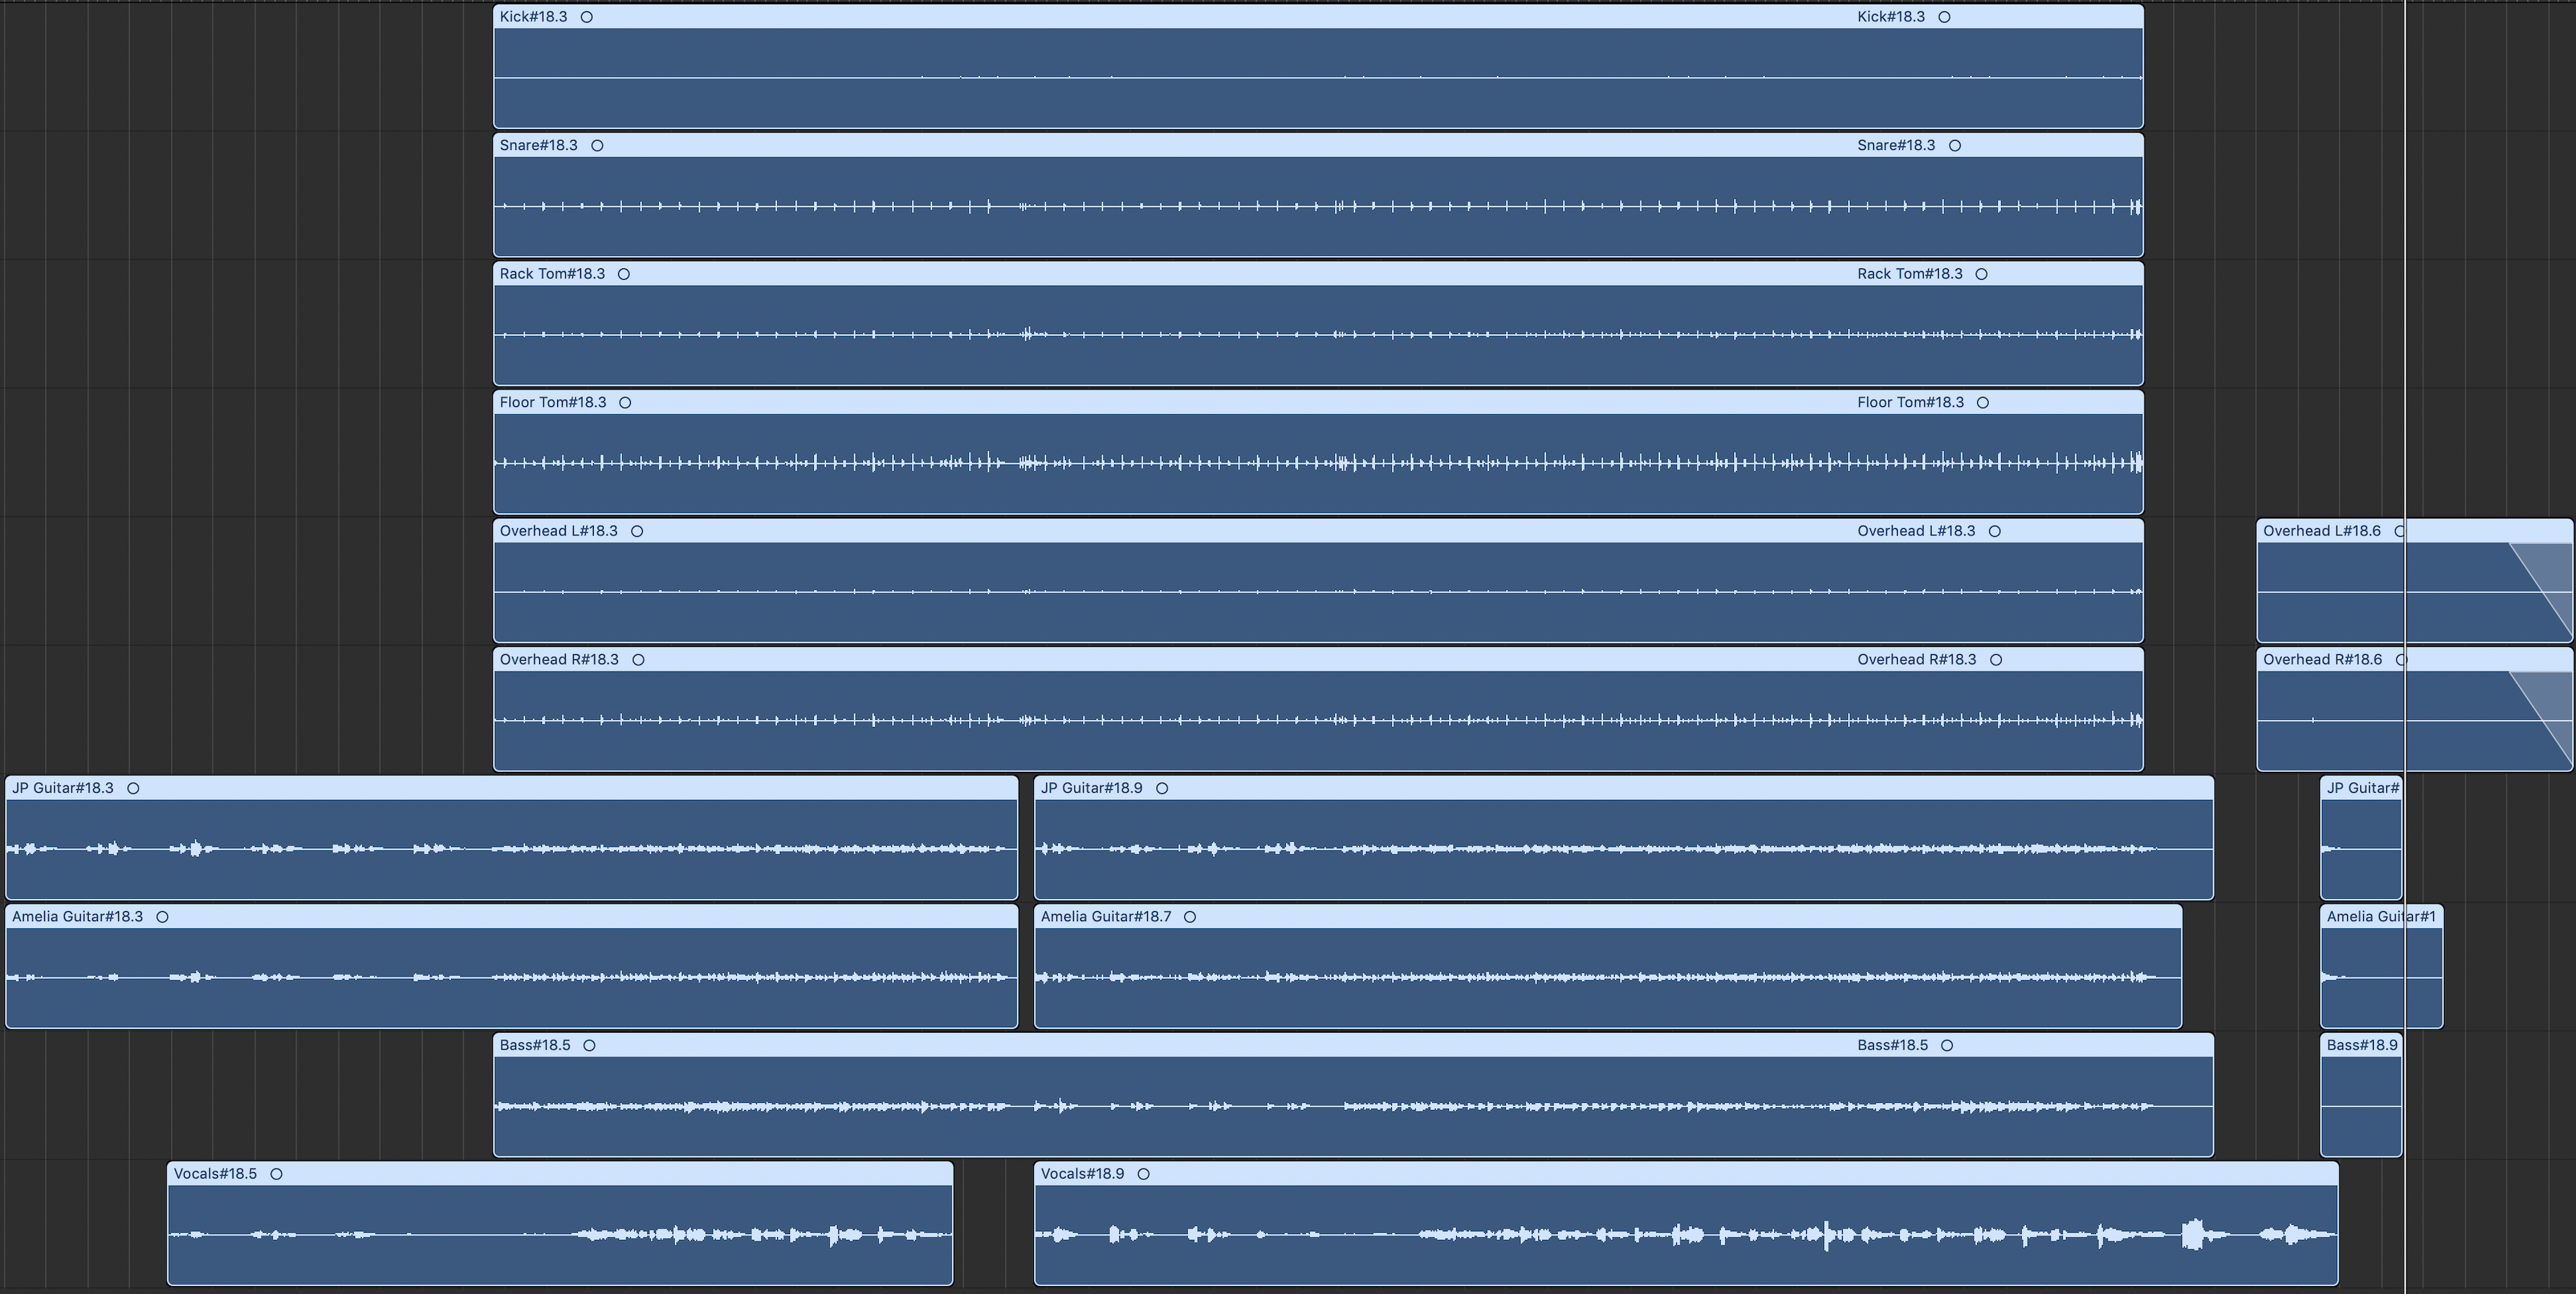
In this session, we started to mix the tracks that we had recorded. First of all, I imported it into Logic Pro X and removed all of the tracks that I wasn’t going to be using from the project but kept them in the audio file folder in case I need them in later sessions. Then, I bounced down the raw track. Here it is:
After that, I cleaned up the tracks by deleting sections of the recordings that are silent or have things on there that shouldn’t be on there such as spill.
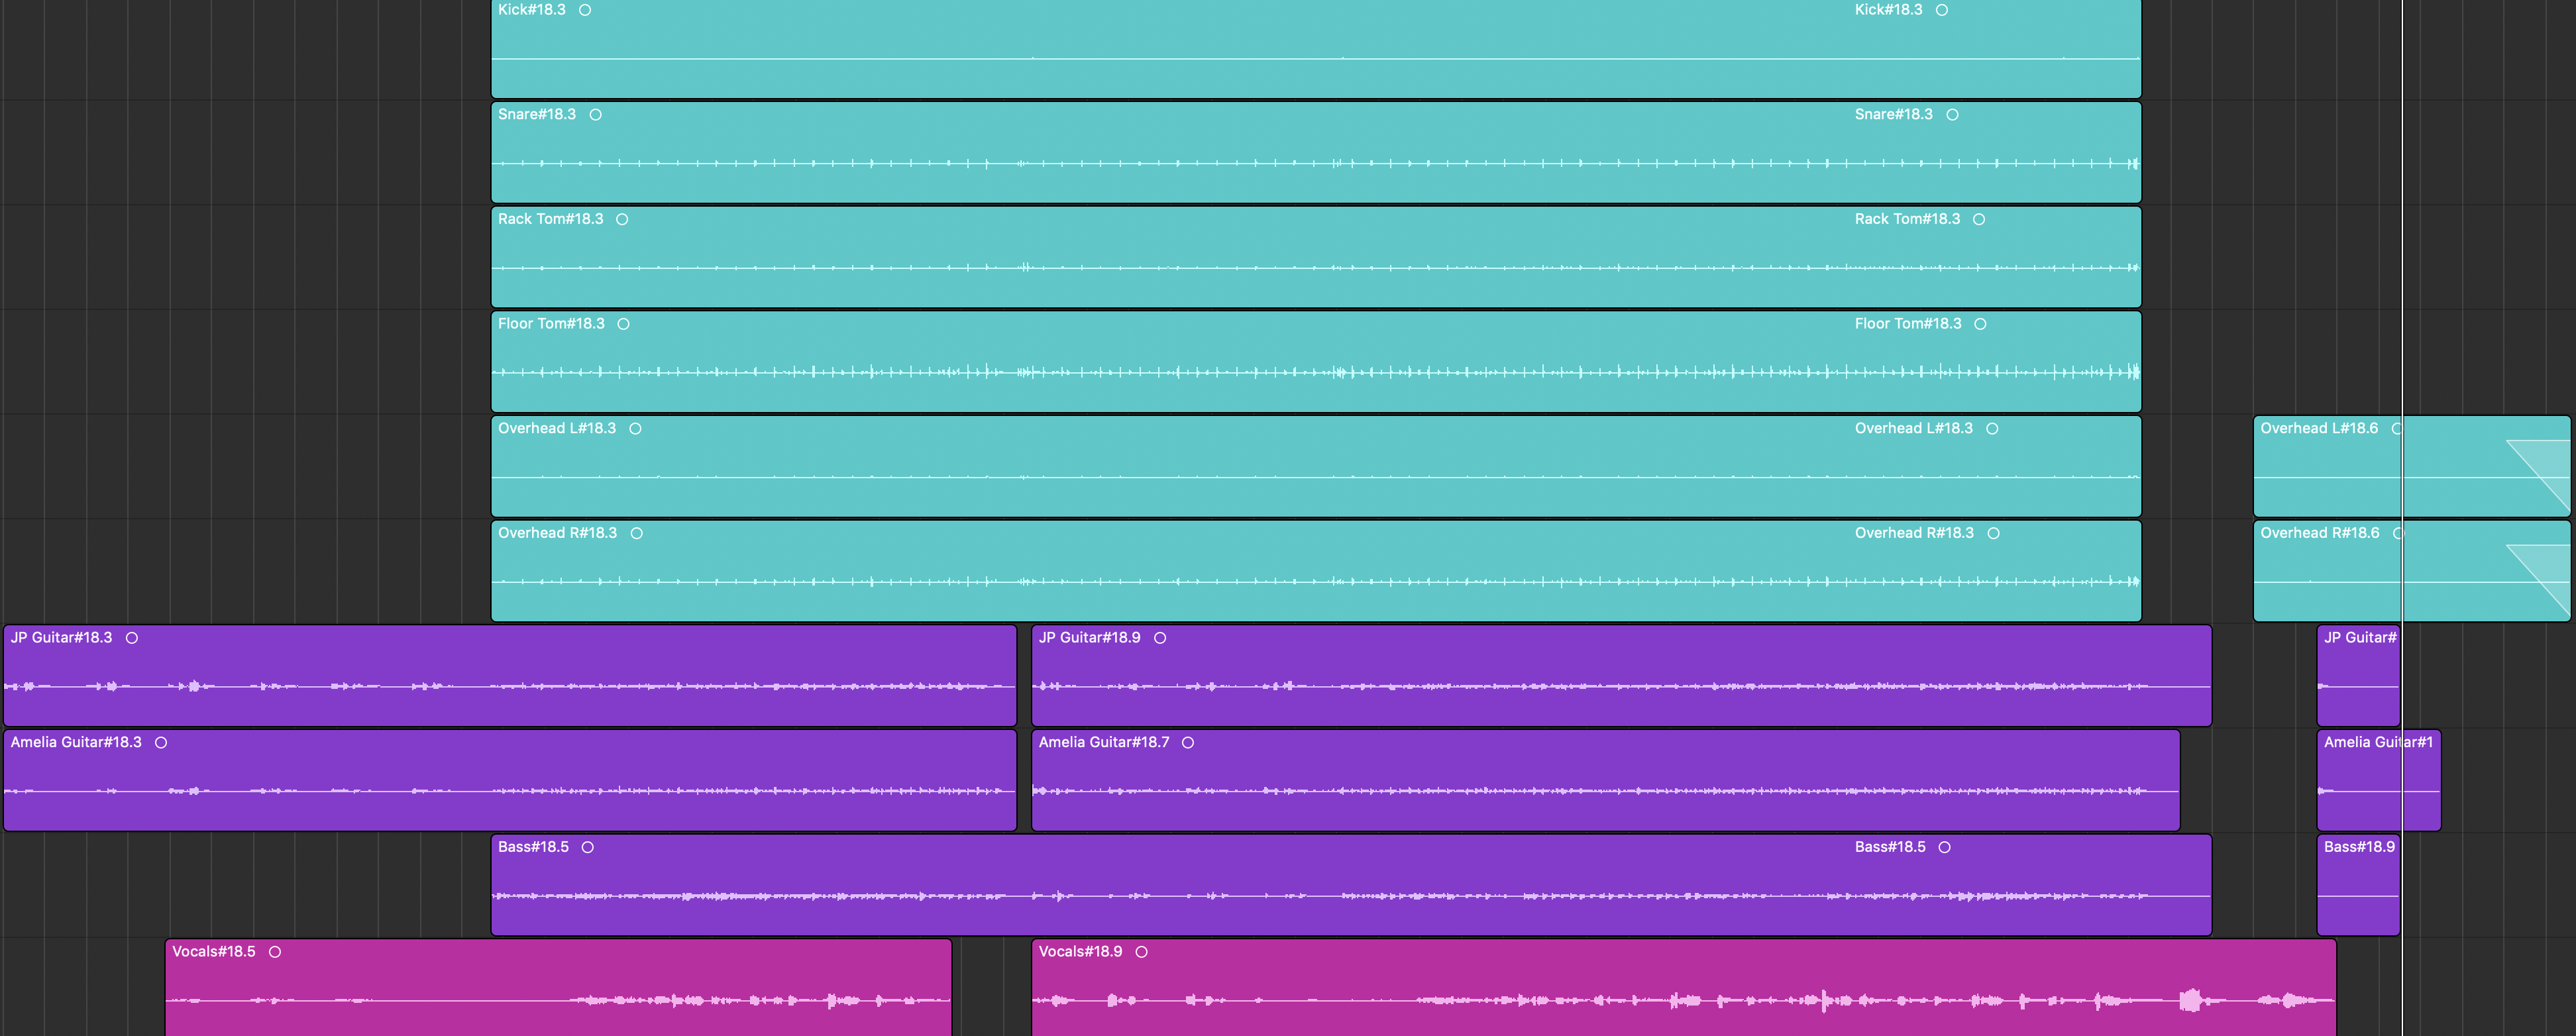
I then organised the tracks into groups called busses so that mixing would be easier to do and then colour coded them to avoid confusion.
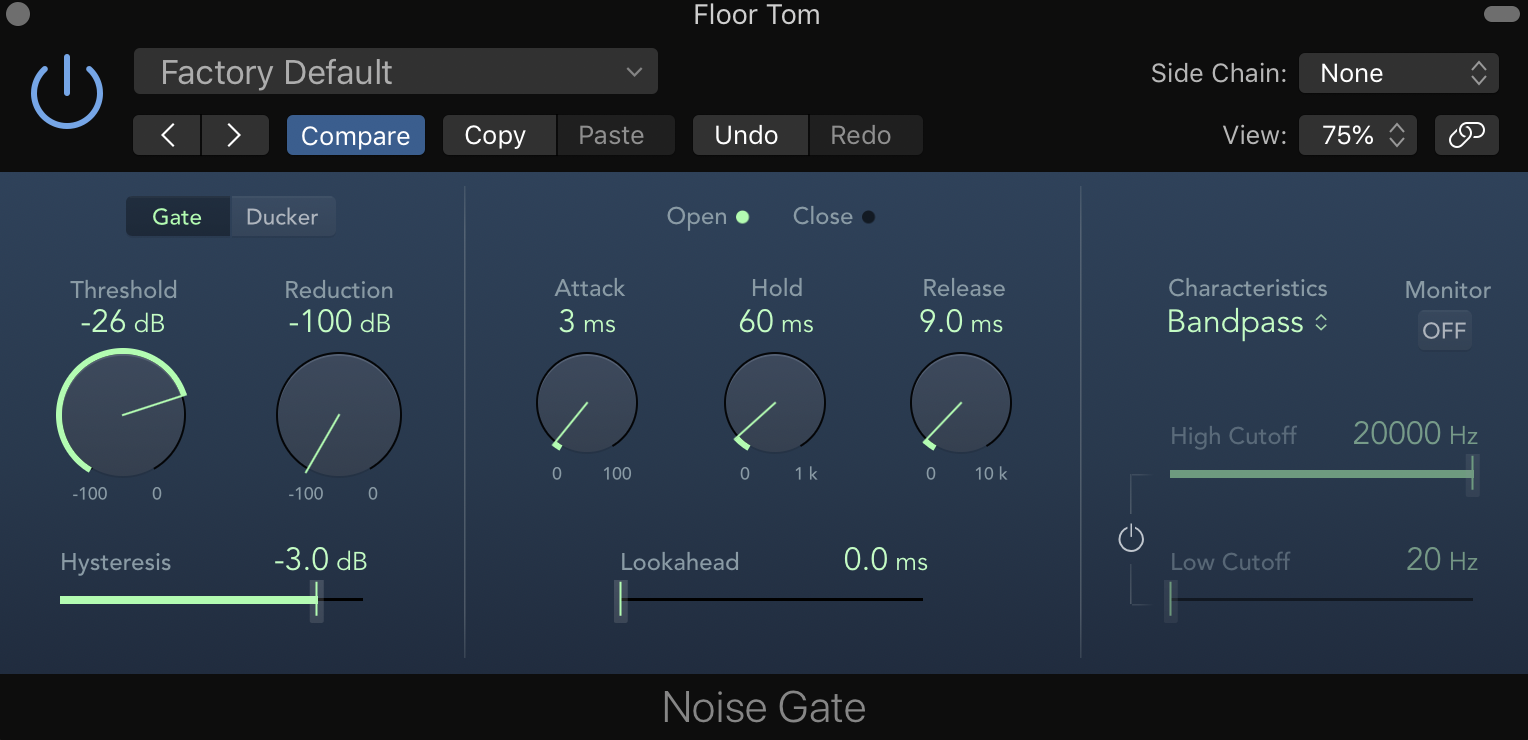
Next, I added a noise gate on the snare drum, kick drum and toms. The function of a noise gate is to prevent noise under a certain amount of decibels (dB) from being heard on a recording.
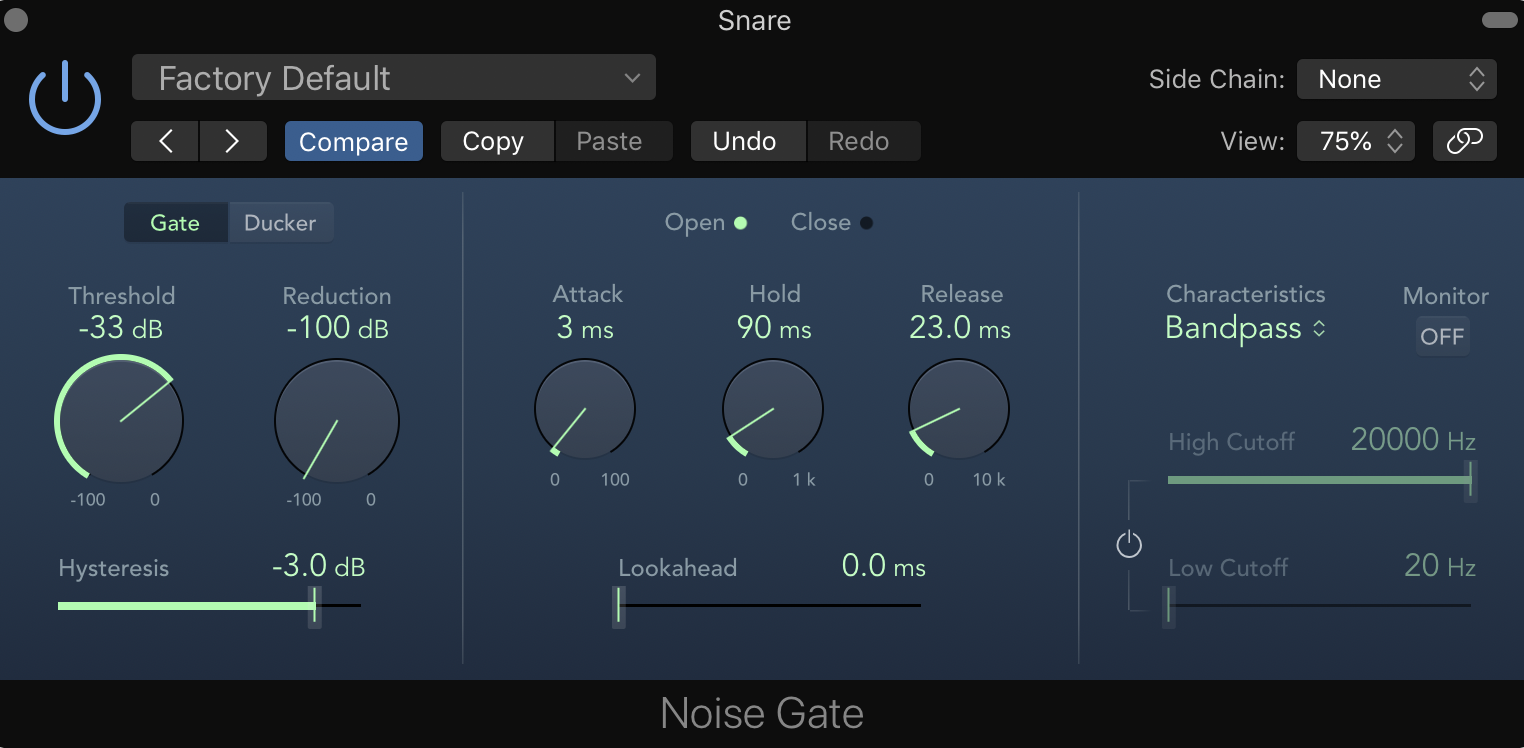
In order to do this, I changed the threshold to 0dB then moved it down until I could hear a signal. For the snare that was at -33dB, which is the point at which the drum can be heard but not the guitar spill.
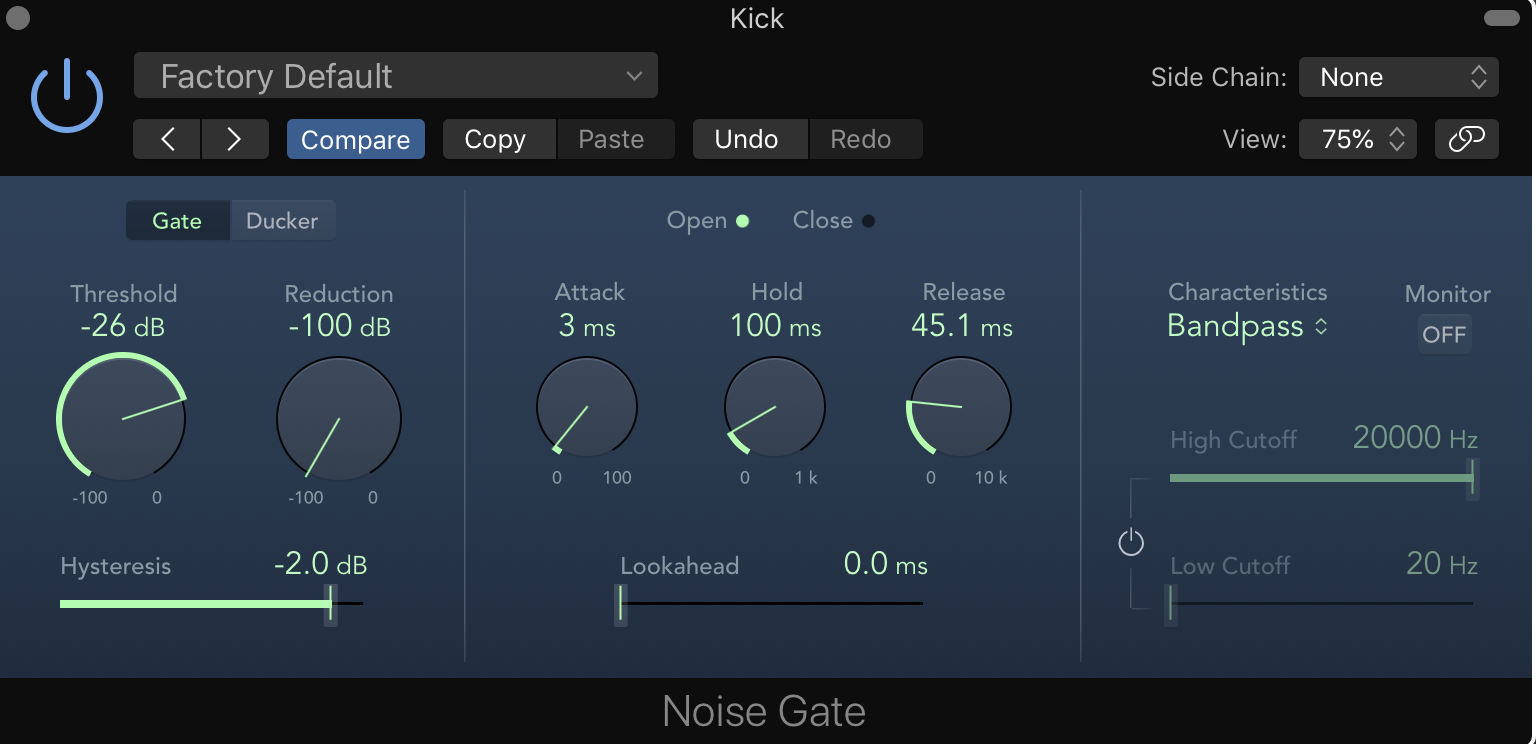
After the threshold was set I changed the hold, which determines the amount of time the gate remains open for so that the sound can ring out. For the kick, I set this to 100 milliseconds (ms).
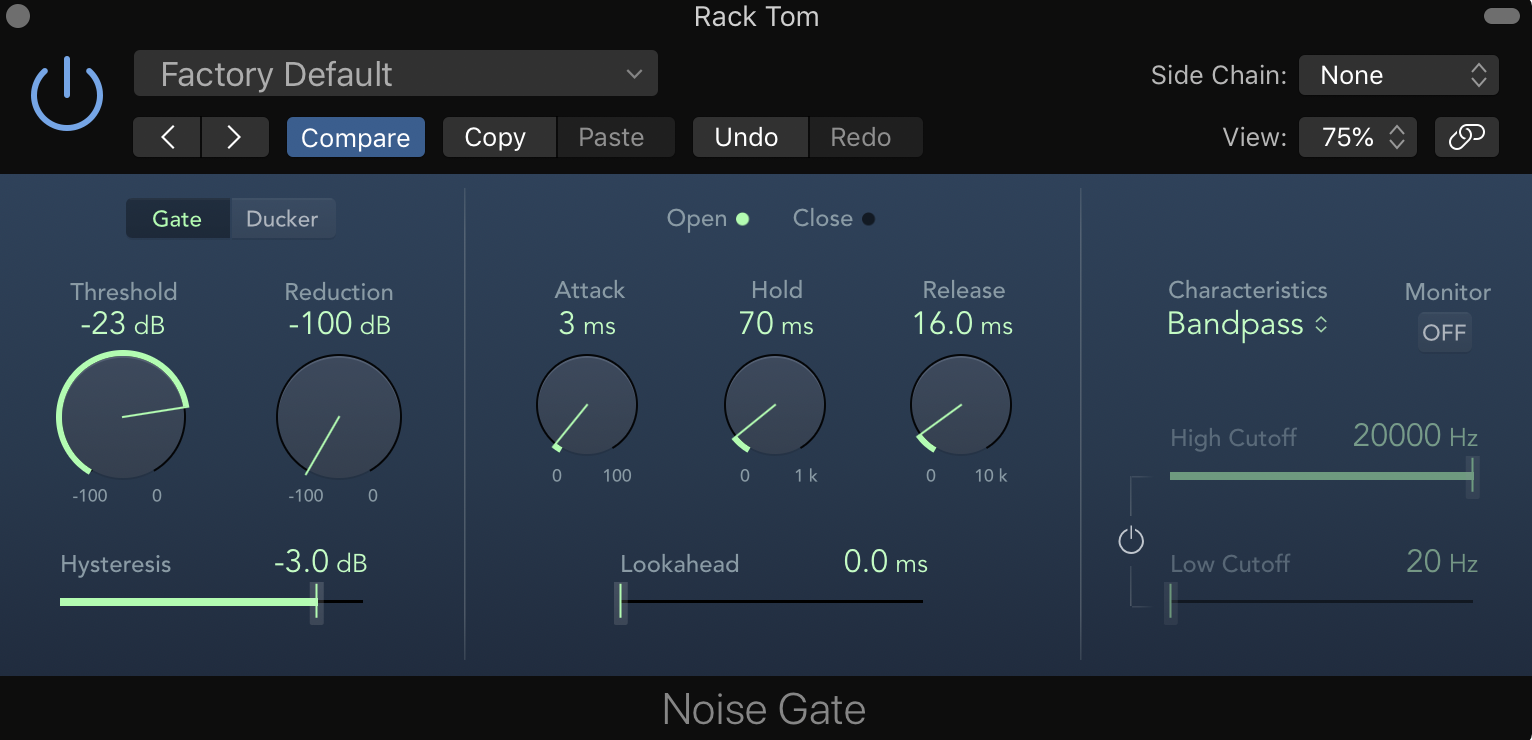
The final thing to adjust in the gate settings is the release, which determines the amount of time the gate is closed for. On the rack tom I set this to 16ms.
Once this is done, all of the drums as clear without any spill of other instruments on them.
Then I bounced down what I have so far, here is how it sounds:
04/02/2020:
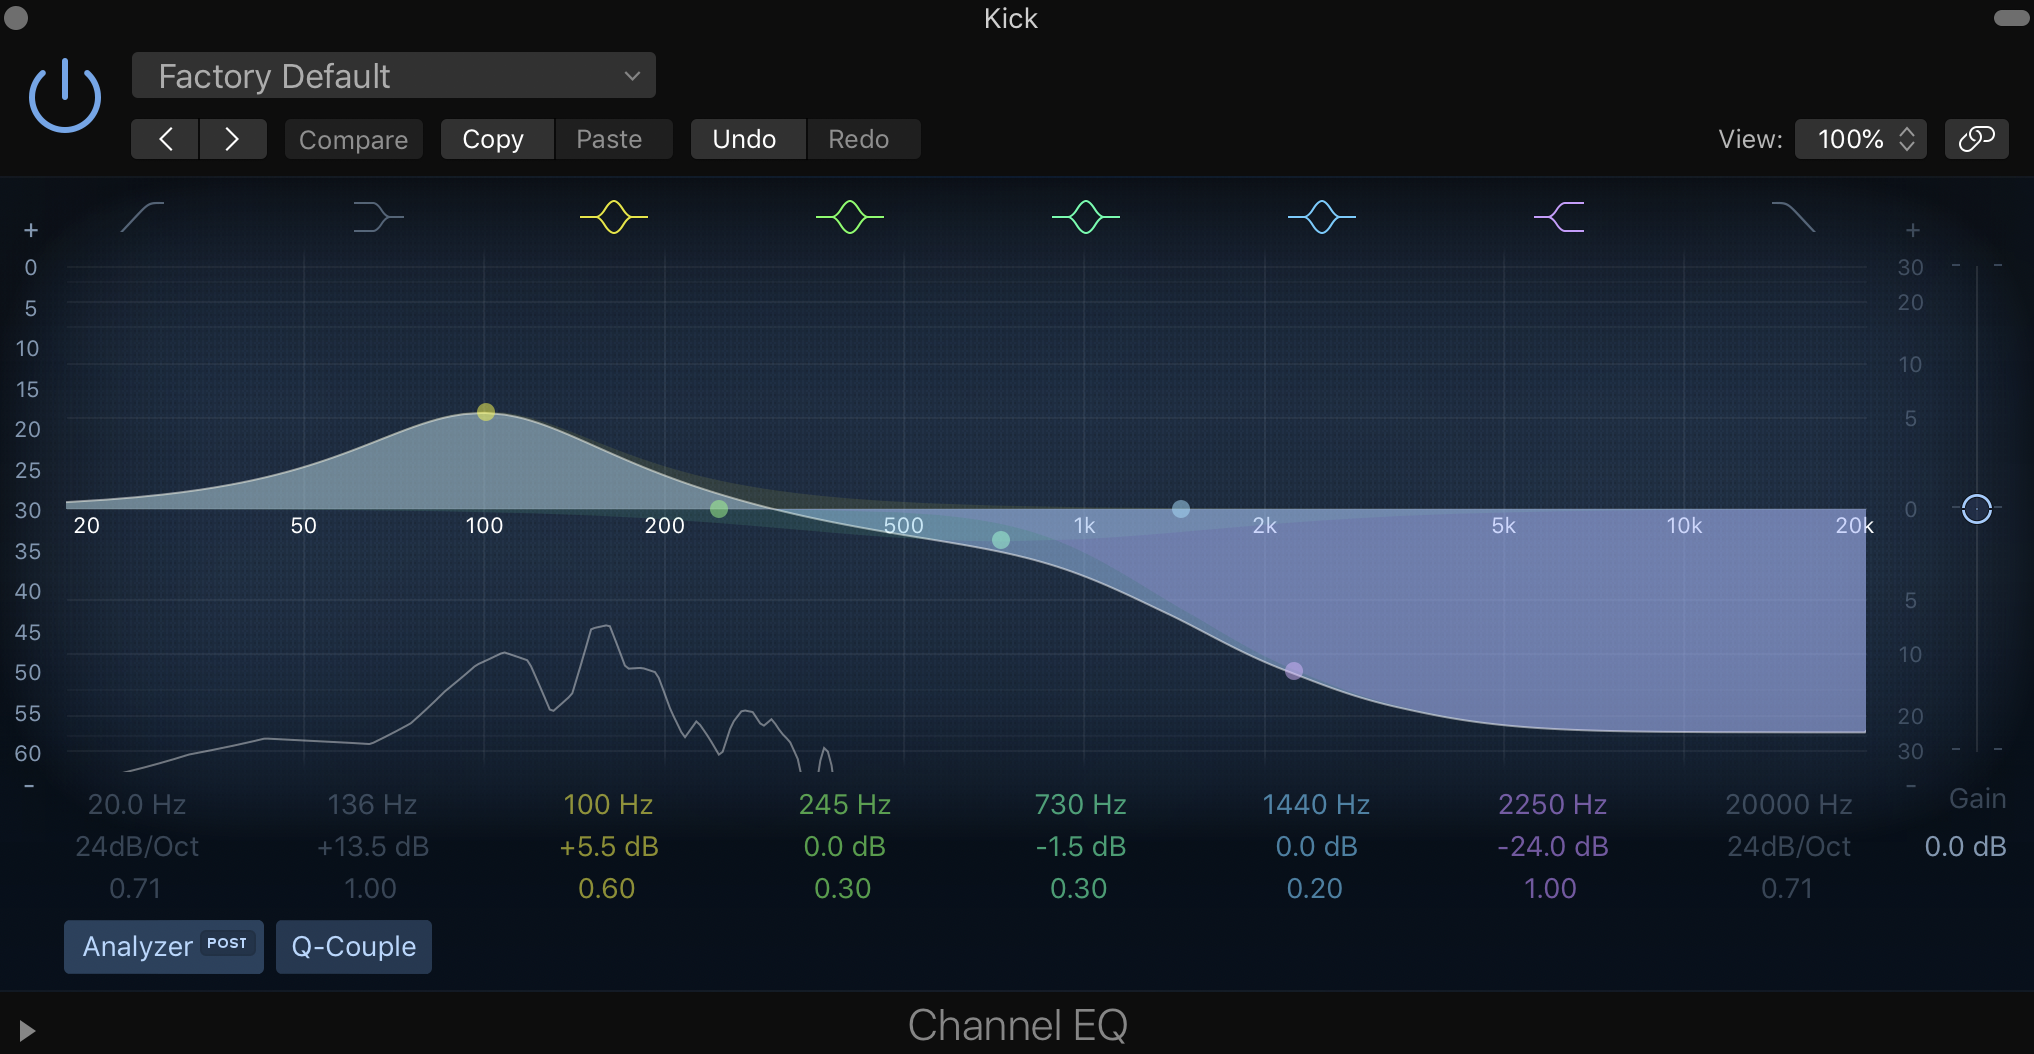
To start the session today, Lewis spoke to us as a class about the importance of balance. If a track is not balanced, it can be distracting or sound distorted to the listener. The first thing I did to make sure that this did not happen, was set the equalisation (EQ). On the kick drum, it is important to make sure that there are more low end frequencies than mid and high frequencies because it is a bass instrument. This means I had to cut all high end frequencies and boost low end ones.
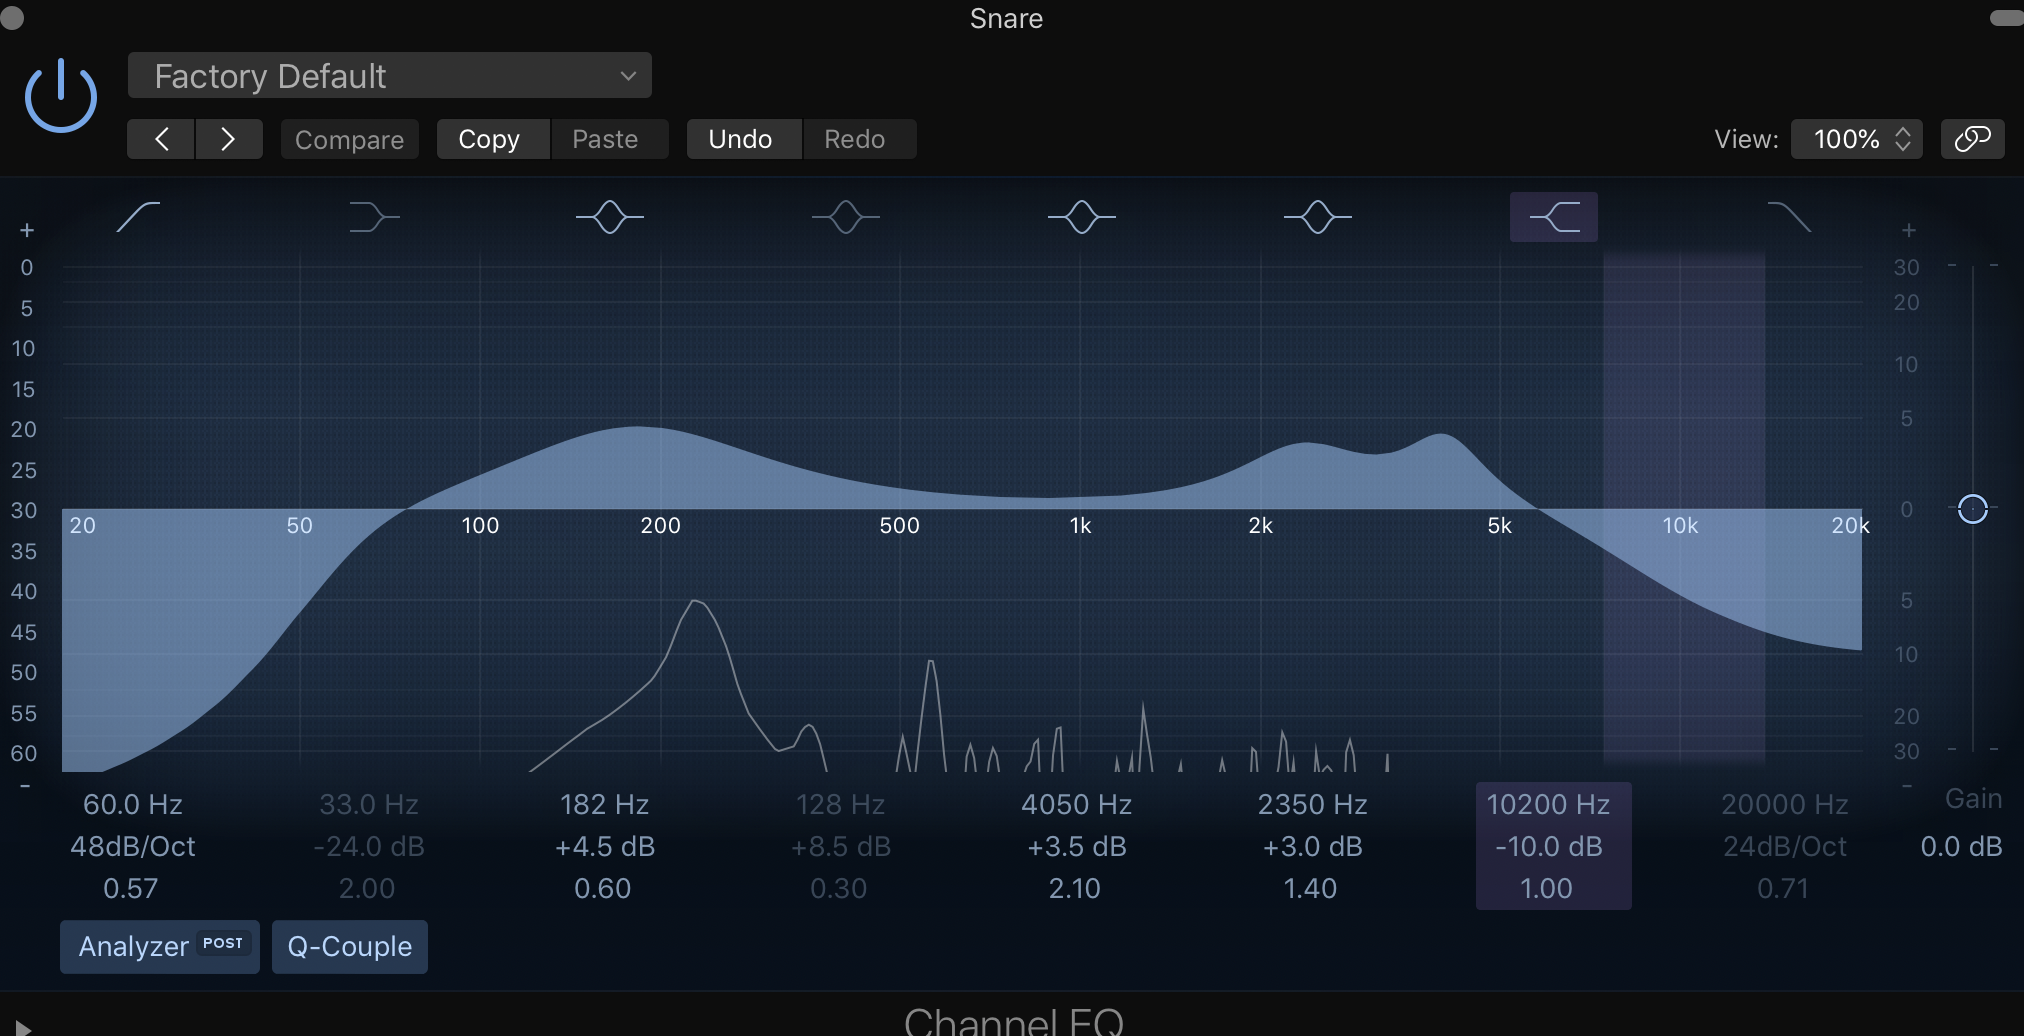
Next I did the EQ for the snare drum. As this is more of a mid-range frequency instrument, I had to reduce the bass frequencies to avoid kick drum spill and boost the prominent higher end frequencies. I then decided to add brightness so that it was a little bit clearer.
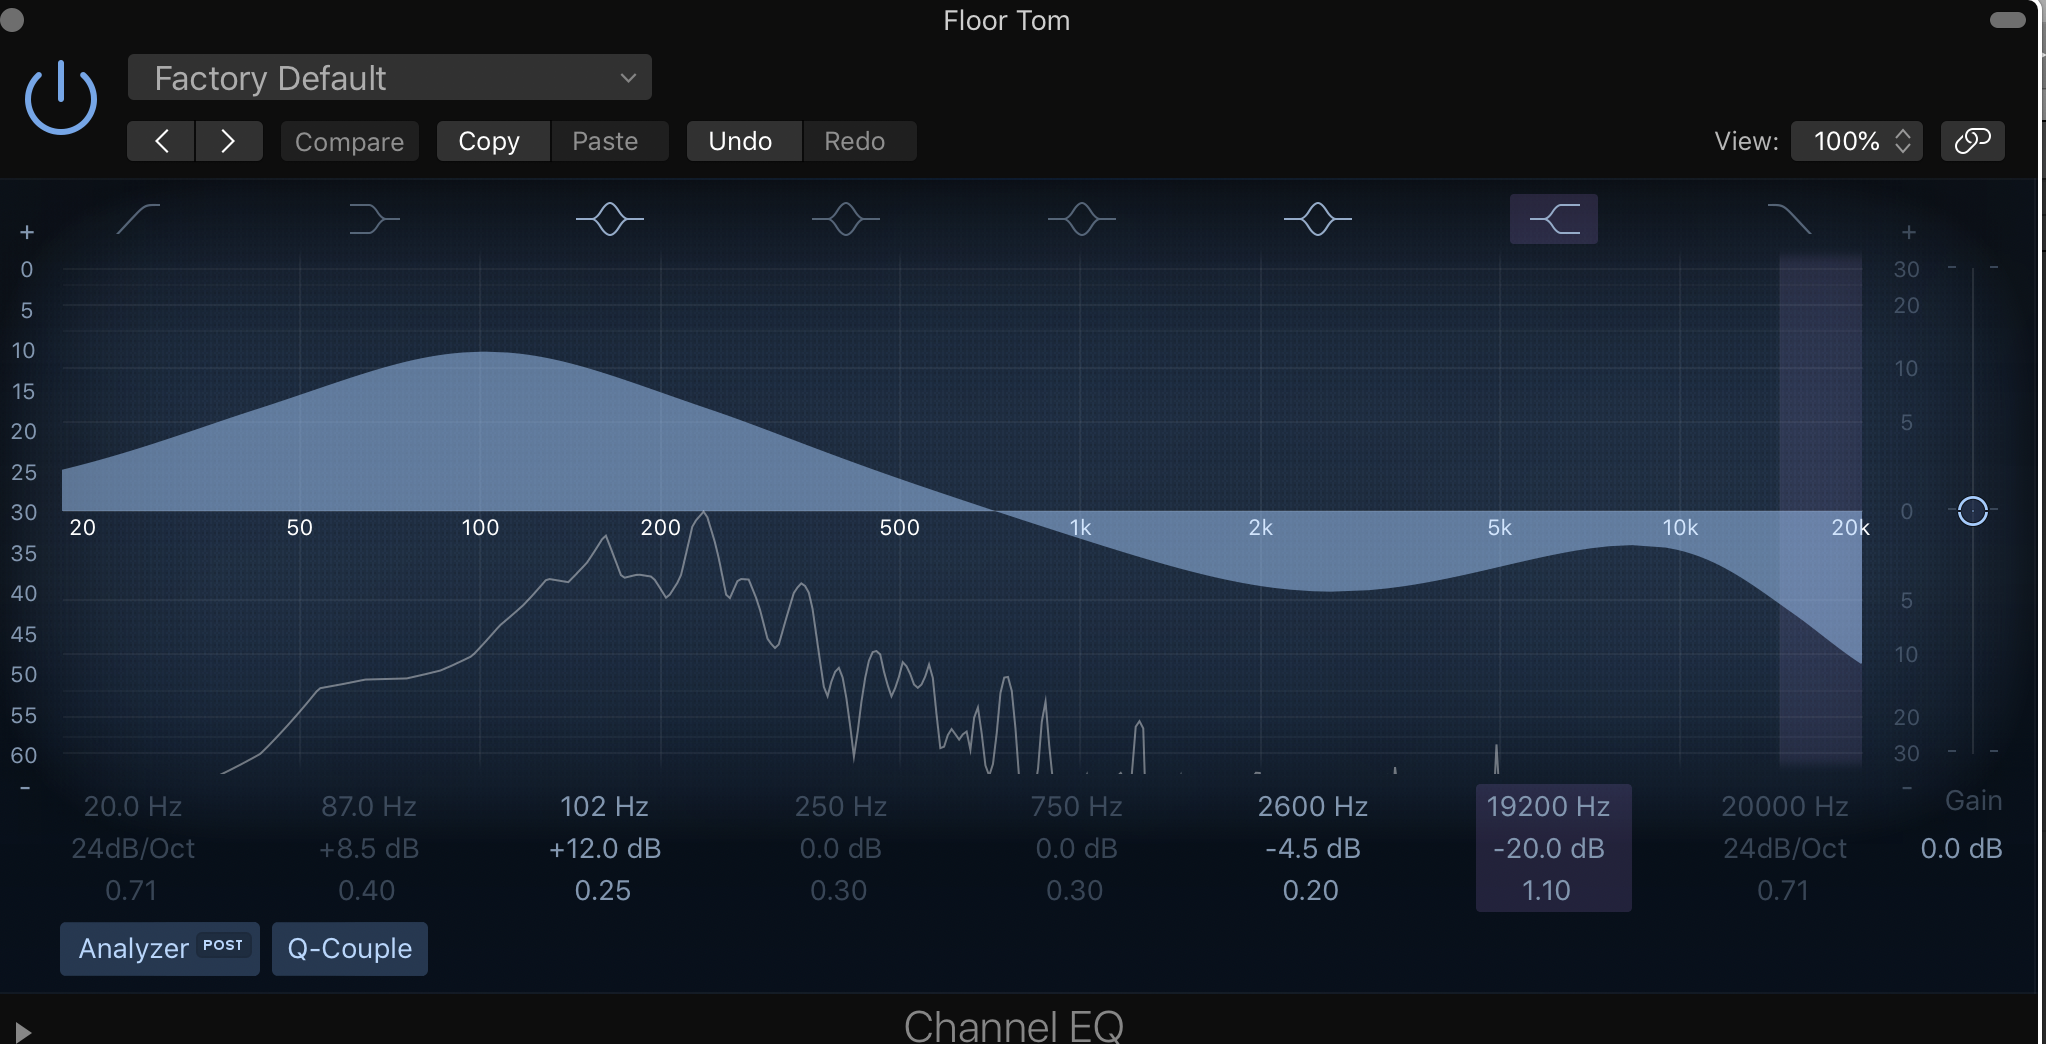
After the snare, comes the toms. This was just a case of creating more clarity and minimising spill. I cut higher end frequencies on the floor tom because it is a more bass heavy instrument. It now sounds much fuller.
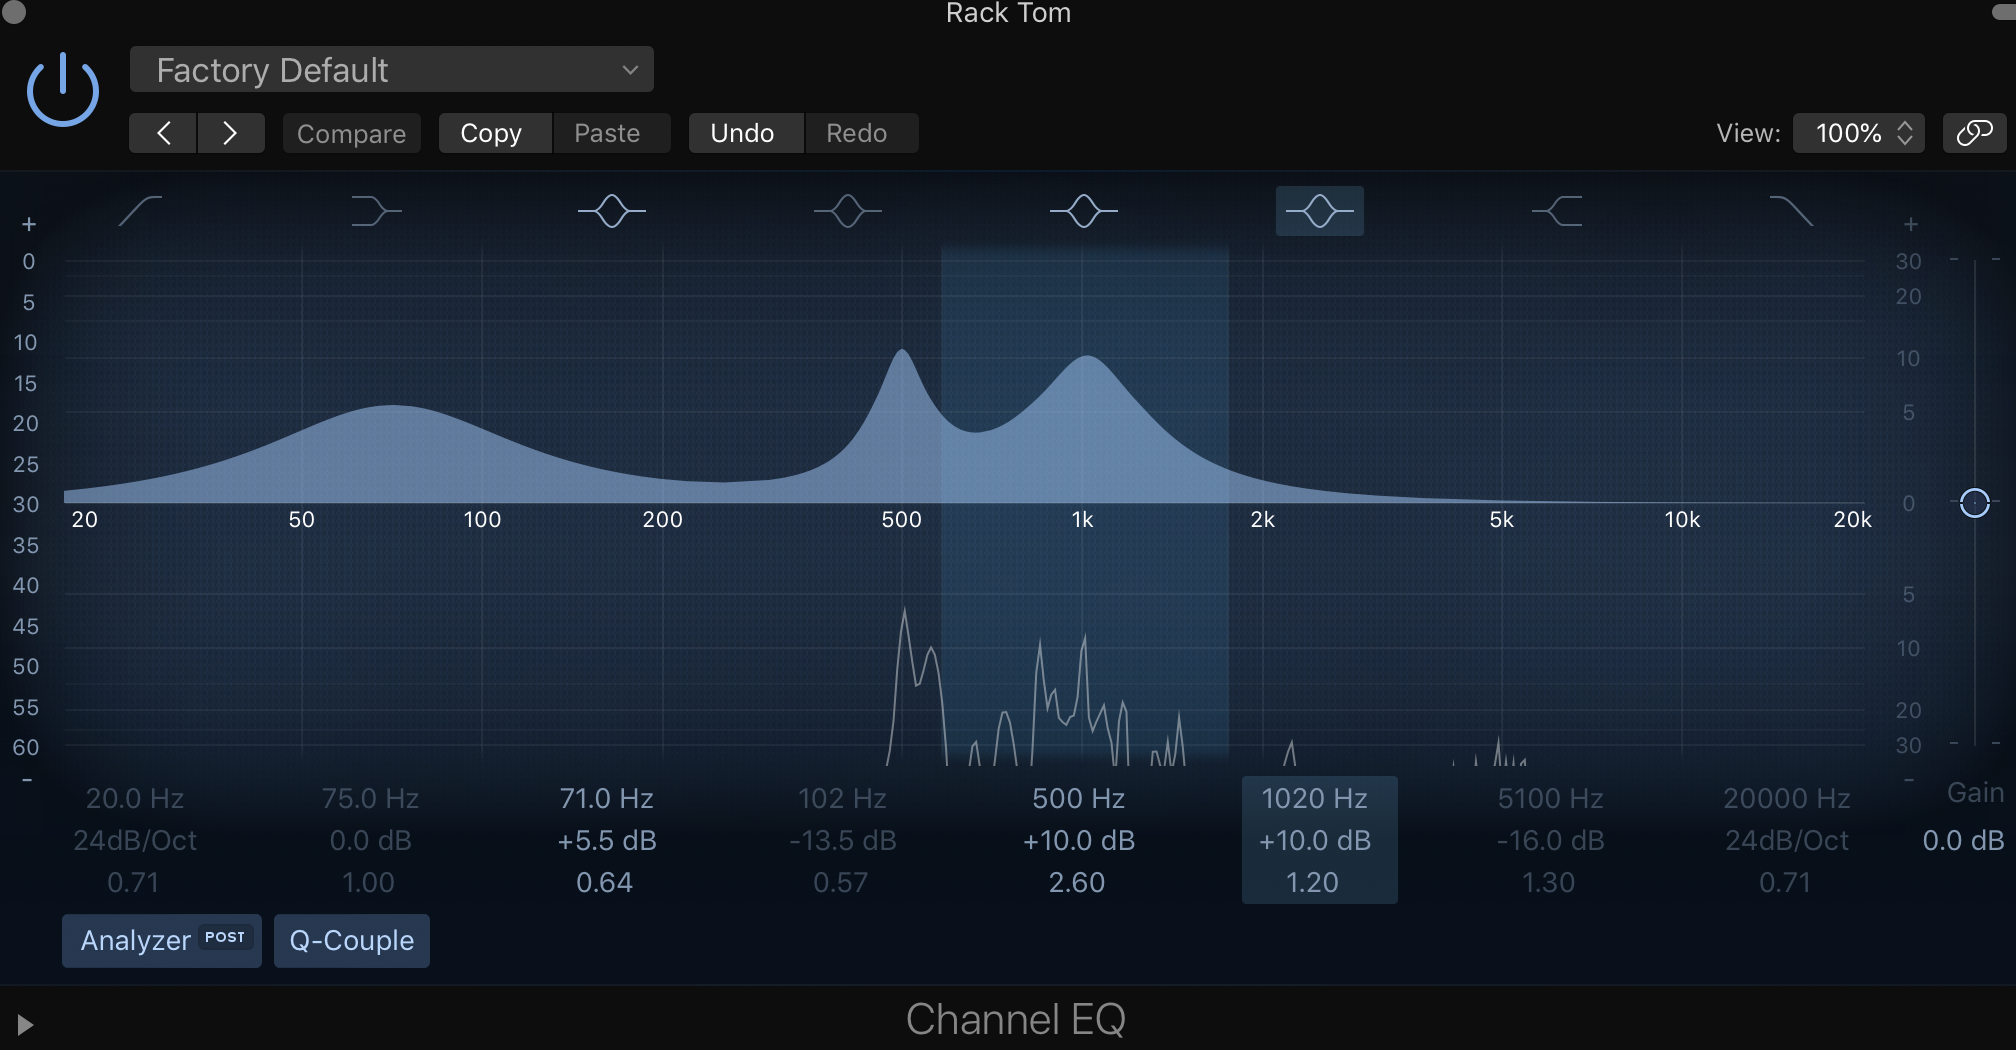
Then on the rack tom, I boosted a lot of mid range frequencies to make the sound clearer and then boosted bass frequencies for fullness.
After doing that, the drums were equalised so I moved onto the guitars. I really enjoyed doing this because I am really happy with the outcome. First of all, I did James’ guitar. This had a tiny bit of spill on it but once I boosted the mid range and only boosted a little bit of bass frequencies it was very clear.

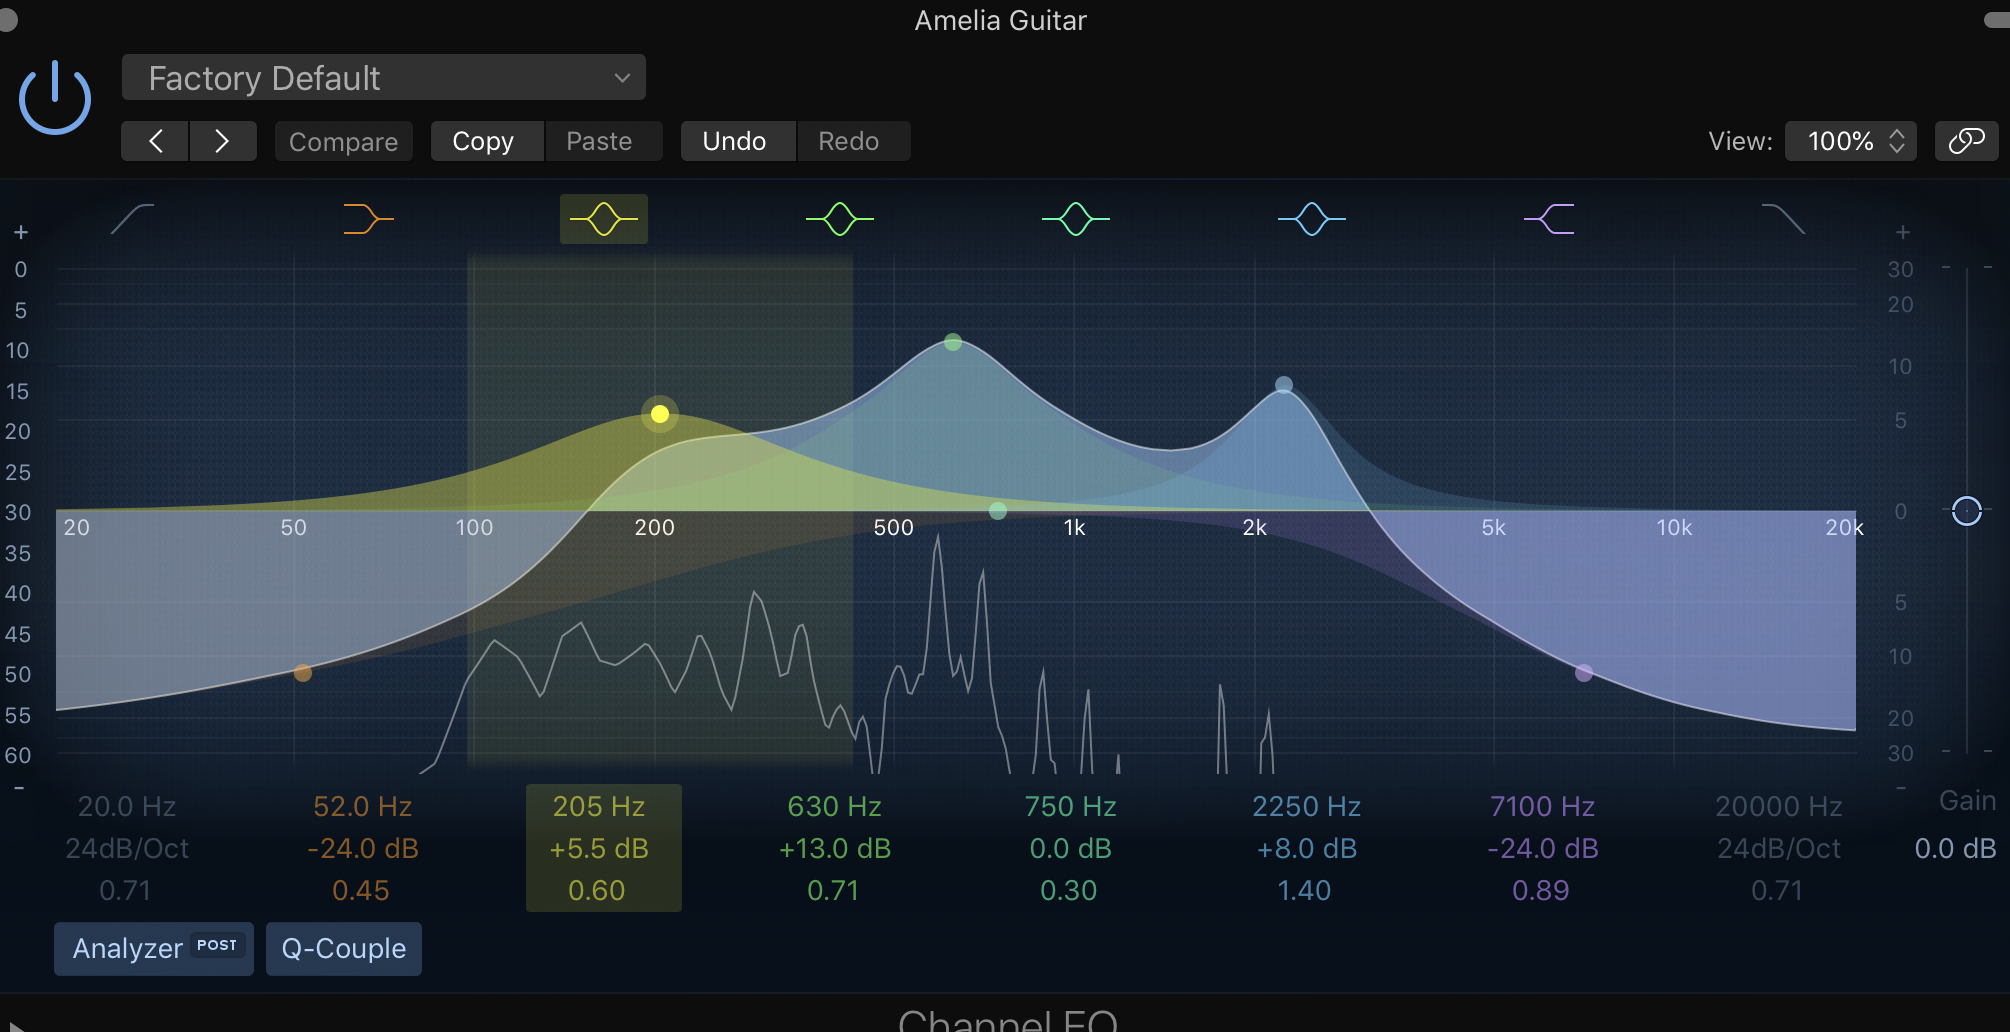
Finally, I added EQ to Amelia’s guitar. Hers is a lot more high pitched than James’ which meant it would need to sound brighter and all of the mid range frequencies would need to be boosted.
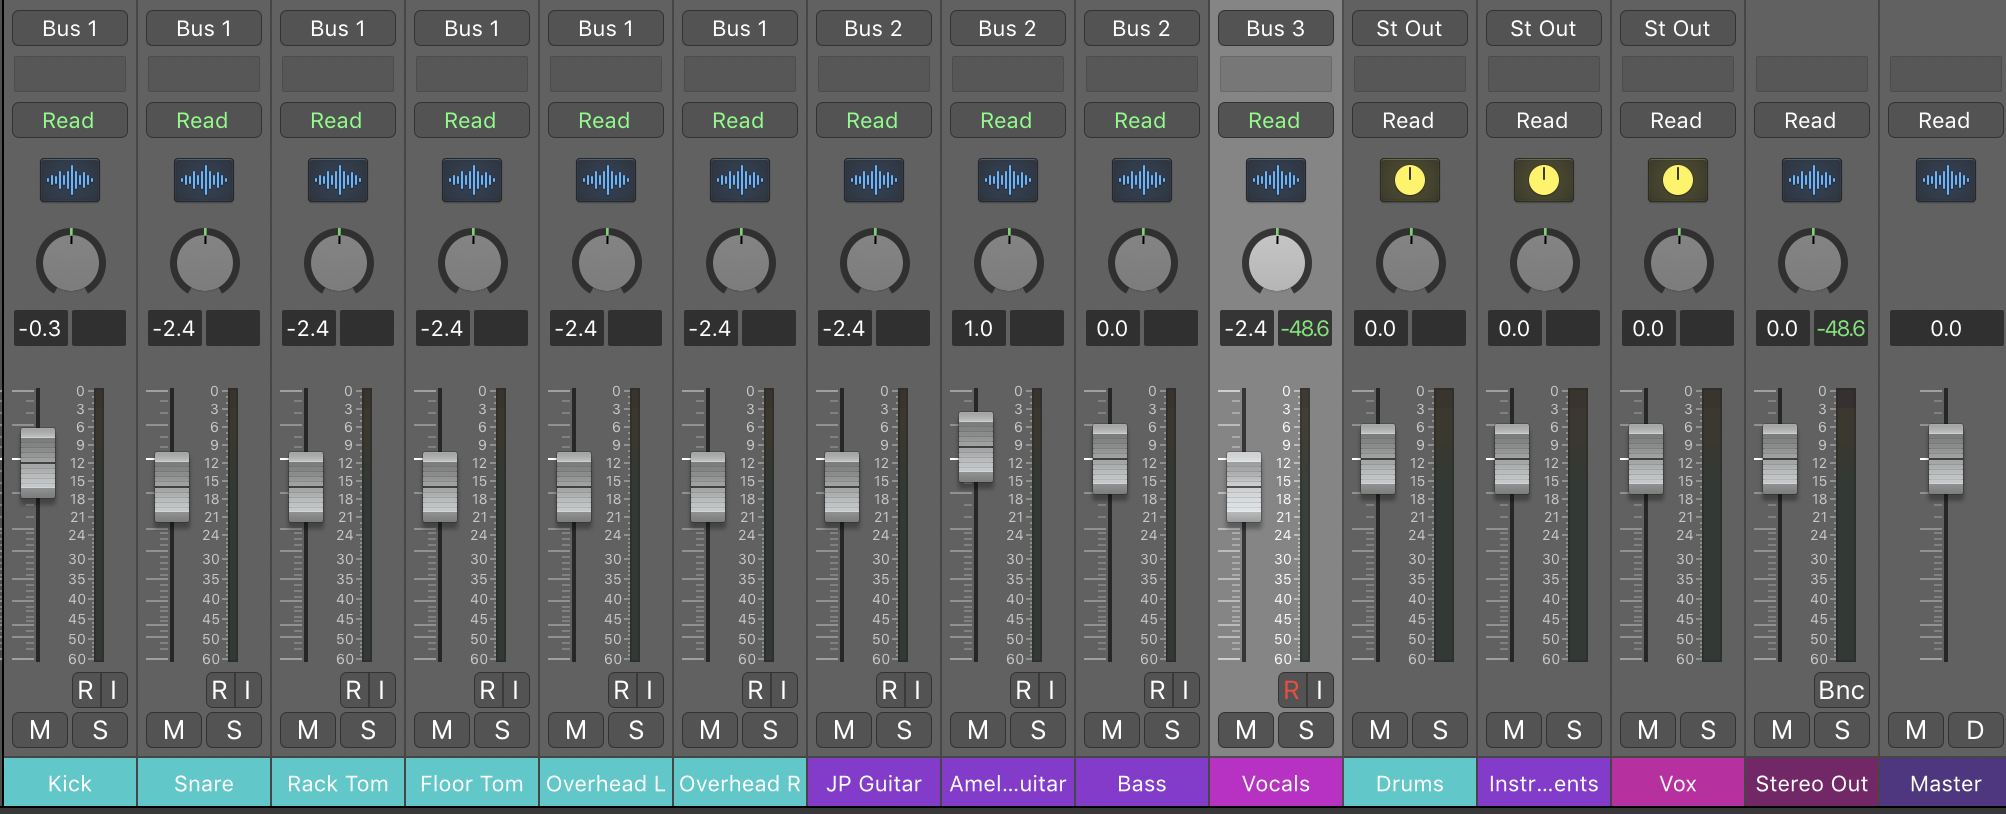
After setting all of the EQ required, I needed to pan the instruments. I did this according to a normal live sound set up. This means that bass instruments such as the bass guitar and drum kit remain in the middle as well as the singer so that they are the main focus. Then the rest are panned off to each side. Especially the drum overhead mics which are on either side of the drum kit.
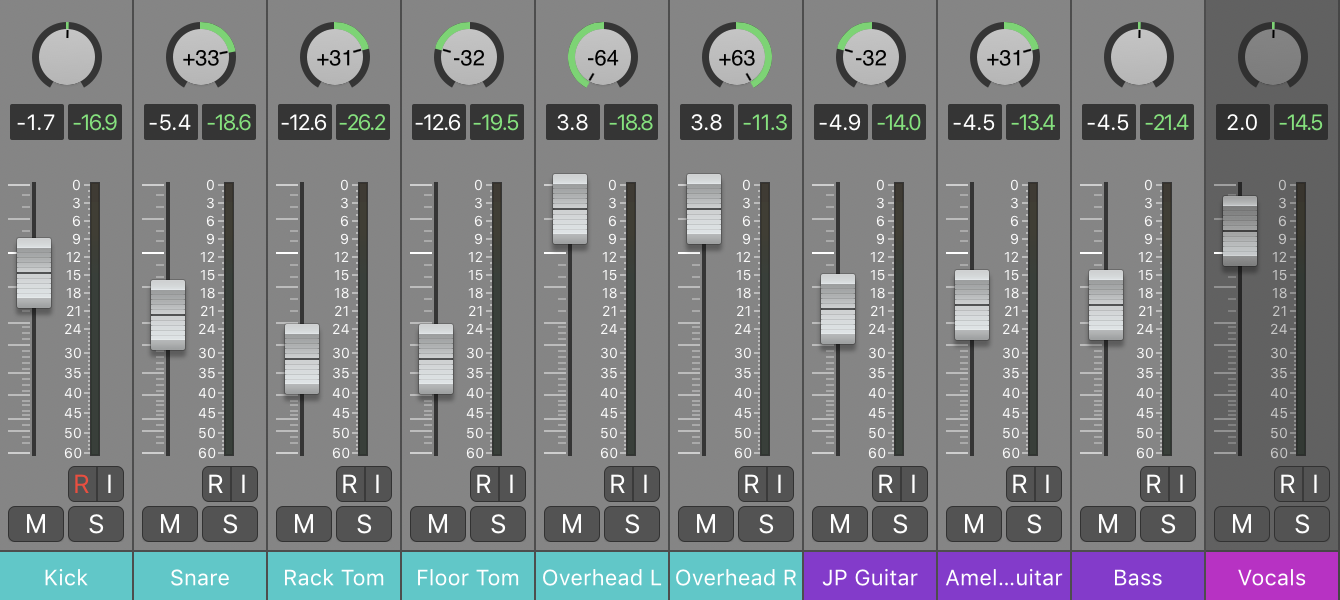
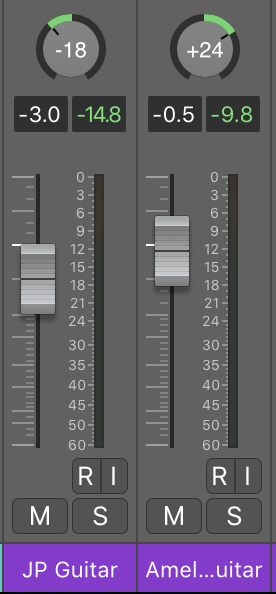
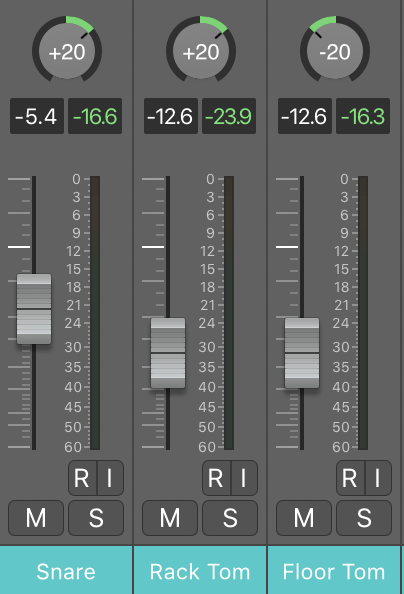
Finally, we set the volume levels. To do this, I used the key command ‘command and L’ which opened a setting which allowed me to assign a fader on the midi keyboard to the faders in Logic. This makes it much easier to adjust the levels and perfect them. The volumes I chose to use are shown in the screenshot above.
This is the new mix:
06/02/2020:
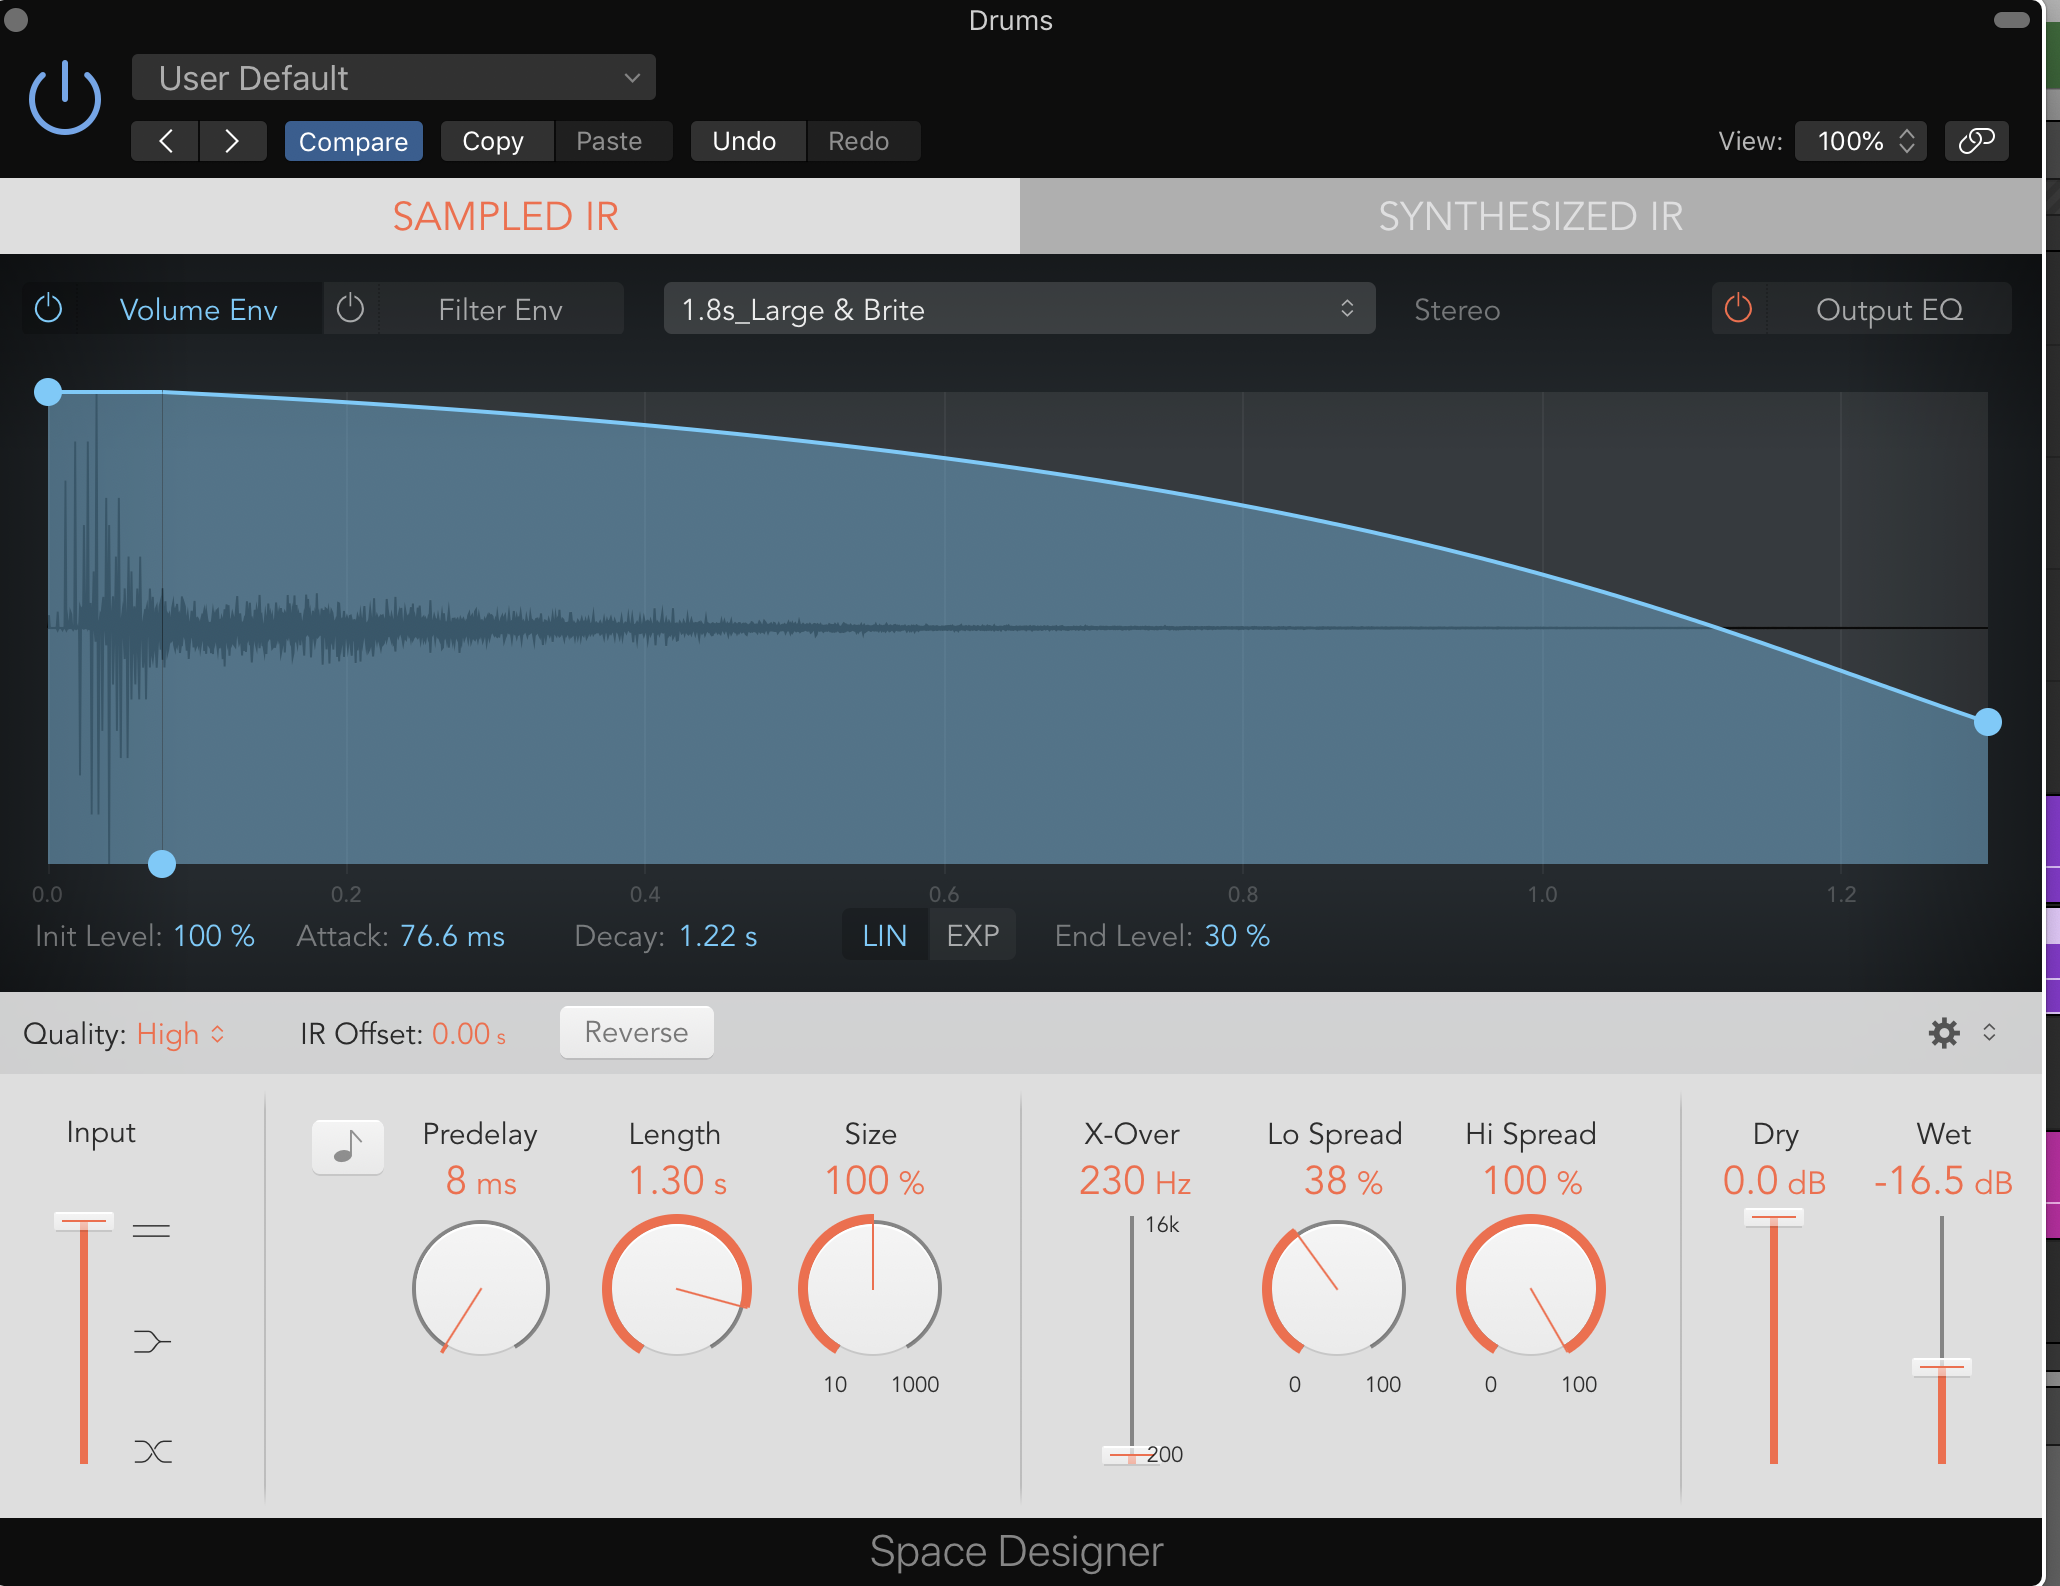
Today we added reverb to our tracks. The reason for adding this is because when sound is being recorded through a directional microphone (cardioid, bi-directional etc.) a lot of the reverb is not picked up. Reverb is what happens when sound waves bounce off of surfaces and into our ears. If we add this to a track, we can make it sound more realistic. The more reverb you add, the more echoey it will sound. So again, we are talking about the importance of balance.
I added reverb by bus. This not only saved some time but also meant that each instrument in each group had the same amount of reverb. First of all I added reverb to the vocals.

For this I only moved around the wet and dry effects, making the sound clearer and more reverberant but not adding delay so it did not have the desired effect I was looking for. I was not sure if I had added too much but after consulting my tutor, he said that it would be better to add a predelay and it now sounds much better.

Next I added reverb to the drums. This did not need much and sounded how I wanted it to almost straight away. It has a minimal amount of reverb and no delay. The best part about this is that the drums do not need reverb added to each one separately as they sound good together.
The other instruments are different to the drums because they need to have reverb added not only to the bus but to themselves separately. First of all, I added reverb to all of them at once but the guitars sounded strange.

In order to fix this, I edited the reverb on both guitars individually. For James’ guitar, I added quite a lot of predelay because it sounded very ‘washy’. Then I reduced the wetness as well to make it sound much better.

For Amelia’s guitar I added much less predelay but the rest of the reverb settings are the same.

Once the reverb was finished, I moved on to adding compression. I put this on the kick drum, snare drum, bass guitar and vocals.
Compression is important because it makes dynamics seem more natural and appealing, as very loud or quiet parts of music can become distracting. Before I did anything, I turned off the auto gain and auto release, this is not necessary but is helpful. The next thing to do when adding compression is to adjust the threshold. This is used to determine at which point the signal is compressed. I adjusted this until the meter was between -10 and -5.

After that, the ratio needs to be adjusted. This dictates the amount of compression added to the signal that passes the threshold. The ratio is usually lower for drums that other instruments but it is dependant on the signal itself.

Once the ratio was set, I moved onto the attack. This is used to dictate how long it takes for compression to be applied. The higher the attack time, the slower the compression takes to be applied.

The next thing to adjust is the release which works similarly to the attack but instead of applying compression, this dictates how fast the compression is let go of (or ‘released’).
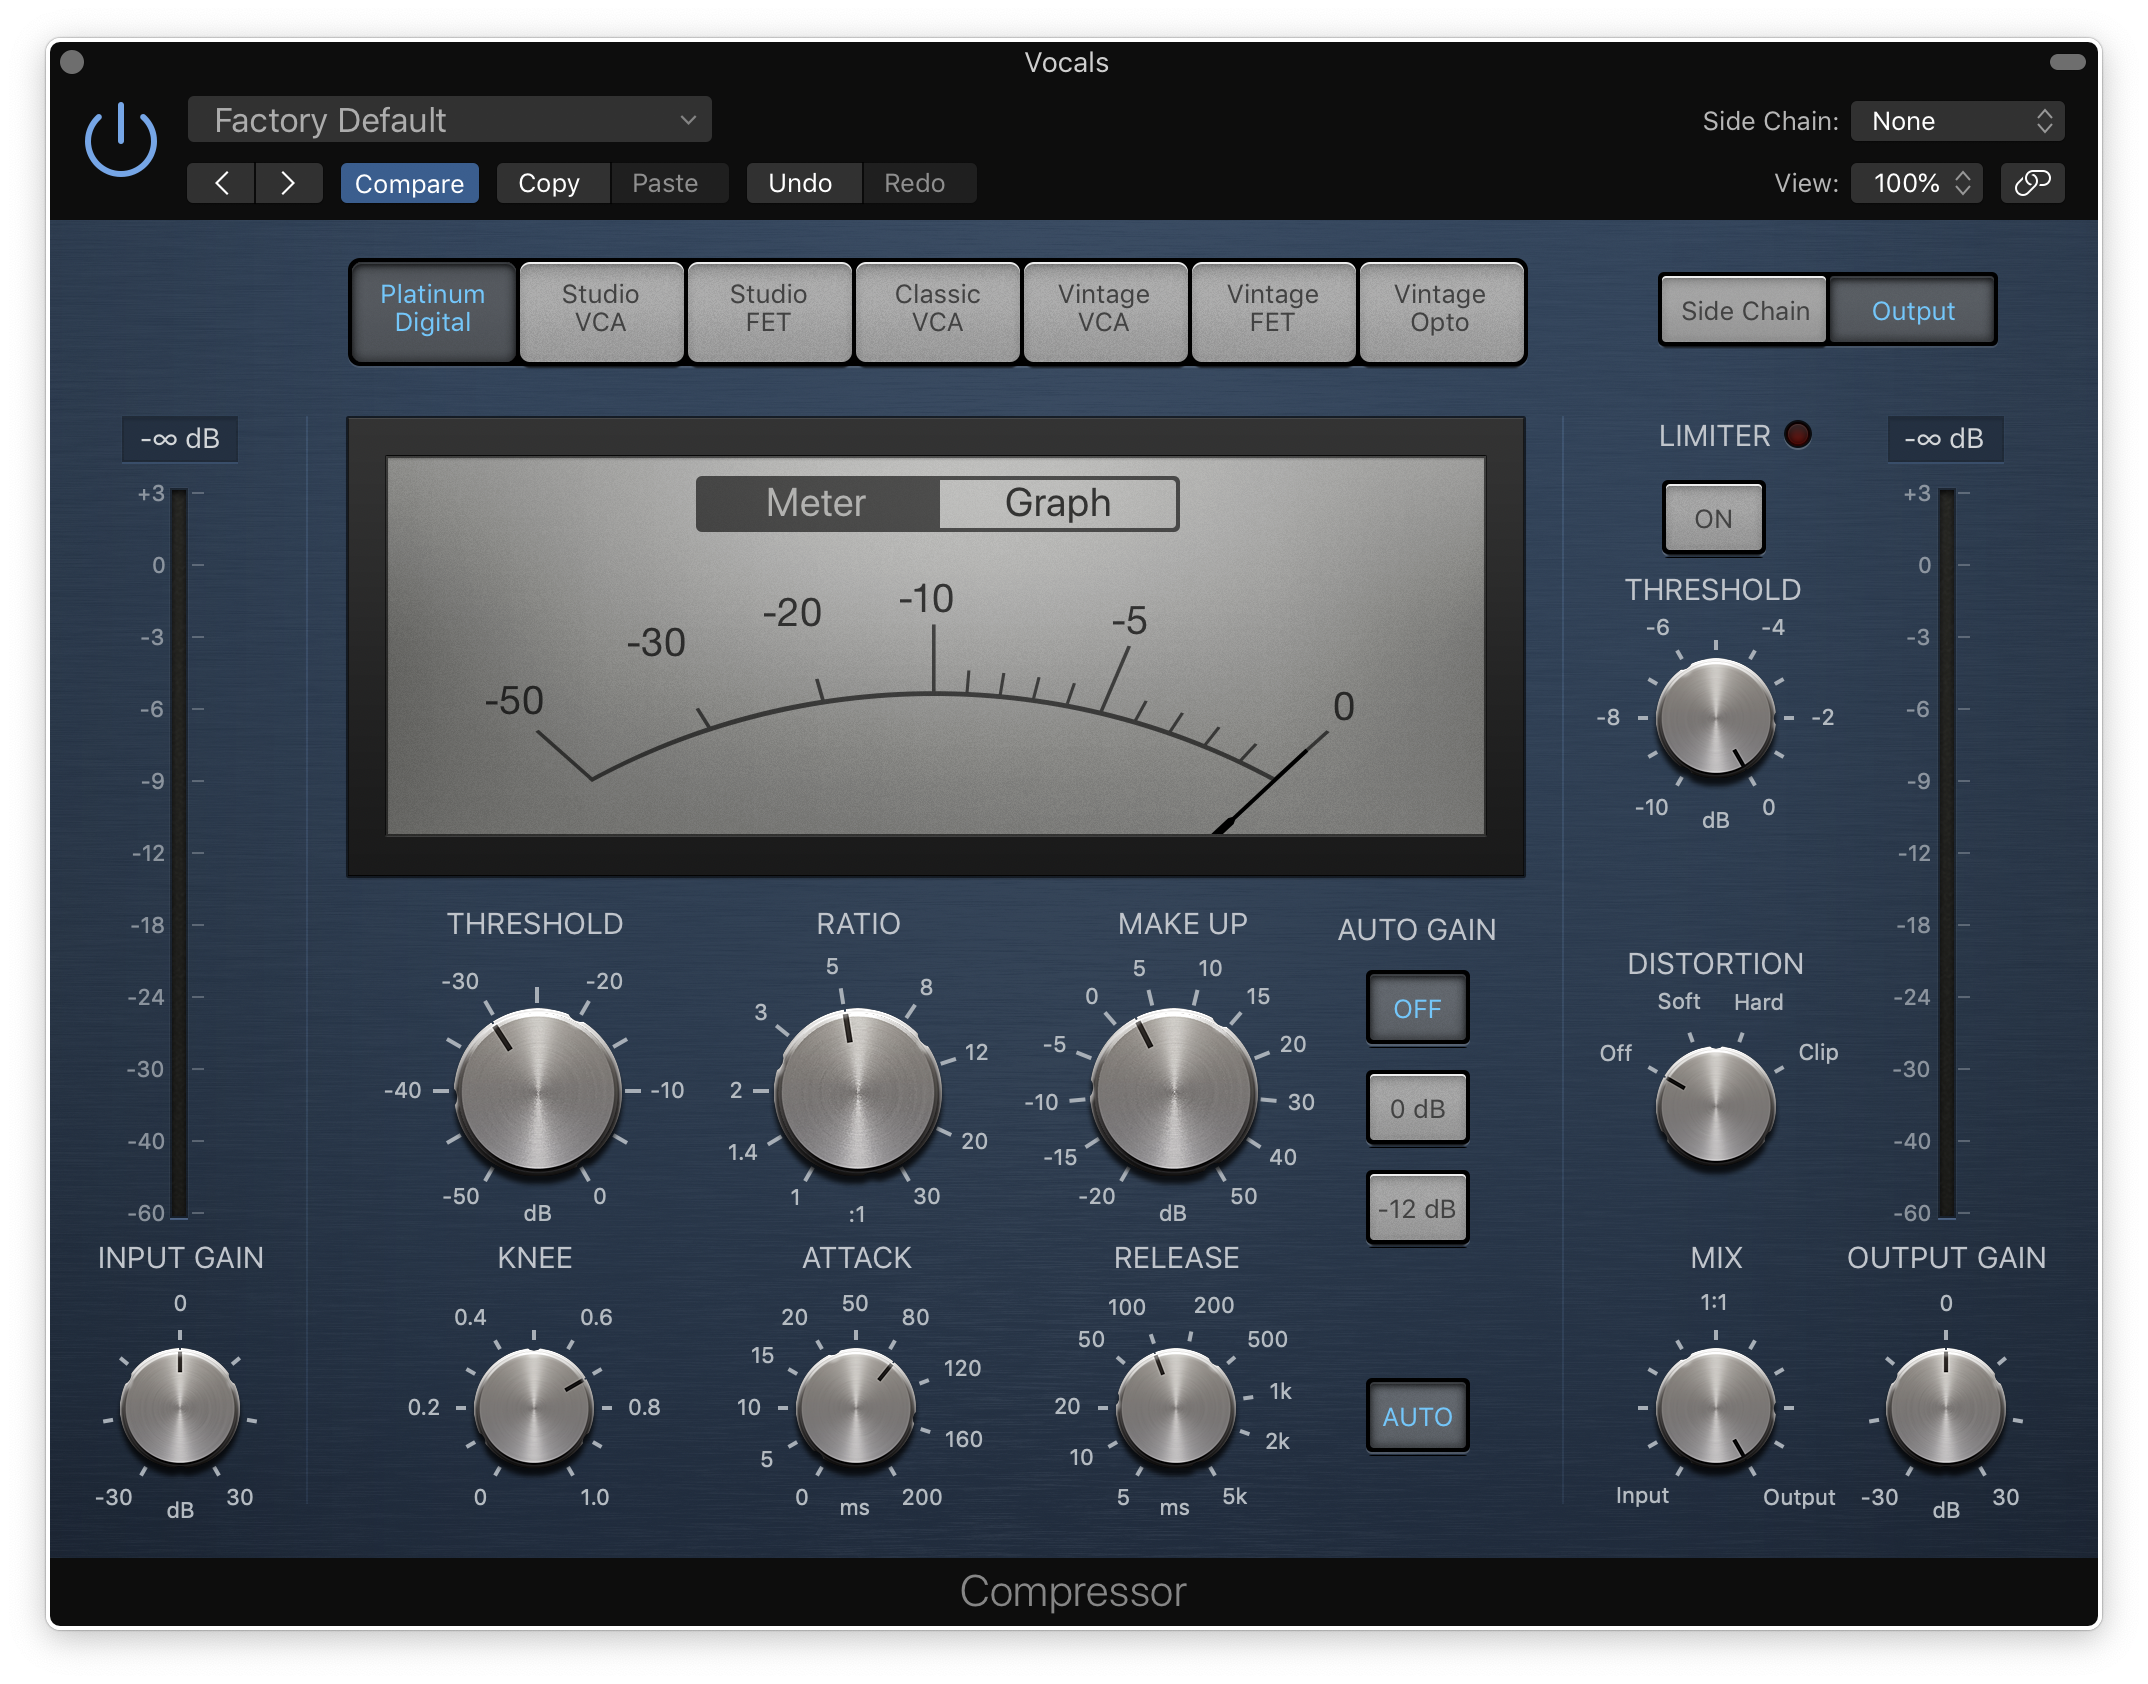
Finally, the make up needs to be adjusted. This is used to make the volume of the original track the same as the compressed track. This is important because the loudest track will automatically seem like the best one because our ears trick us into thinking that it is. As soon as this is set, you can listen to the original track by pressing the bypass and adjust things as needed.
11/02/2020:
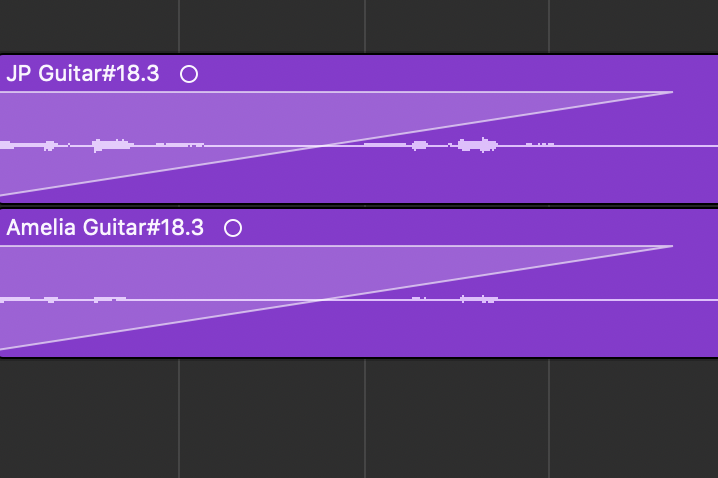
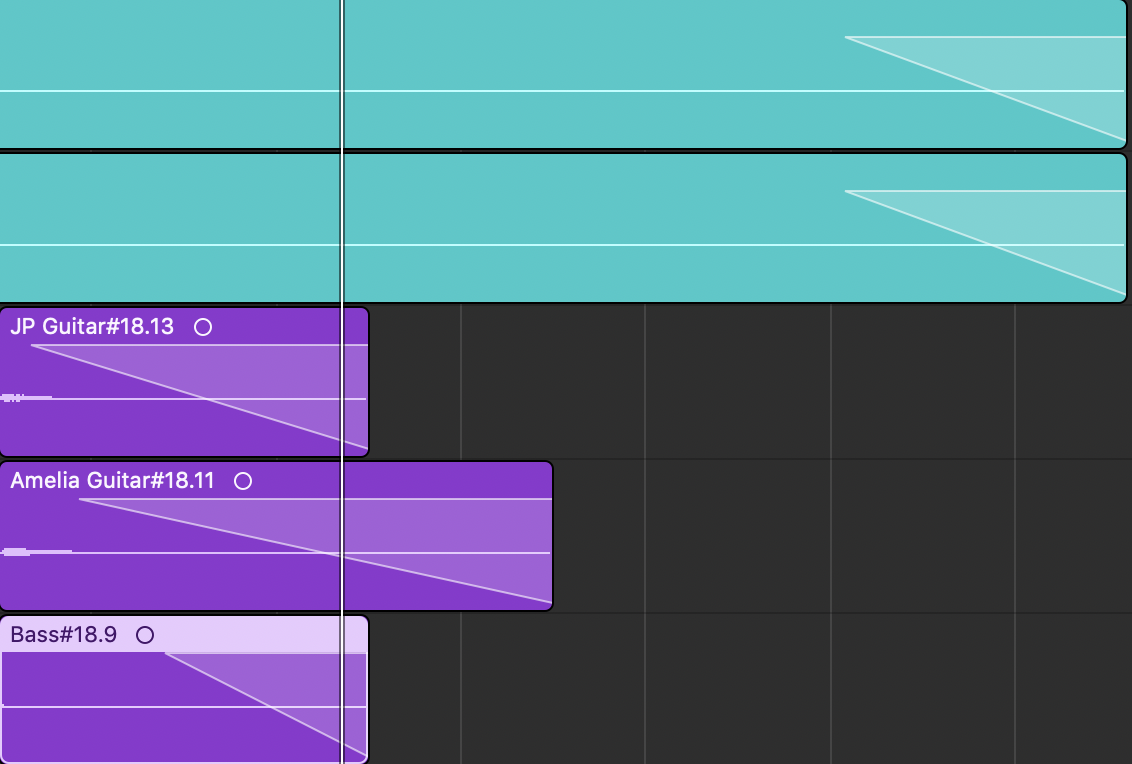
In today’s session, I was finalising my mix and adding effects to make the sound better. The first thing I did was adding fades in and out of the track. This already makes it sound more professional and finished. I added this to the guitars, which introduce the track and then I added it to the guitars as well as the drums and bass, which finish the track. My fade in is twice as long as my fade out because there is more time given to do so.
![]()
![]()
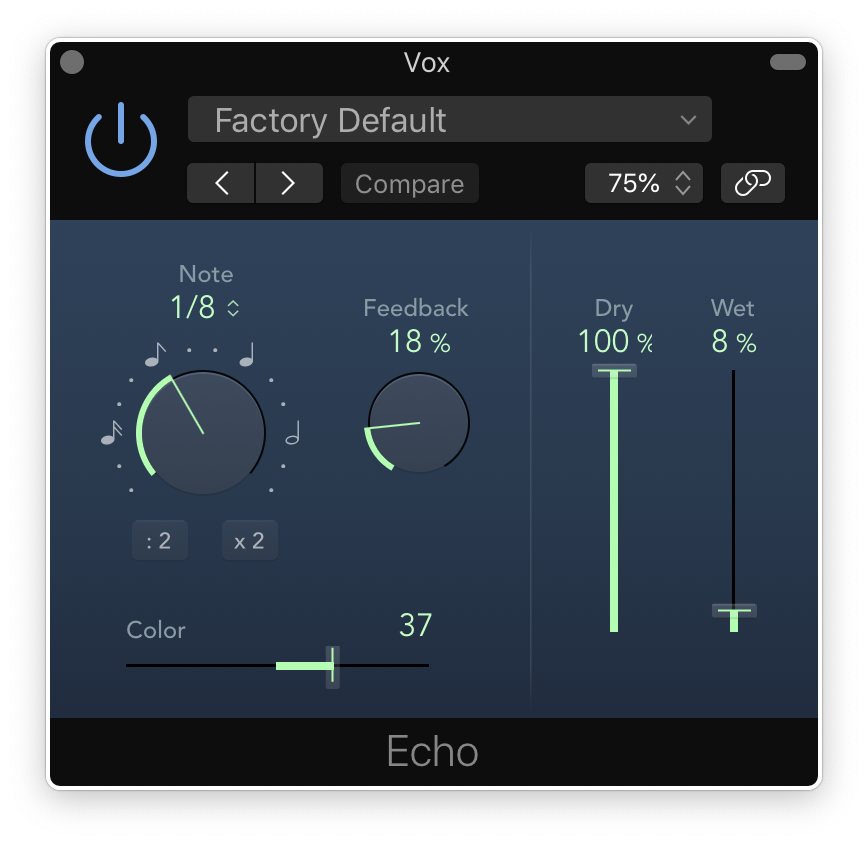
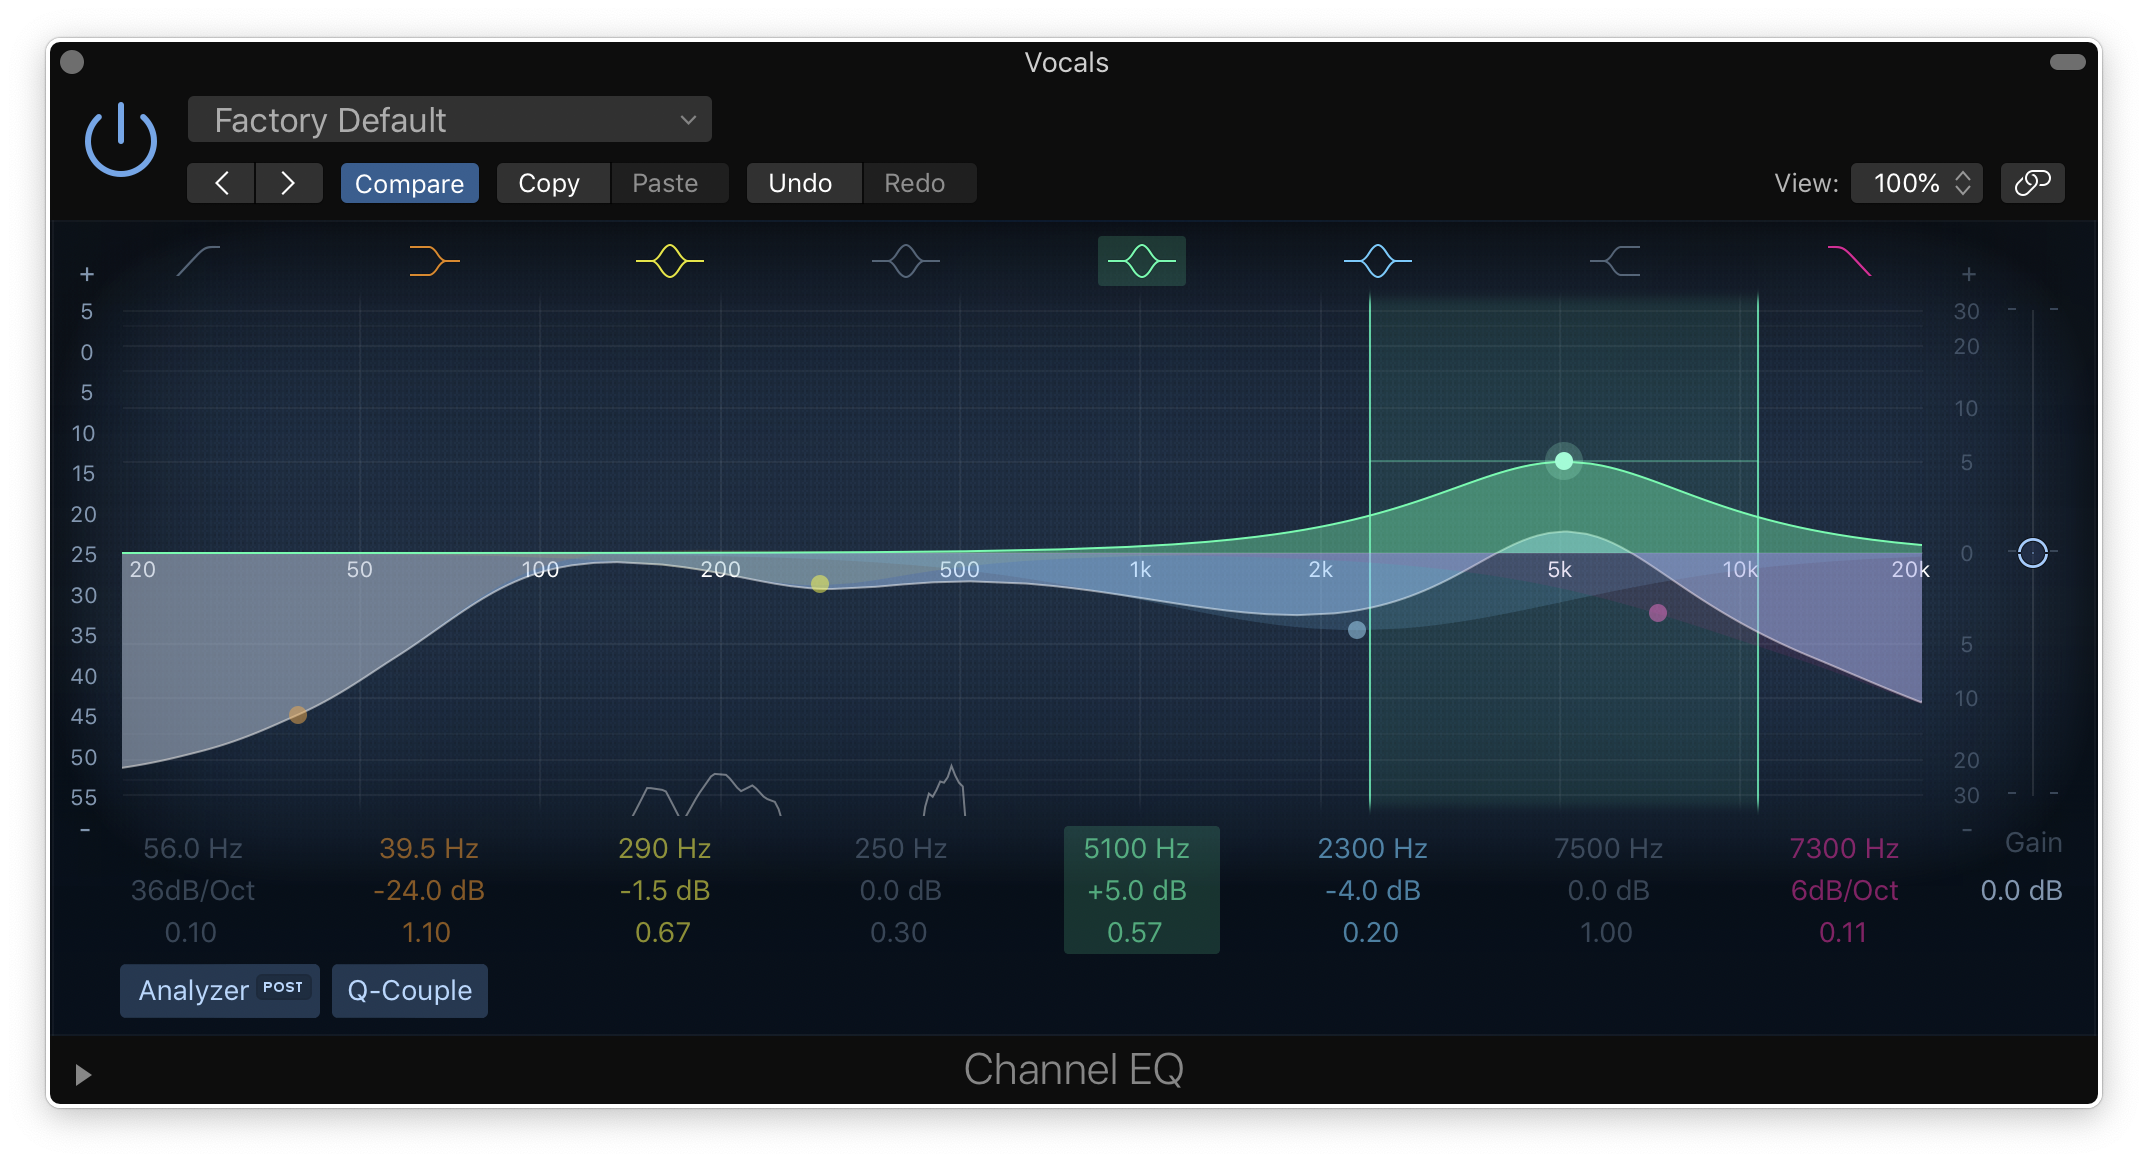
After that, I worked on adding something to the vocals. I decided to try a pitch shift of 2 semitones (or 1 tone) but it did not seem to fit. I decided to consult Lewis who said that it would sound better without it so I removed it and added an echo instead. I had a problem with this because it was too fast and made it sound like it was out of time. We slowed it down and only applied a small echo so that it was effective but almost unnoticable. I then adjusted the EQ of the vocals and Lewis told me that I needed to add a little bit more ratio to the compression. He also said that I should adjust the reverb as it was too short and didn’t blend well with the rest of the track. After doing all of this, it sounded much better.

Once I was happy with the way that the vocals sounded, I moved onto my guitar tracks. I was already really pleased with the way that these sounded especially considering that the recordings we got were not very good quality. The changes I made to these are limited but effective. The first thing I did was reduce the volume of James’ guitar as it seemed to be overpowering Amelia’s. Then I reduced the pan of them because they seemed too far apart and were creating an unbalanced sound.
Finally following the guitars, I also adjusted the pan on the snare drum and both toms to make them sound tighter.
This is my final mix:
Peer Feedback:
“You used appropriate amounts of reverb when necessary. Your use of compression was superb. The bass could’ve been a bit higher in the mix as it seems rather quiet. Your effort is commendable and you should be very proud of yourself. Well done Carys!” – James Humphreys-Goodall
I would agree with James’ comment about the bass being quiet but I also think that it should be quieter in this song as the guitars carry a lot of the melody and often take the lead which in my eyes makes them more important.
“The mix sounds very open and clean, the vocals are really nice and the level of effects are very well balanced. A couple of things I noticed that Amelia’s guitar is very effect heavy while JP’s guitar is very dry sounding, I think balancing the guitars more would make them more present in the mix. Other than this small factor the mix is really impressive.” – Tom Hall
I think that the guitars sound okay and no alterations should me made to them. I do agree with everything else that was said though.