Music Videos
Thirty seven years ago, on the 1st of August 1981 MTV was born, the first ever 24 hour music video channel that gave birth to a new concept called a music video. The first video to break onto this stage displayed a track called ”Video killed the radio star” – by The Buggles. The Buggles prior to this hit were relatively unknown, however the use of a music video transformed this song into a one hit wonder.
Here is that video.
Today music videos are an accepted and necessary part to most working musicians careers, they act as both a way of promoting an artist or composer as well as generating revenue from advertisements. As technology develops, it is becoming easier to undertake ambitious video projects on a small budget which means that today the music video market is more competitive than ever.
Below are two examples of music videos from the past and present.
In this video, we can see how far technology has developed in the 26 years between Rockit and false alarm. Although there are many music videos out there with more up to date uses of technology, I think that false alarm shows the scale that music video as are on today as False alarm comes across to the viewer as a small action movie. Although false alarm was obviously running on a large budget, it has become much easier today to film a decent music video with a limited budget and personel.
Promotion videos
The point of this project was to give us a range of knowledge in video editing and to understand what techniques make videos interesting to watch and of a high quality. For our project, we were tasked with shooting an introduction video for our band.
An introduction video is a great way to introduce and promote a new band or idea, by taking elements from the practical side, in our case performance as well as from interviews an introduction video could engage a range of viewers as well as give a good balance of background information and music.
Here is a very interesting introduction video about Ed Sheeran from 6 years ago. The video features a range of camera angles as well as a good mixture of performance and talking from Ed. He explains the context to a couple of his songs as well as what he is doing in America. Overall it is an engaging and entertaining video.
Interview
We spent an afternoon in a tv studio, here is the clip of our band being interviewed. I also got some experience as an interviewer which can also be seen below.
This interview was a very enjoyable experience as we answered a range of questions and came across well, it was interesting to be in front of 3 tv cameras and to understand what it is like in a normal interviewing situation.
I enjoyed conducting both of these interviews and it was surprise to me that I came across so well on camera. I was tasked with coming up with some interesting questions as well as reading into the interviewee in order to create a decent final product. Interviewing is an area I would like to experiment with more in the future and it was great to get this introductory opportunity.
Editing basics
To edit our introduction video, we used a programme called I movie. Here are some basic editing techniques that I used in order to structure my introduction video.
Creating a caption at the beginning –
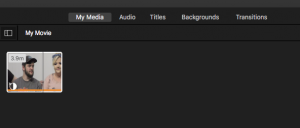
After inserting the video into imovie, you can choose from a range of different categories. In order to create a caption at any point you will need to select titles.
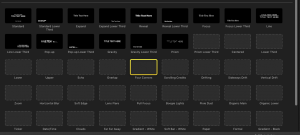
Once in the title section, you need to choose the title screen that you would like to see, these vary from different animations to different fonts. The one I chose is highlighted in yellow.
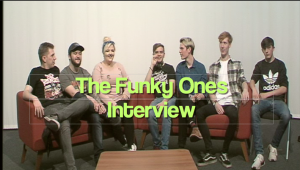
Next, you will need to write in a caption. The example here is the interview video that I was using as part of my final introduction video.
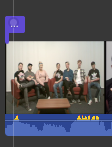
Above the picture is a purple shape with 3 dots, this is the caption. By clicking on this, you can adjust the length of the caption and where in the video it is positioned. In my final video I used 3 captions in all. This included 1 at the beginning in order to introduce the video as well as 2 at the end which gave some information about future events.
Cutting scenes-
Splitting the clips was the thing that I used most on imovie. It allowed me to mix and match different videos in order to create interesting contrasts.
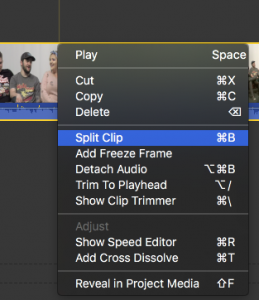
In order to split a clip you just ctrl and right click on the section of the video you need and press split clip.
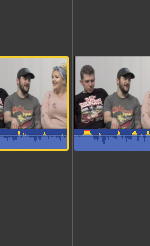
It will then split into two parts looking like this.
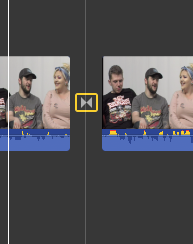
In these gaps you can then introduce transitions which when used correctly can add an interesting movement from one scene to the next. You can also adjust how long the transitions are, with the standard length being 1 second long.
Black and white-
Although imovie equips you with the possibility of highlighting or emphasising any colour, the most common variant I used for this project was changing the colour to black and white.
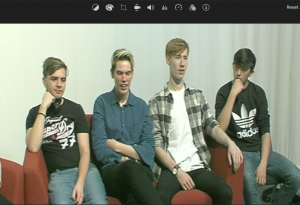
Here is an image that I selected from our interview, as you can see above there is a line of tools, the paint pallet is the one that allows us to change the colour.
![]()
After clicking on the paint pallet, these are options that are made available to you.
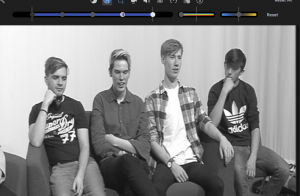
By sliding the rainbow slider to the left hand side, you can achieve a stylish looking image. By experimenting with the sliders you can also create a range of different colours and designs.
Zooming-
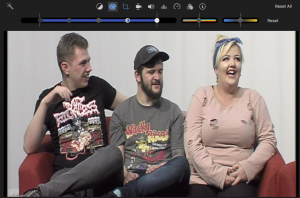
Above the image is the same list of tools, this time we’re looking for the crop tool which is the weird shape to the right of the paint pallet.
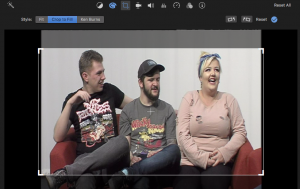
After clicking on the crop tool, we have the ability to crop to fill or to use a ken burns cropping method. Ken burns allows us to use a moving zoom, however for this project I only used the crop to fill option.
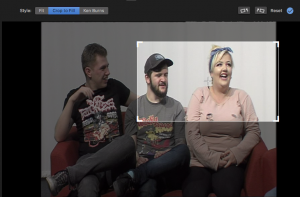
After clicking crop to fill, you can drag the highlighted square to your preferred position.
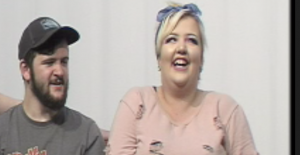
This is the final result.
Slowing things down –
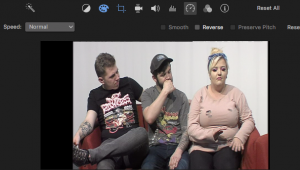
To slow a clip down, you simply click on the clock icon in the toolbar.
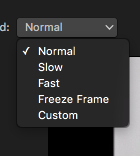
Here are the options that you could choose to edit a video with.
Introduction video
Overall, I was quite proud with how the video came together as I was very new to video editing and although there are a couple of questionable moments, I believe I was able to carry out most of the ideas that I had when going into the editing of this video. The parts I am most proud of is the transitions from the original versions of the songs into the live videos of us performing. In terms of things that I would change, I would have liked to have improvised with ken burns cropping as well as maybe played with the colours and freeze frames a bit more. However I was very satisfied with the final product.

