When recording in the studio, we faced a number of tasks in order to create an efficient and effective working environment for the performing artists.
Setting up the live room
Our first task was to set up microphone placement and to rearrange the studio to create the best quality sound. This mainly featured moving the drum kit away from the amps in order to try and limit the microphone bleed to as little as possible.
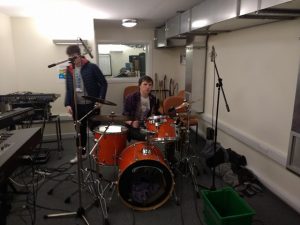
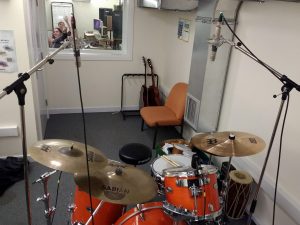
Above is the position we moved the drum kit to. You can see some of the mic position of the kit including the overhead microphones.
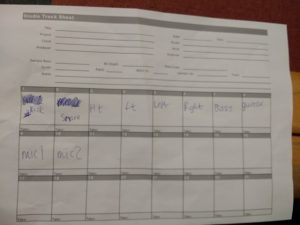
In order to keep track of our microphone placement and there input into the mixing desk, we used a tracking sheet as seen below. As you can see, our recording contained 10 tracks including the drum kit, bass, guitar and vocals.
As our recording studio and live room are in adjoining rooms, we used a multicore that allowed us to plug the microphone leads into it and transmit the sound through to the studio without running wires through the doors, The multicore is seen below
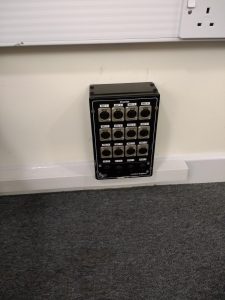
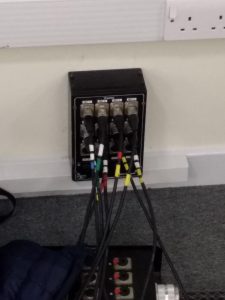
On the left an empty multicore, on the right the multicore set up and ready to record.
Microphone setup
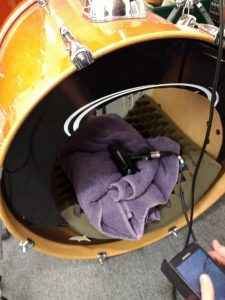
Above is the microphone positioning for the bass drum. The microphone we used was a D 550 dynamic microphone. We placed it on a towel to reduce the amount of boominess that the drum creates in order to create a better sound. The blanket basically acts as a dampener by placing it in the bass drum and therefore limits the resonance creating a shorter bass drum sound.
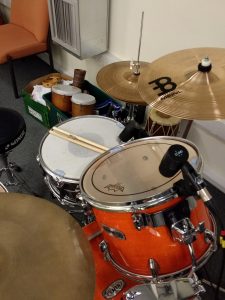
For the Toms and snare as seen above in the two pictures, we used D 440 dynamic microphones. These were placed very close to the drums in order to get as clear as possible sound.
Above the drumkit you can see two silver microphones on stands. These were condenser microphones that we used as overheads which means that we were recording the whole sound of the drumkit and not just one element of the kit. We had a left overhead and right overheard in order to create as balanced a sound as possible. When mixing these further on we could pan these to the left or right to create a full sounding song. The overheads were very important when we recorded as we didn’t have the resources to mic up the hi hat and the crashes individually, therefore the overheads were essentially working as our cymbal microphones. A problem we ran into with the overheads and much of the drumkit recording however was bleed from different drums into the microphone.To counter this we tried to use different microphone placement, however quite a few of the microphones experienced bleed which we would later try and cut out when mixing. After recording, we had brilliant bass drum, snare drum and tom tom sounds however the signal for the overheads was quite weak which is something that I’ll look at for future recordings I do.
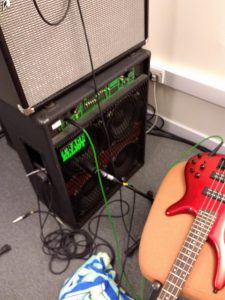
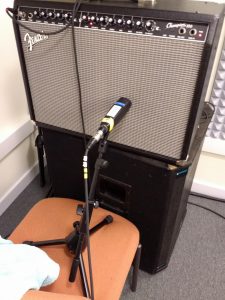
Above Left is the placement for the microphone on the bass amp. We used a dynamic microphone for this as dynamic microphones deal the best with low frequency sounds. Above right is the microphone placement for the guitar amp, it was important with the guitars to direct the microphones towards the speaker. At first with the bass amp we tried to place the microphone in the middle of all 4 speakers however this didn’t create a very good sound so instead we reverted to the placement we should have started with which can be seen above. Most amps have a sweet spot in which you can mic them up and as this is quite a fiddly objective to achieve many bands mark their amps with a cross which marks the best spot to mic up in order to save time when setting up.
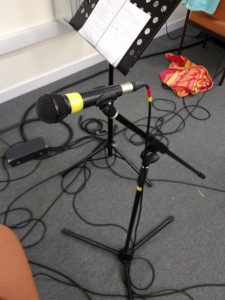
Above is the microphone with which we used to record the vocals on our track. For this recording we used a dynamic microphone as we were recording the entire band at once. When recording vocals in a professional studio, a studio engineer may use a pop screen which serves to reduce or eliminate popping sounds caused by the mechanical impact of fast-moving air on the microphone during recorded speech and singing. They may also record vocals in a separate room to the band or in a vocal booth. The purpose of these techniques is to record the vocals without any bleed from other instruments. By recording vocals in a separate space, studio engineers could also use condenser microphones which could add to the recording by creating a better atmosphere on the rack or providing better sound quality depending on the quality of the microphone.
setting up the mixing desk
After setting up the microphones, we then set up the mixing desk and our logic file which we were recording our tracks within. In this case, the mixing desk was acting a sound card in order to transfer the live sound into digital sound therefore the only things we had to do to the sound level was adjust the gain, as well as giving phantom power to the two over head condenser microphones.
Below are pictures of the mixing desk and the computer connected from which logic was running on.
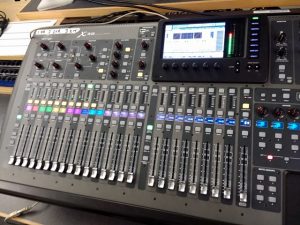
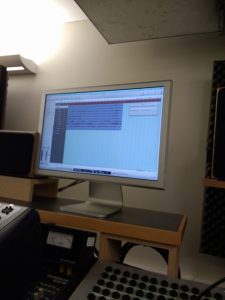
The mixing desk that we used was a behringer X32 Digital mixing desk, although it has 32 tracks we only ended up utilising 9 of these.
I thought that the X32 was great to use as although at first it looked quite intimidating, after a brief introduction to it, it was incredibly easy to use. Setting up the Mixing desk we had to connect it to the computer and to the power. We then inputted the amount of tracks we would be using by pluggin XLRs into the back of the mixing desk.
Setting up the logic file on the computer
On our logic project we created 12 audio tracks in ascending order, although we would only be using 9 for our recording. We then named these tracks in order to make mixing the recording afterwards much simpler.
The soundcheck before recording
In order to create the best possible sound, we ran a soundcheck before our first recording in order to set our gain levels. When setting gain levels we were looking to avoid clipping, however we tried to get as close to this as possible in order to get the best result. Although we ran through a couple of sound checks, we faced a couple of problems when recording the band, as the drummer played at very different levels of volume in different parts of the song , being sometimes incredibly quiet and other times clipping. We addressed this as best as possible by changing the gain levels. However it meant that we had to do 3 takes in order to achieve a relatively decent final product. When in the recording studio, we used the sliders to adjust the volume that we played back using speakers. However these had no effect on the overall recording but instead just allowed us a much better understanding of the overall sound we would be recording.
When sound checking we were directly working with the band and organising them in order to get a decent read of the levels. Unfortunately we didn’t have the time to set up talback in the studio, therefore we had to send someone to run in and out of the studio and the live room to tell each band member when to play. Unfortunately I was chosen for this job, therefore in the future I will do my best to set up talback so I don’t have to do this again, this would also have allowed us to have much better communication with the band.
Another classy touch would have been to have playback for each band member in headphones therefore allowing them an understanding of how they sound. This would mostly have benefited the singer as a minor problem we ran in to was that of the singer and band adjusting to not being able to hear the singers voice.
Recording
When we were finally satisfied with our soundcheck, we began recording the band. As we had everything completely set up, it was as simple as pressing the record button on the logic file. However as we ran our first take we ran into the problem of some of the channels clipping. By the time it came to the third take we had a relatively decent final project, which with a bit of mixing would turn out to be quite a clean cut. After we finished recording we exported the logic file onto a USB so that we could then adjust it on our own computers.
We then packed up the microphones and returned the live room to its original state.
Overall our recording session lasted between 2 and 3 hours from setting up everything to getting a decent recording to packing it all down again. I assume this is very different to recording song in a recording studio as from what I’ve seen on documentaries bands can be in for days getting the perfect version of a track and recording sessions can last over 12 hours.
Therefore although our recording session went quite well, I think it’ll be a while before I will have the experience and skill set to become a working studio engineer. However I did very much enjoy working in the studio and would enjoy doing it again in the future.
